5–8 ROOF, BACK PANEL AND REAR FLOOR PANEL
2-2. REPAIR PROCEDURE
1. Remove the related parts.
• Rear and trunk trims.
• Trunk lid lock and related parts.
• Rear combination lamps and wiring harness.
• Rear bumper and related parts.
• Other related parts.
• Level and finish the burrs from the fried off spot
welds with disc sander and repair all cracks, holes
or other defects by welding also repair the floor
panel if necessary.
CAUTION: To prevent eye injury, wear goggles or
safety glasses whenever sanding, cutting, or grind-
ing.
2. Roughly pull out and straighten the damaged area.
• Check the damage and roughly pull out and re-
pair the related side panel inner, rear floor, rear
longitudinal and other damaged parts with the
frame straightener before removing the back
panel.
• Attach the car to the frame straightener by tight-
ening the underbody clamps located at the jack
up designated points on the bottom of the frame
door opening.
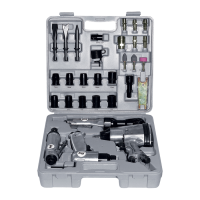
3. Cut and pry off the rear panel.
• Center punch around the spot weld imprints with
the rear side outer and extension rear floor panel.
• Use the special spot cutter to drill holes at the
spot weld nuggets on the rear side outer and
extension rear floor panel.
NOTE: When drilling holes be careful not to drill down
to the side outer and extension rear floor panel them-
selves.
• Cut off the rear panel with an air chisel, leaving
the welding flanges intact.
Fig. 9
Fig. 10
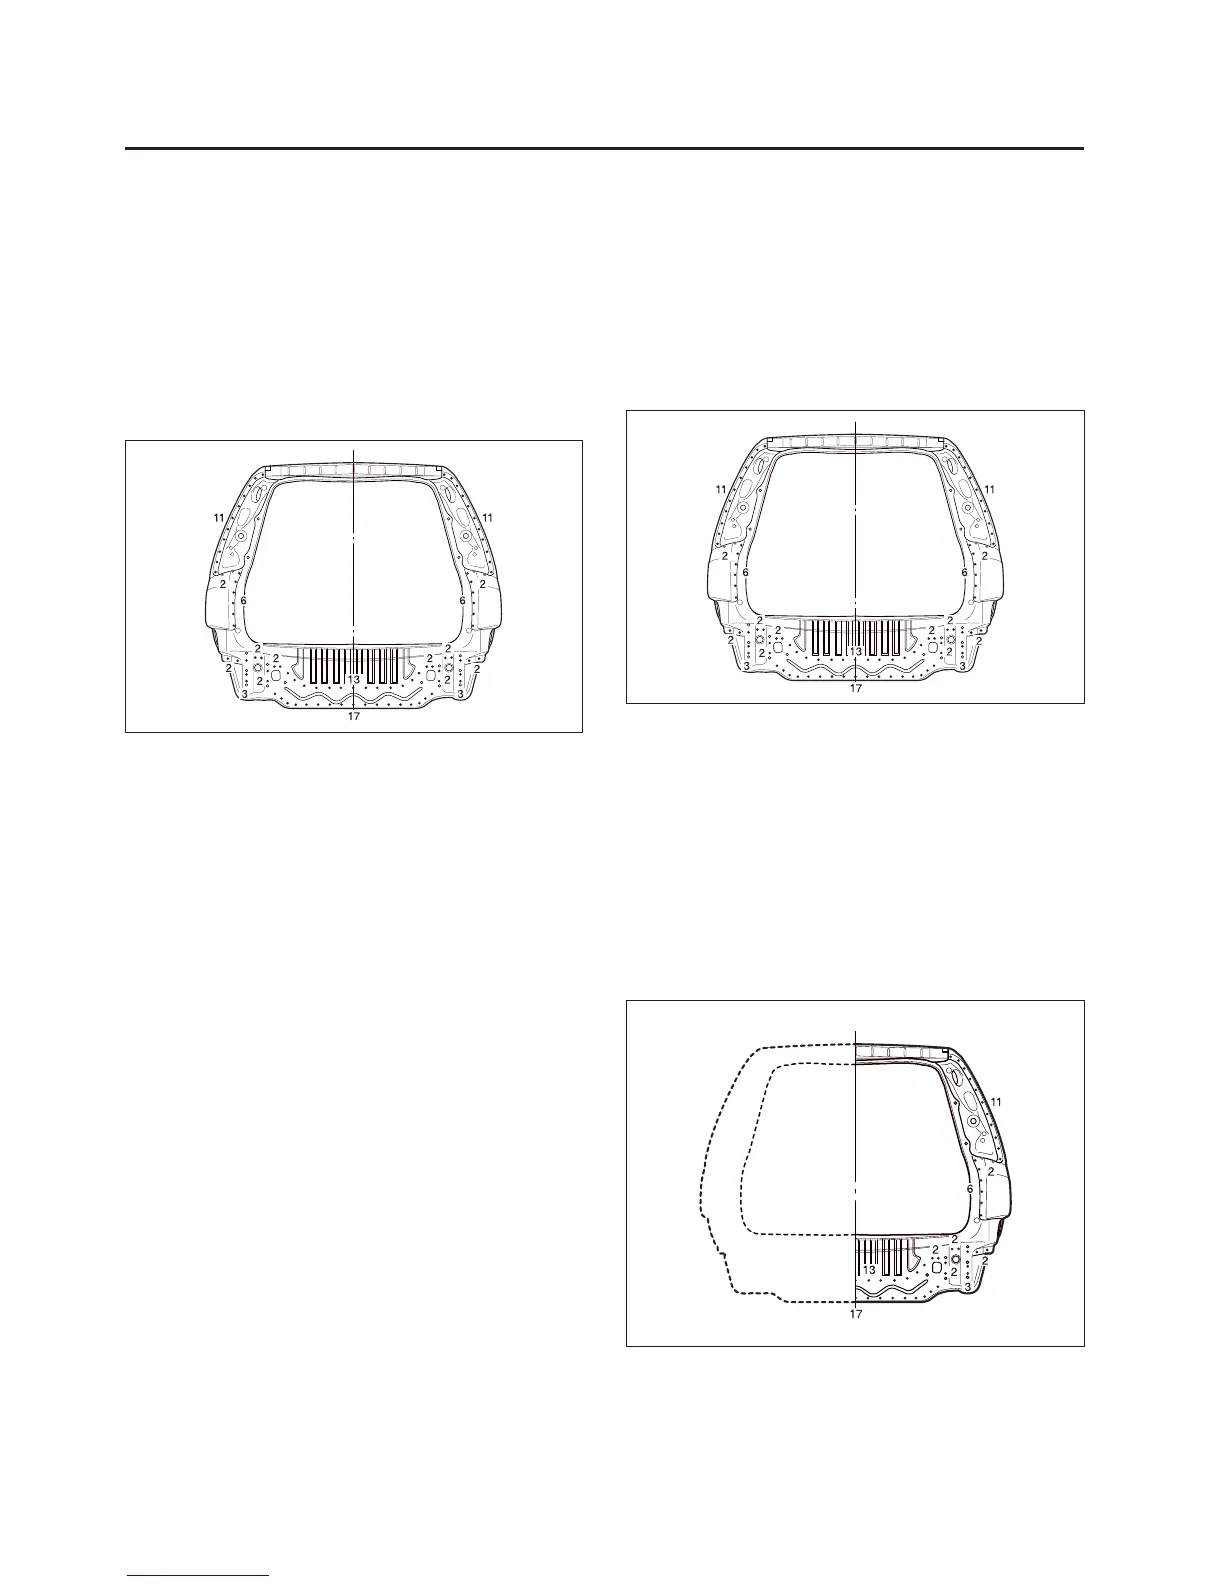
NOTE:
• If damage has occurred only on one side, cut the
damaged section of the rear panel, trim the new
panel to fit the remaining section, then butt weld
both parts at the inner ends.
• Where damage has not extended into the rear
side outer panel, cut the rear panel from the body
on either panel.
Fig. 11

 Loading...