5 Piping installation
Installation manual
14
2MXM-A9, 3MXM-A9, 4MXM-A9, 5MXM-A9
R32 Split series
3P600450-9T – 2022.09
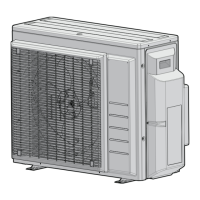
It is recommended to provide at least 150mm of free space below
the unit (300mm for heavy snowfall areas). Additionally, make sure
the unit is positioned at least 100mm above the maximum expected
level of snow. If necessary, construct a pedestal. See "4.2Mounting
the outdoor unit"[414] for more details.
In heavy snowfall areas it is very important to select an installation
site where the snow will NOT affect the unit. If lateral snowfall is
possible, make sure that the heat exchanger coil is NOT affected by
the snow. If necessary, install a snow cover or shed and a pedestal.
4.2 Mounting the outdoor unit
4.2.1 To provide the installation structure
Use a vibration-proof rubber (field supply) in cases where vibrations
may be transmitted to the building.
The unit may be installed directly on a concrete veranda or another
solid surface as long as it provides proper drainage.
Prepare 4 sets of M8 or M10 anchor bolts, nuts and washers (field
supply).
a 100mm above expected level of snow
4.2.2 To install the outdoor unit
4.2.3 To provide drainage
NOTICE
In cold areas, do NOT use a drain socket, hose and caps
(large, small) with the outdoor unit. Take adequate
measures so that the evacuated condensate CANNOT
freeze.
NOTICE
If the drain holes of the outdoor unit are blocked up by a
mounting base or floor surface, place additional foot bases
≤30mm under the outdoor unit's feet.
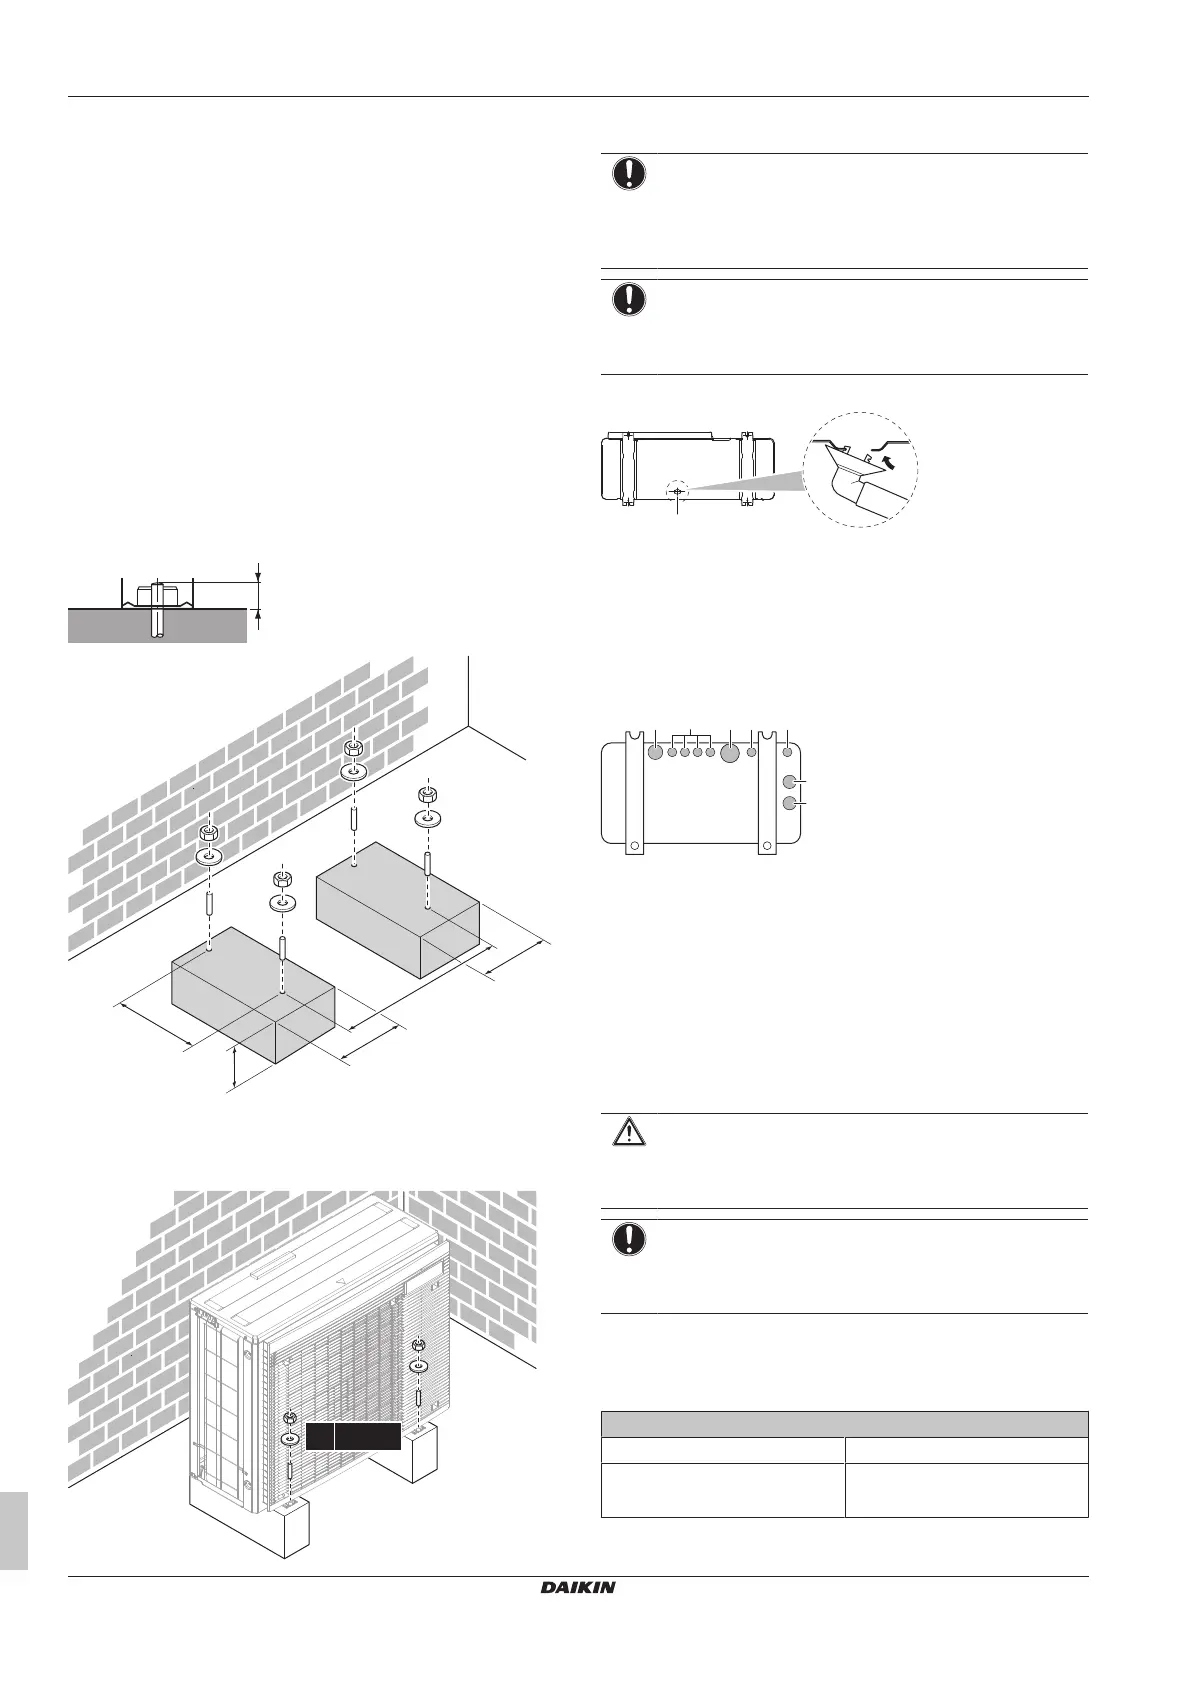
▪ Use a drain socket for drainage if necessary.
a Drain hole
To close the drain holes and attach the drain
socket
1 Install drain caps (accessory f) and (accessory g). Make sure
the edges of the drain caps close off the holes completely.
2 Install the drain socket.
a Drain hole. Install a drain cap (large).
b Drain hole. Install a drain cap (small).
c Drain hole for drain socket
5 Piping installation
5.1 Preparing refrigerant piping
5.1.1 Refrigerant piping requirements
CAUTION
Piping and joints of a split system shall be made with
permanent joints when inside an occupied space except
joints directly connecting the piping to the indoor units.
NOTICE
The piping and other pressure-containing parts shall be
suitable for refrigerant. Use phosphoric acid deoxidised
seamless copper for refrigerant piping.
▪ Foreign materials inside pipes (including oils for fabrication) must
be ≤30mg/10m.
Refrigerant piping diameter
2MXM68
Liquid piping 2× Ø6.4mm (1/4")
Gas piping 1× Ø9.5mm (3/8")
1× Ø12.7mm (1/2")
 Loading...