Top cover / function module
1.
1.1.
1.2.
1.3.
1.4.
2.
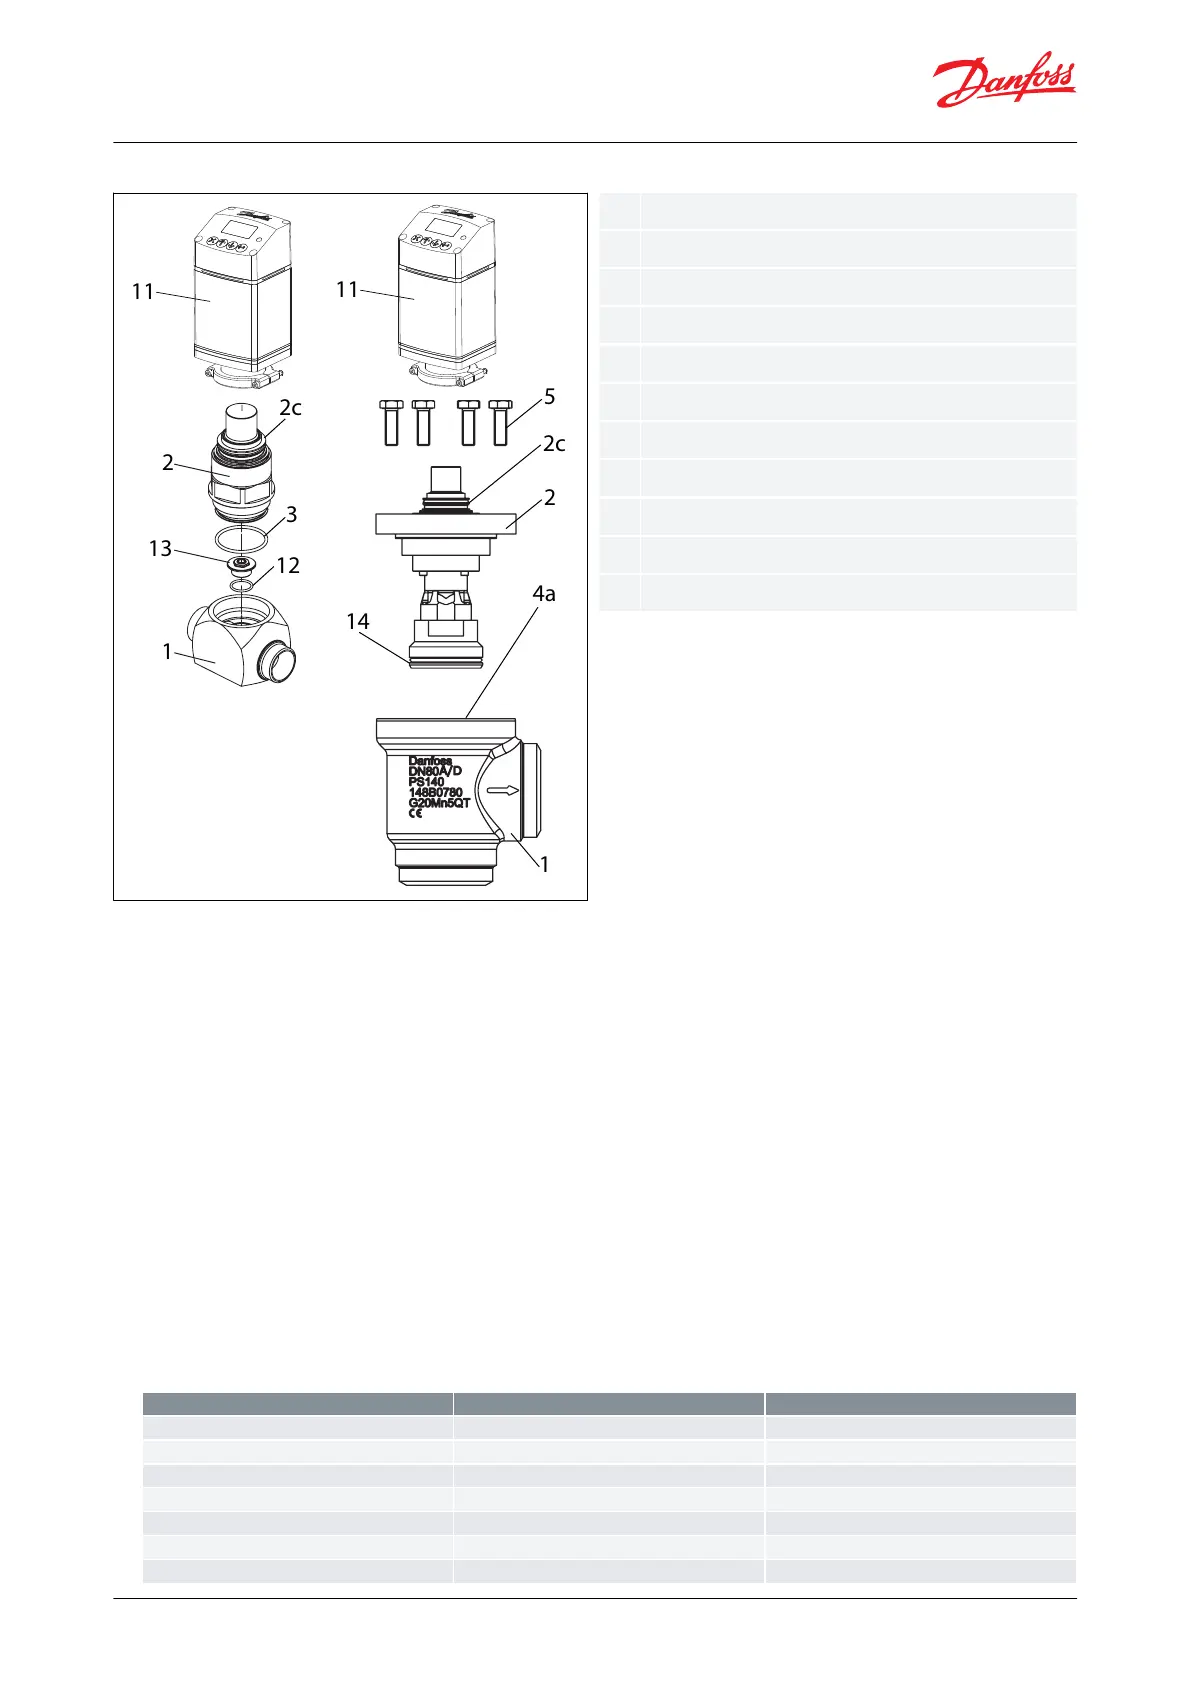
Figure 4: ICMTS 20 and ICMTS 50/80
CAUTION:
Care should be taken to protect the ICM/ICMTS function module when it is removed and stored during installation
of valve body.
Weld the valve body in line making sure that the arrow on the valve body is pointing in the direction of ow
For ICM 20 through 65 and ICMTS 20 through 80, make sure that all debris is removed from valve body
before bonnet/ function module is re-installed
For the ICM 20 and ICMTS 20, make sure that the removable orice seat is re-installed in the valve body
with the small o-ring between the orice seat and the body. Use a 13mm socket to tighten the 20-A33 or
20-A valve seat to a torque of 6.5 ft-lbs (9 N-m). Use a 12 mm hex key to tighten the 20-B66, 20-B or 20-C
valve seat to a torque of 1.5 ft-lbs (2 Nm)
DO NOT OVERTIGHTEN THE REMOVABLE SEAT.
Make sure that the bonnet gasket or bonnet o-ring for ICMTS 20 is installed and in good condition.
For the ICM 25 through ICM 65, check that the two o-rings are installed on the function module and that
the gasket located on the top of the valve body is installed and all are in good condition. A light coating of
refrigerant oil on the bonnet o-rings and the cover gasket will facilitate assembly of the valve
For the ICMTS 50/80, check that the o-ring is installed on the function module and that the gasket located
on the top of the valve body is installed and all are in good condition. A light coating of refrigerant oil on
the bonnet o-ring and the cover gasket will facilitate assembly of the valve
Install the bolts and torque to the following specications:
© Danfoss | Climate Solutions | 2024.01 BC465027827472en-000102 | 7
ICM and ICMTS Motorized Valves with ICAD Actuators

 Loading...