43
INSTALLATION & SERVICE MANUAL FOR PROFESSIONALS
Maintenance and care: Preventive maintenance
en
Step Action Illustration
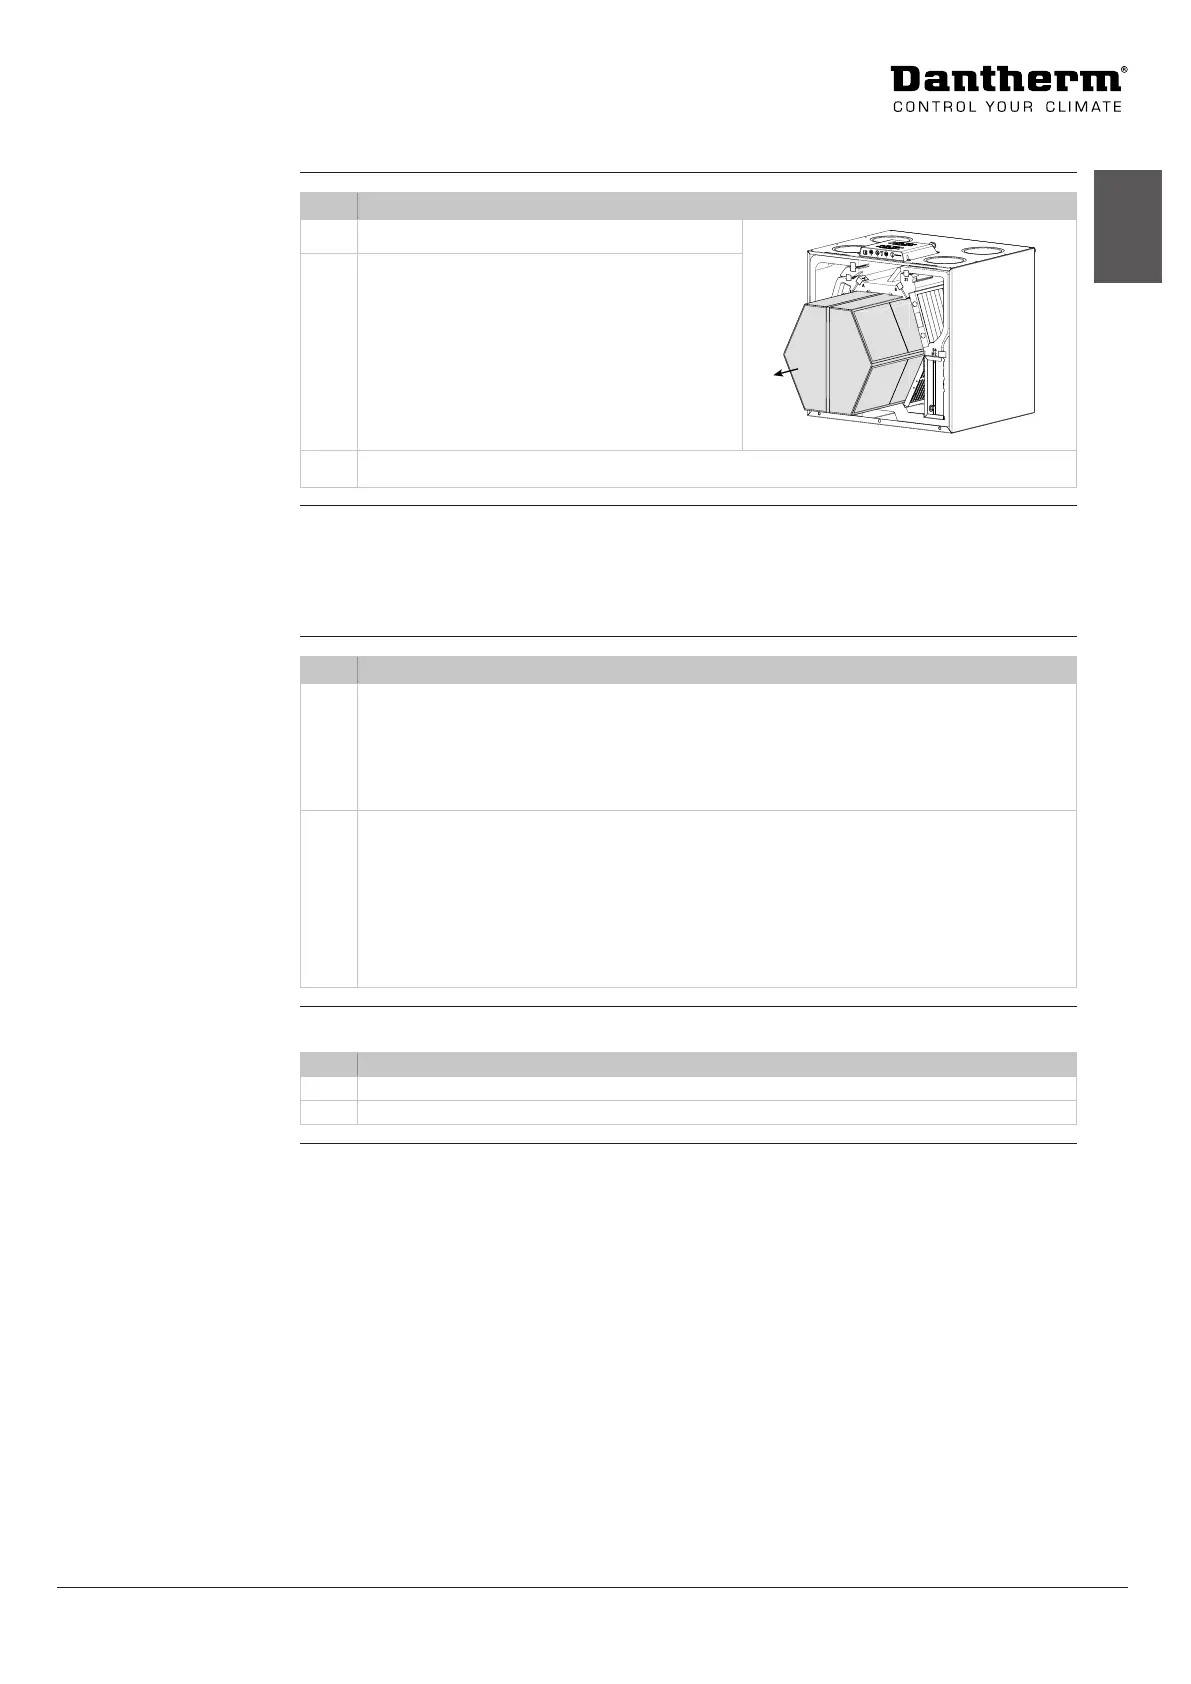
1 Remove the heat exchanger from the unit.
2 Clean the heat exchanger with a soft brush
and a vacuum cleaner at all four inlets.
In special cases, for example, if there are
clear traces of accumulated, dirty condensed
water in the heat exchanger, it will be neces-
sary to clean the heat exchanger with soapy
water outside the unit.
3 Wait until the heat exchanger is completely dry and reinstall it.
Remove the fan boxes, heat exchanger and lters and visually inspect the ducts and internal
surfaces inside the unit for dirt. If the ducts or surfaces are dirty, clean them with a wet cloth,
brush, vacuum cleaner or similar.
Ret the fan boxes, heat exchanger and lters when you have nished cleaning.
Step Action Illustration
1 Remove the extract air fan box (and bypass, if the unit runs in mode A) to inspect the
drip tray.
• Check that the condensation outlet is not blocked in the drip tray.
• Clean the drip tray with soapy water and a brush/cloth.
Reinstall the fan box (and bypass).
2 Check drain hoses for damage and correct installation. See the optimum installation
on page 36.
• Make sure that the water hose has a minimum fall of 1% towards the drain
• Ensure that the water hose is protected against frost from the unit to the drain
• Ensure that there is water in the siphon.
• Check the siphon regularly, especially during the summer, and make sure it is
lled with water as recommended.
When the service is completed, close the unit again.
Step Action Illustration
9 Check that all connections are securely xed to the PCB.
10 Mount the front cover with the three screws.
Heat exchanger
(2 years)
Internal cleaning
(2 years)
Drain and drip tray
(2 years)
End inspection