84 M-Class
6.5 Printhead Replacement
Removal:
Note: Printheads are fragile; use extreme care when handling and never use a sharp object on the surface. If you have questions,
contact a qualified technician or Datamax
Technical Support before proceeding.
1. Touch a bare metal part of the printer’s frame to
discharge any static electricity that may be present on
your body.
2. Turn ‘Off’ and unplug the printer. Open the cover; if
ribbon is installed, remove it.
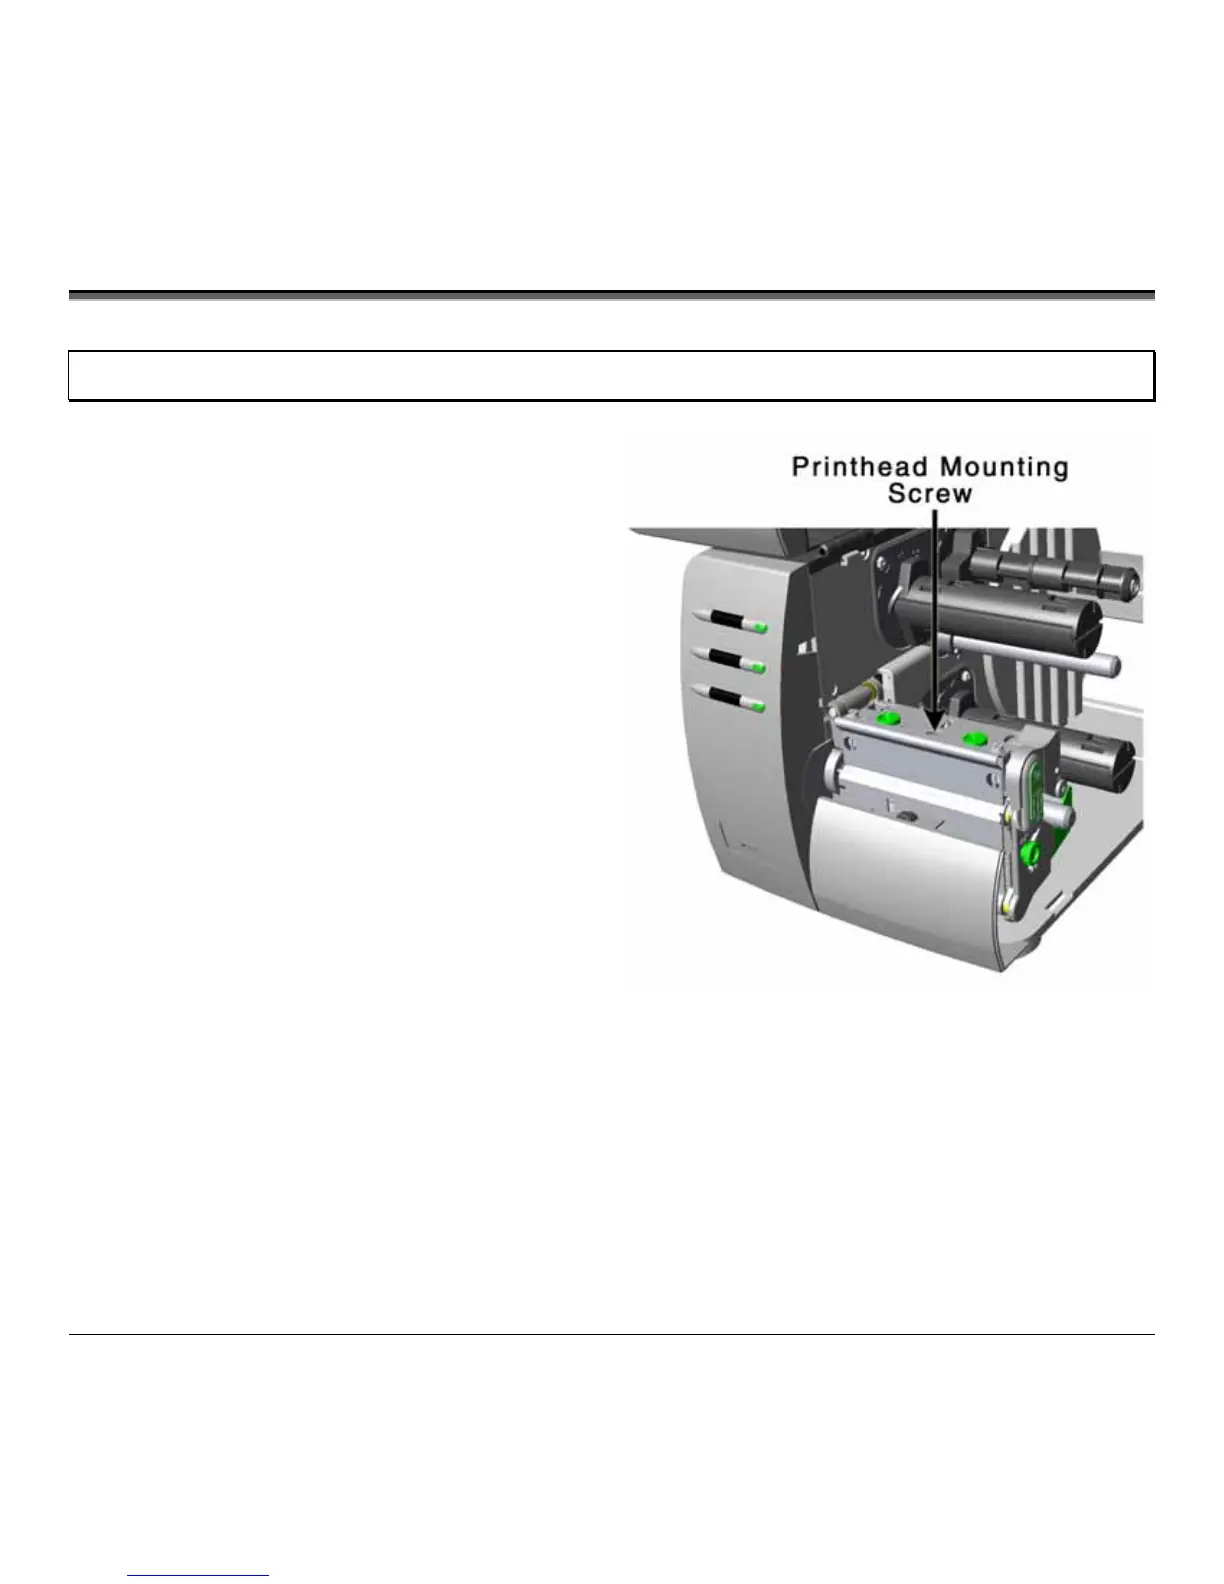
3. With the printhead locked in the down position, loosen
the Printhead Mounting Screw (it will remain in the
assembly).
4. Unlatch the Printhead Assembly. While holding the
Printhead, raise the assembly. Disconnect the two cables
and then remove the old Printhead.
5. While carefully holding the new Printhead, connect both
cables.
6. Position the Printhead onto the Locating Pins in the
Printhead Assembly and secure in place with the
Printhead Mounting Screw (do not over-tighten).
7. Clean the Printhead (see Section 6.1).
8. Reload ribbon (if removed), lower the printhead
assembly, and rotate the printhead latch back, into the
locked position.
9. Use the Darkness Adjustment to match the print contrast of the new printhead to that of the old printhead; (for non-
display printers see Section 6.6 for display printers see Section 5.1.3).