Getting Started Guide 15
Performing the N3000ET-ON/N3000EP-ON Initial
Configuration
The initial configuration procedure is based on the following assumptions:
• The Dell EMC Networking switch was never configured before.
• The Dell EMC Networking switch booted successfully.
• The console connection was established, and the
Dell EMC Easy Setup
Wizard
prompt appears on the screen of a PC running terminal emulation
software.
The initial switch configuration is performed through the console port. After
the initial configuration, you can manage the switch from the already-
connected console port or remotely through an interface defined during the
initial configuration.
NOTE: The switch is not configured with a default user name, password, or IP
address.
Before setting up the initial configuration of the switch, obtain the following
information from your network administrator:
• The IP address to be assigned to the management interface.
• The IP subnet mask for the network.
• The IP address of the management interface default gateway.
These settings are necessary to allow the remote management of the switch
through Telnet (Telnet client) or HTTP (Web browser).
Enabling Remote Management
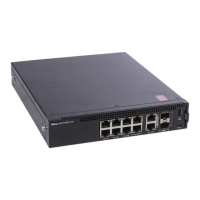
The front panel of the N3000ET-ON/N3000EP-ON switch contains a Gigabit
Ethernet port for out-of band (OOB) management. The OOB port is located
to the right of the console port. On the N3000ET-ON/N3000EP-ON switch,
you can additionally use any of the switch ports on the front panel for in-band
management. By default, all in-band ports are members of VLAN 1.
The Dell EMC Easy Setup Wizard includes prompts to configure network
information for the OOB management interface and the VLAN 1 interface on
the N3000ET-ON/N3000EP-ON switch. You can assign a static IP address and
subnet mask or enable DHCP and allow a network DHCP server to assign the
information.
 Loading...