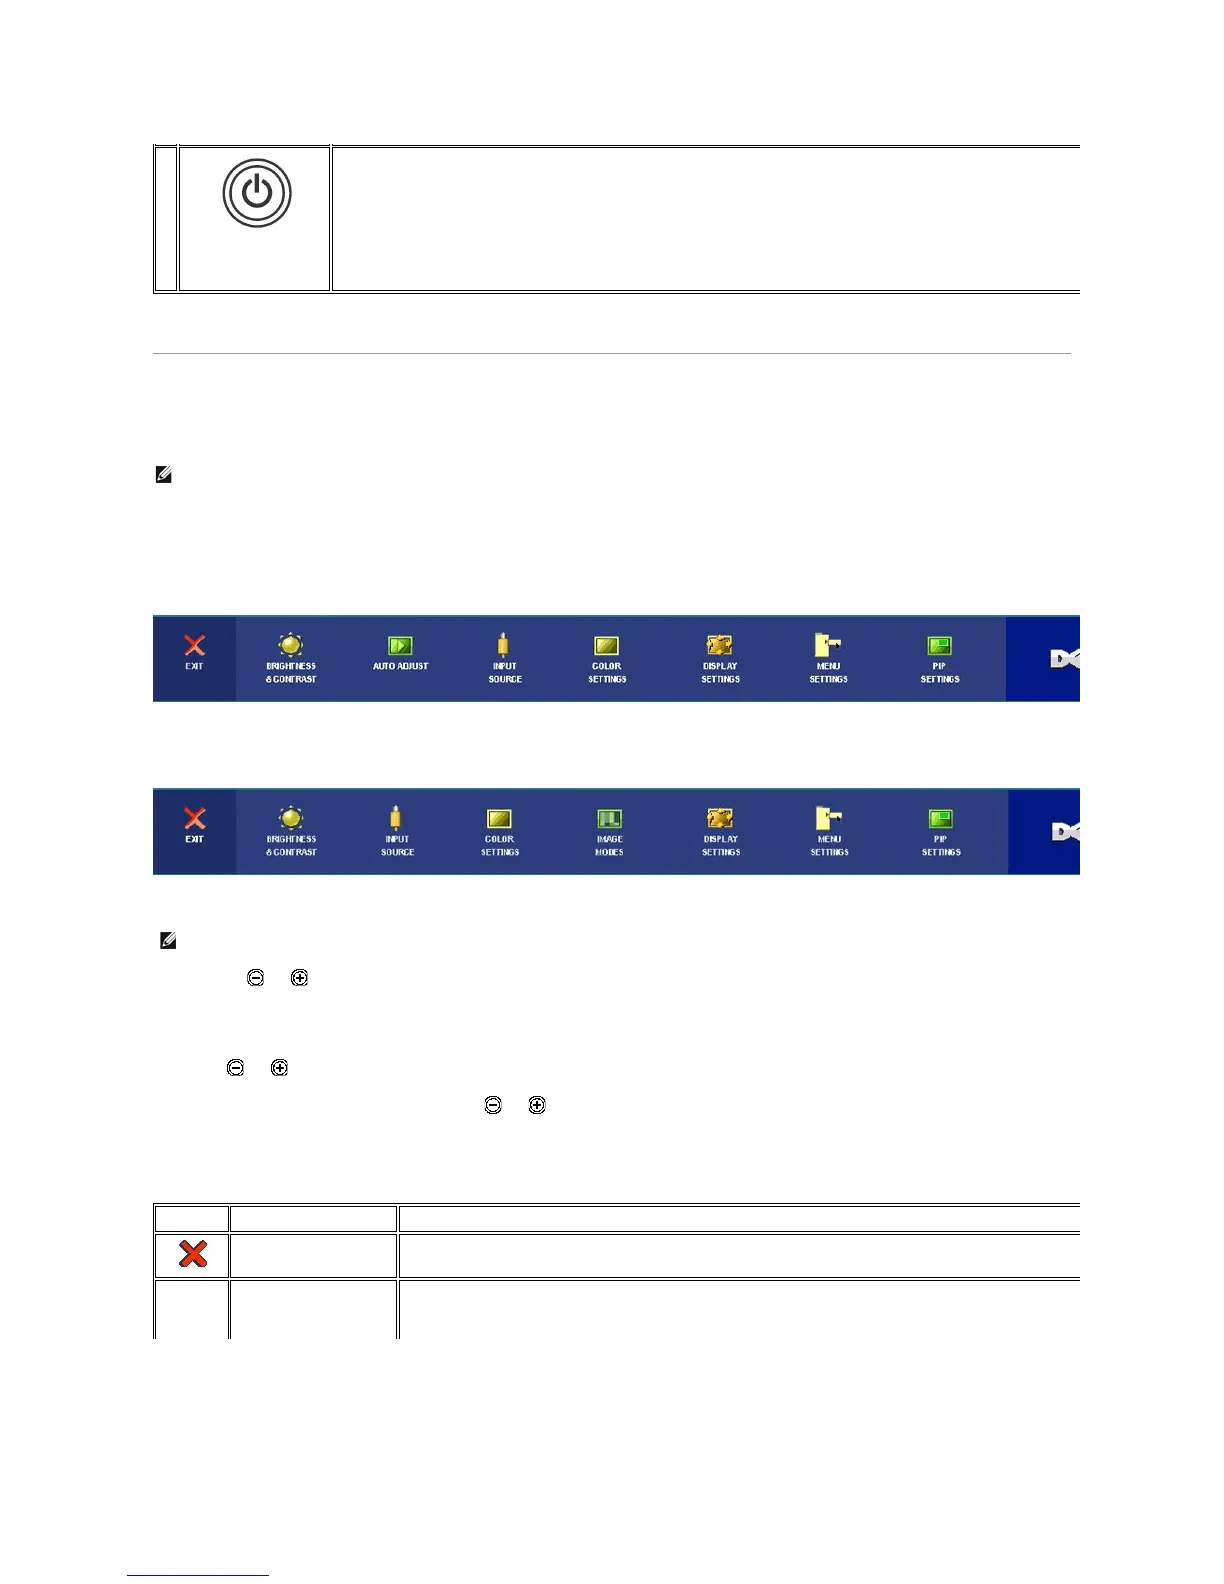
Using the OSD
Accessing the Menu System
1. Push the MENU button to launch the OSD menu and display the main menu.
Main Menu for PC (Analog (VGA), Digital (DVI-D)) Input
Or
Main Menu for Non PC (Analog (VGA), Digital (DVI-D)) Input
2.Pushthe and buttons to move between the setting options. As you move from one icon to another, the option name is highlighted. See the table for a
complete list of all the options available for the monitor.
3.PushtheMENUbuttononcetoactivatethehighlightedoption.
4.Push and button to select the desired parameter.
5.PushMENUtoentertheslidebarandthenusethe and buttons, according to the indicators on the menu, to make your changes.
6.Selectthe"back"optiontoreturntothemainmenuor"exit"toexittheOSDmenu.
The blue LED indicates the monitor is on and fully functional. An amber LED indicates DPMS power save mode.
The Power button turns the monitor on and off.
NOTE: IfyouchangethesettingsandtheneitherproceedtoanothermenuorexittheOSDmenu,themonitorautomaticallysavesthosechanges.Thechanges
are also saved if you change the settings and then wait for the OSD menu to disappear.
 Loading...