78 Removing and Installing Parts
www.dell.com | support.dell.com
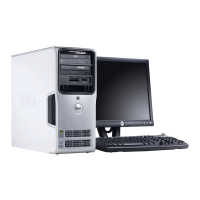
Removing the Drive-Panel Insert
1
Turn the drive panel sideways and find the tip of the drive-panel insert tab that latches over a
tab on the right side of the drive panel.
2
Pull the inner tip of the drive-panel insert tab away from the drive panel.
3
Pivot the drive-panel insert out and away from the drive panel.
4
Set the drive-panel insert aside in a secure location.
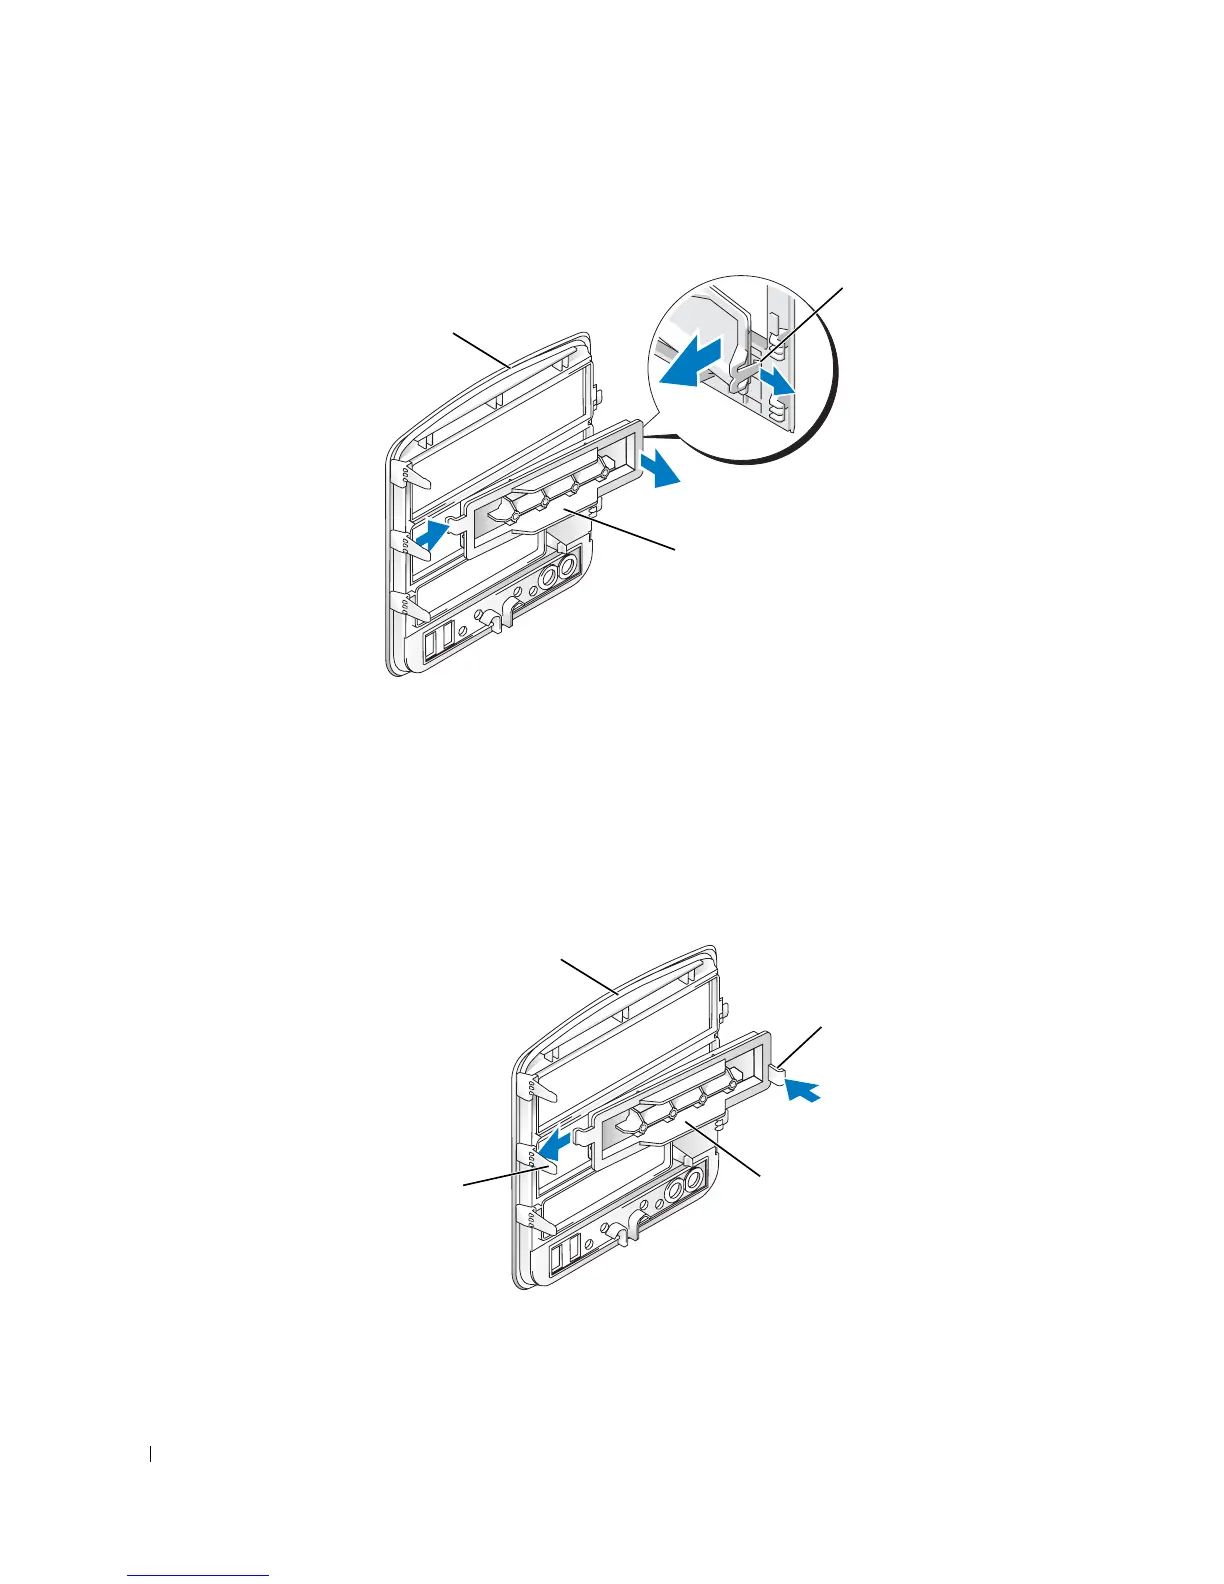
Replacing the Drive-Panel Insert
1
Slide the tab on the left side of the drive-panel insert under the center drive panel tab.
2
Rotate the drive panel insert into place and snap the drive-panel insert tab over the
corresponding tab on the drive panel.
drive panel
drive panel insert
drive panel
insert tab
center drive
panel tab
drive panel
insert tab
drive panel
drive panel insert
 Loading...