Steps
1. Remove the six screws (M2.5x2.5) that secure the display panel to the display assembly.
2. Remove the two screws (M2x2.5) that secure the display panel to the display assembly.
3. Lift and rotate the display panel forward.
NOTE: Ensure that the display panel has a smooth and clean surface to rest on to prevent damage.
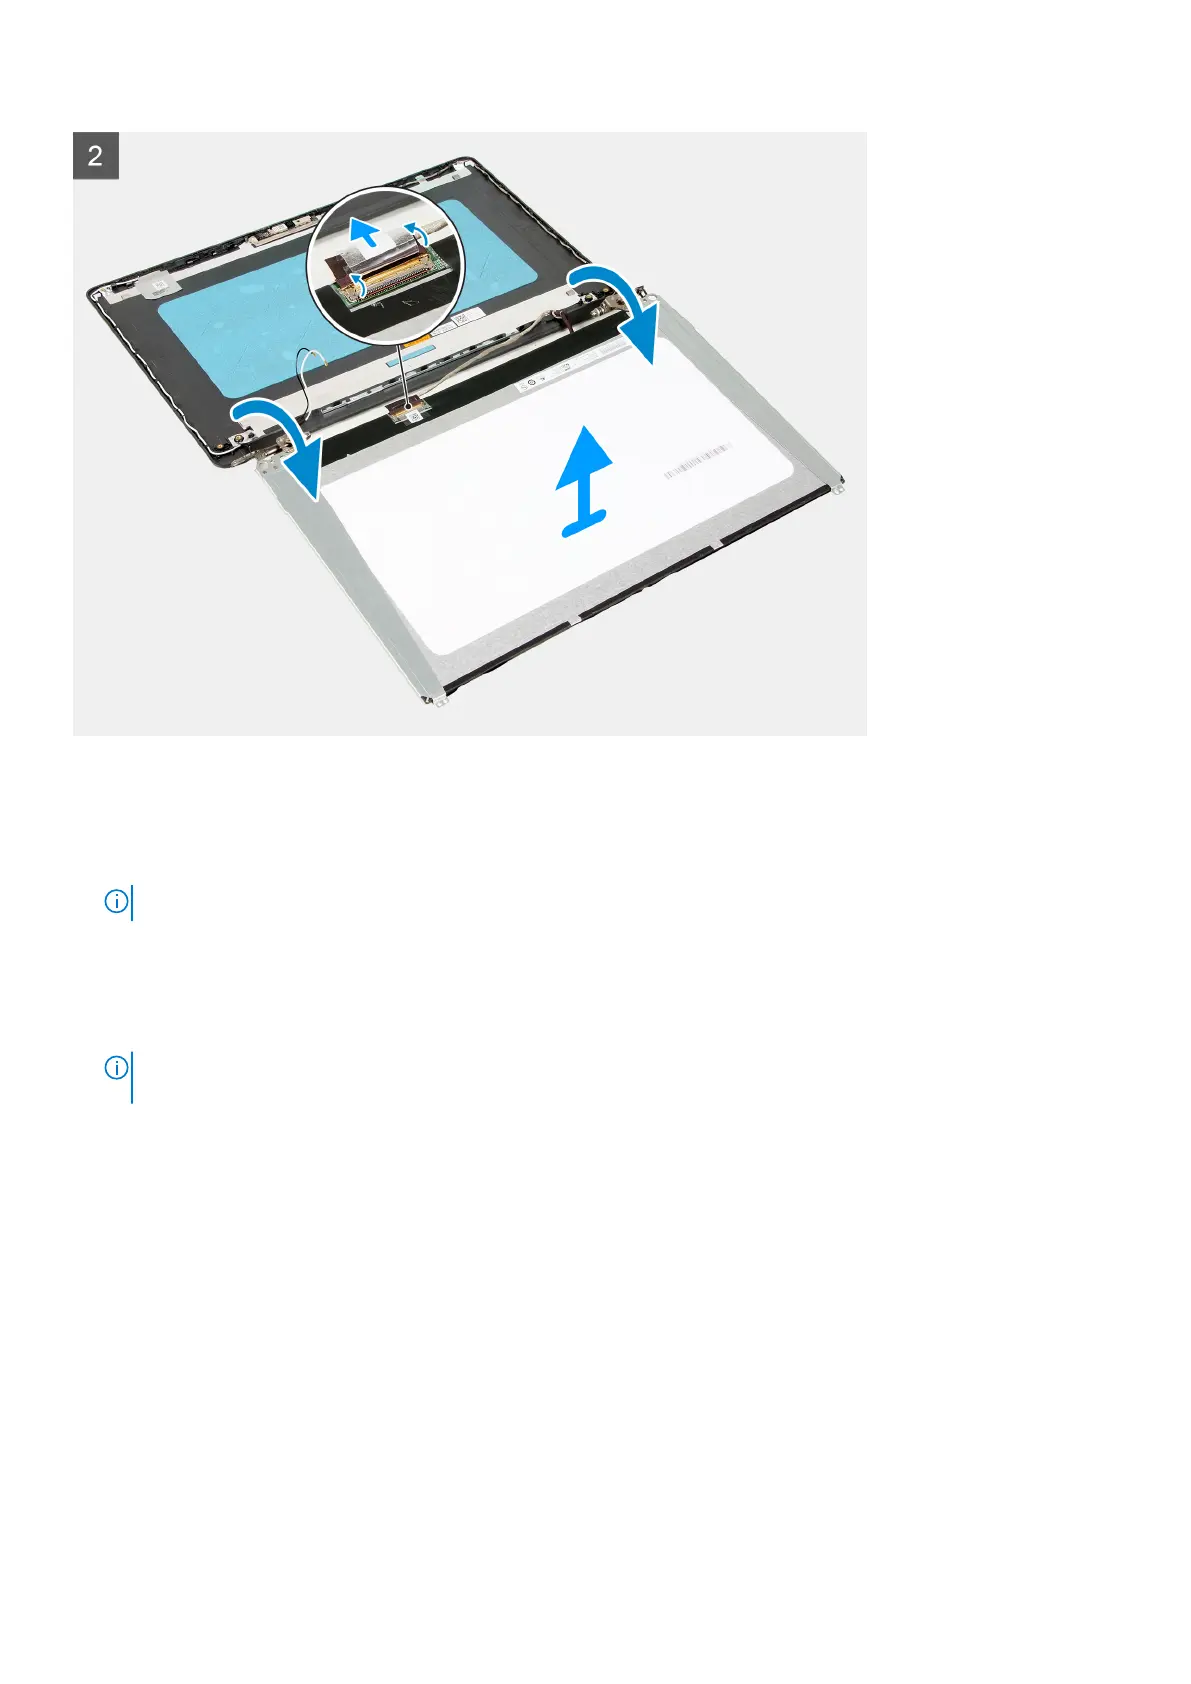
4. Disconnect the display cable from the display panel.
5. Peel the tape that secures the display-cable connector latch to the display panel.
6. Lift the display-cable latch and disconect the display cable from the display panel.
7. Lift the display panel off the display assembly.
NOTE:
The display brackets are shipped together with the display panel, do not remove the display brackets from the
display panel.
Installing the display panel
Prerequisites
If you are replacing a component, remove the existing component before performing the installation process.
About this task
The following images indicate the location of the display panel and provides a visual representation of the installation procedure.
Removing and installing components
51
 Loading...