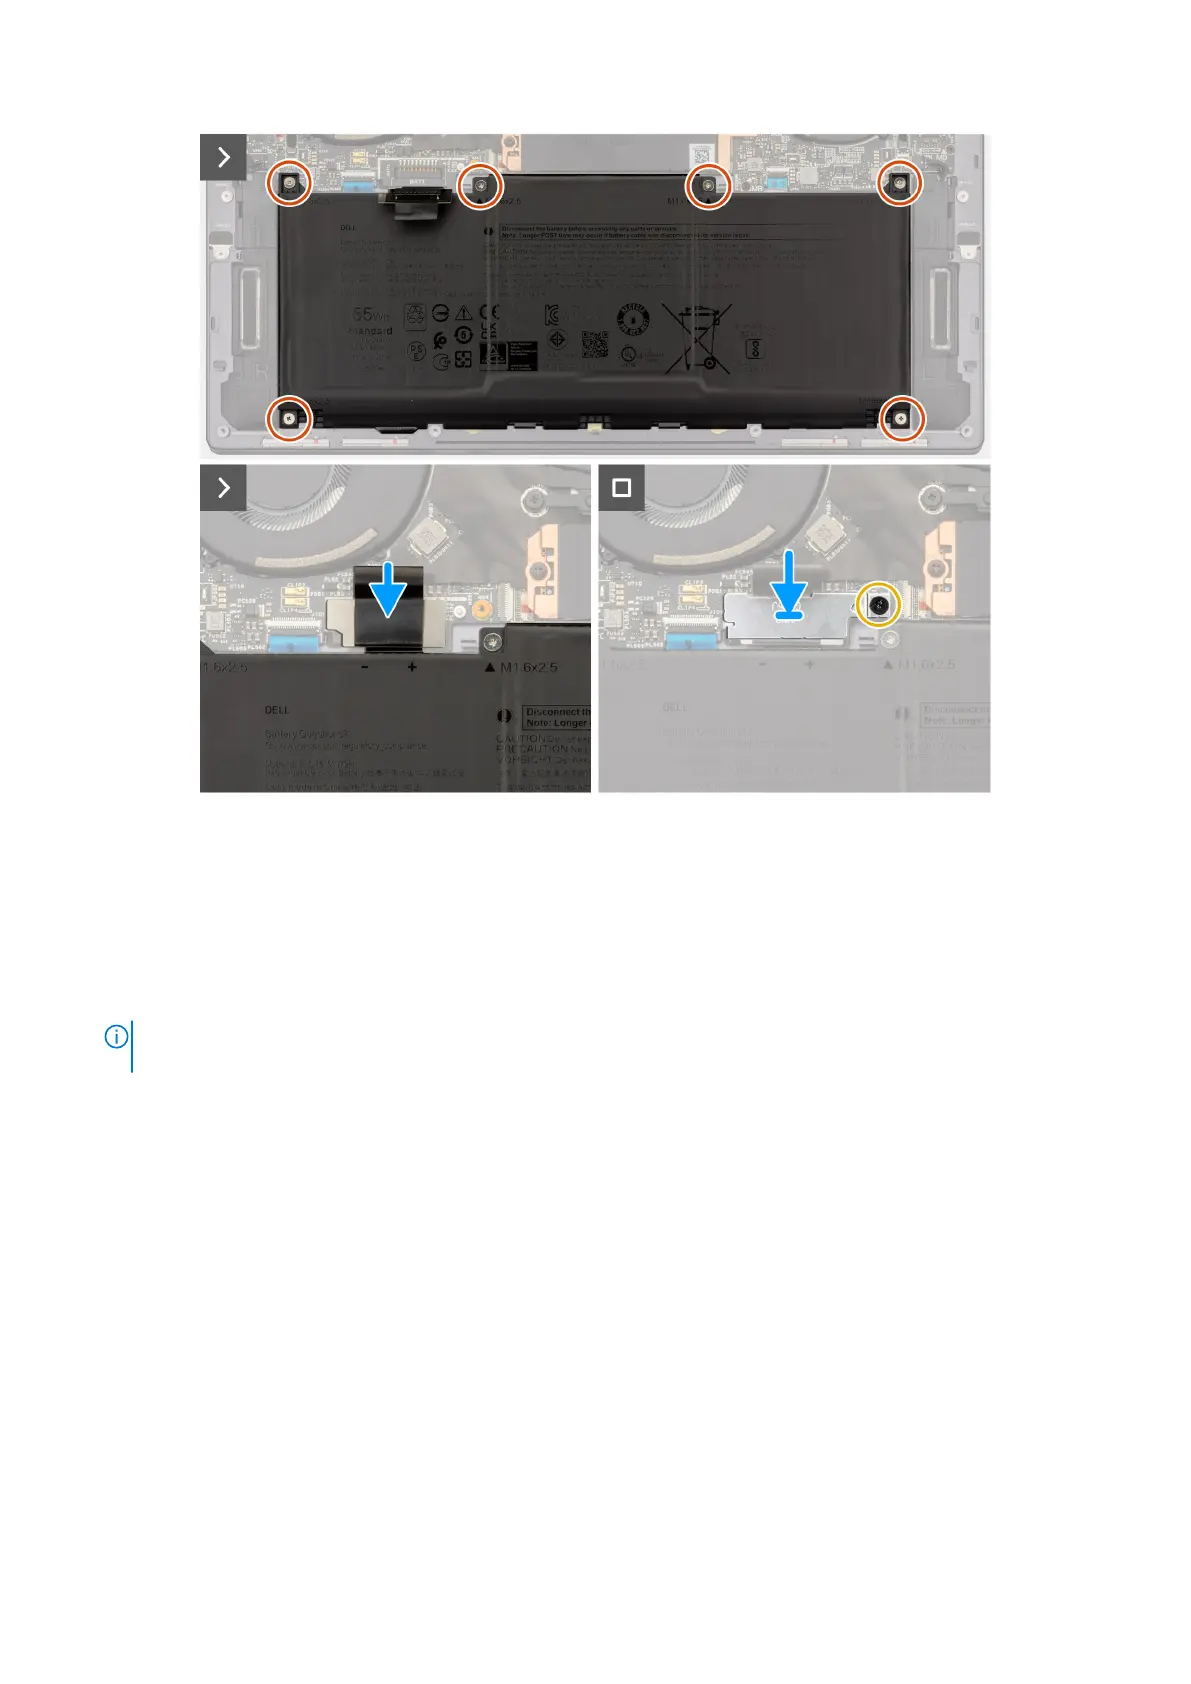
Figure 23. Installing the battery
Steps
1. Align the edge of the battery at an angle so that the cutouts on the battery fit into the hooks on the palm-rest and keyboard
assembly. Align the two screw holes on the battery with the screw holes on the palm-rest and keyboard assembly as well.
2. Lower the battery to the palm-rest and keyboard assembly until it fits into the battery section of the palm-rest and keyboard
assembly.
3. Replace the six screws (M1.6x2.5) to secure the battery to the palm-rest and keyboard assembly.
NOTE:
Align the screw holes on the base cover with the screw holes on the palm-rest and keyboard assembly before
replacing the screws.
4. Connect the battery cable to the system board.
5. Line up the battery-connector bracket over the battery connector on the system board.
6. Slide the hook at the end of the battery-connector bracket under the system board. Ensure the hook fits into the underside
of the system board.
7. Tighten the captive screw (M1.6x2) to secure the bracket to the system board. Ensure that the stud on the system board
fits into its opening on the battery-connector bracket.
Next steps
1. Install the base cover.
2. Follow the procedure in After working inside your computer.
42
Removing and installing Field Replaceable Units (FRUs)
 Loading...