Replacing the Front I/O Panel: Dell XPS 430 Service Manual
iopanel.htm[4/15/2014 11:28:32 AM]
Back to Contents Page
Replacing the Front I/O Panel
Dell™ XPS™ 430 Service Manual
Front I/O-Panel Components
CAUTION: Before working inside your computer, read the safety information that shipped with your
computer. For additional safety best practices information, see the Regulatory Compliance Homepage at
www.dell.com/regulatory_compliance.
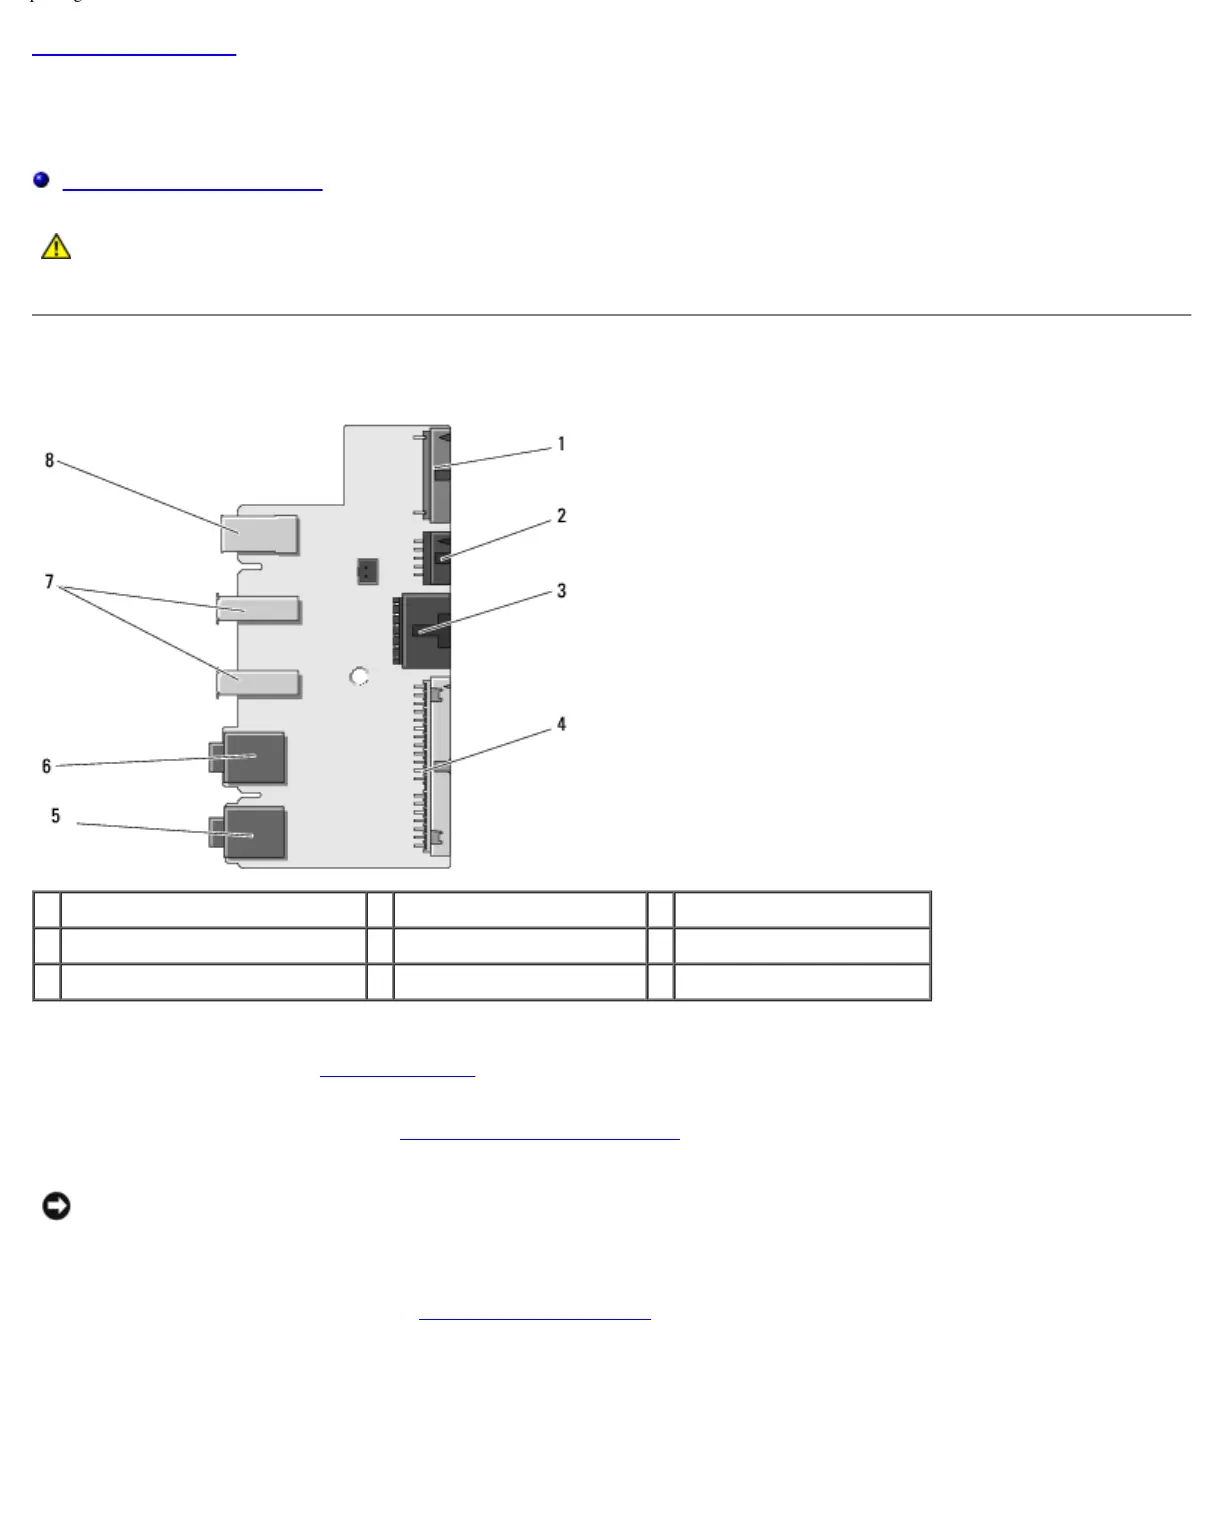
Front I/O-Panel Components
1 add-in audio internal connector 2 1394a internal connector 3 power button connector
4 front I/O connector 5 microphone-in connector 6 headphone-out connector
7 USB 2.0 connectors (2) 8 1394a external connector
To replace the front I/O panel:
1. Follow the procedures in Before You Begin
.
2. Remove the computer cover (see Removing the Computer Cover).
NOTICE: Carefully note the routing of each cable before you disconnect it, so that you are sure to re-route cables
correctly. An incorrectly routed or a disconnected cable could lead to computer problems.
3. Remove the front plastic bezel:
a. Remove the drive panel (see Replacing the Drive Panel
).
b. Remove the two screws from the bottom of the chassis.
c. Press out to release the six tabs that secure the bezel to the front panel.
d. Pull the bezel away from the front of the computer.
 Loading...