1515
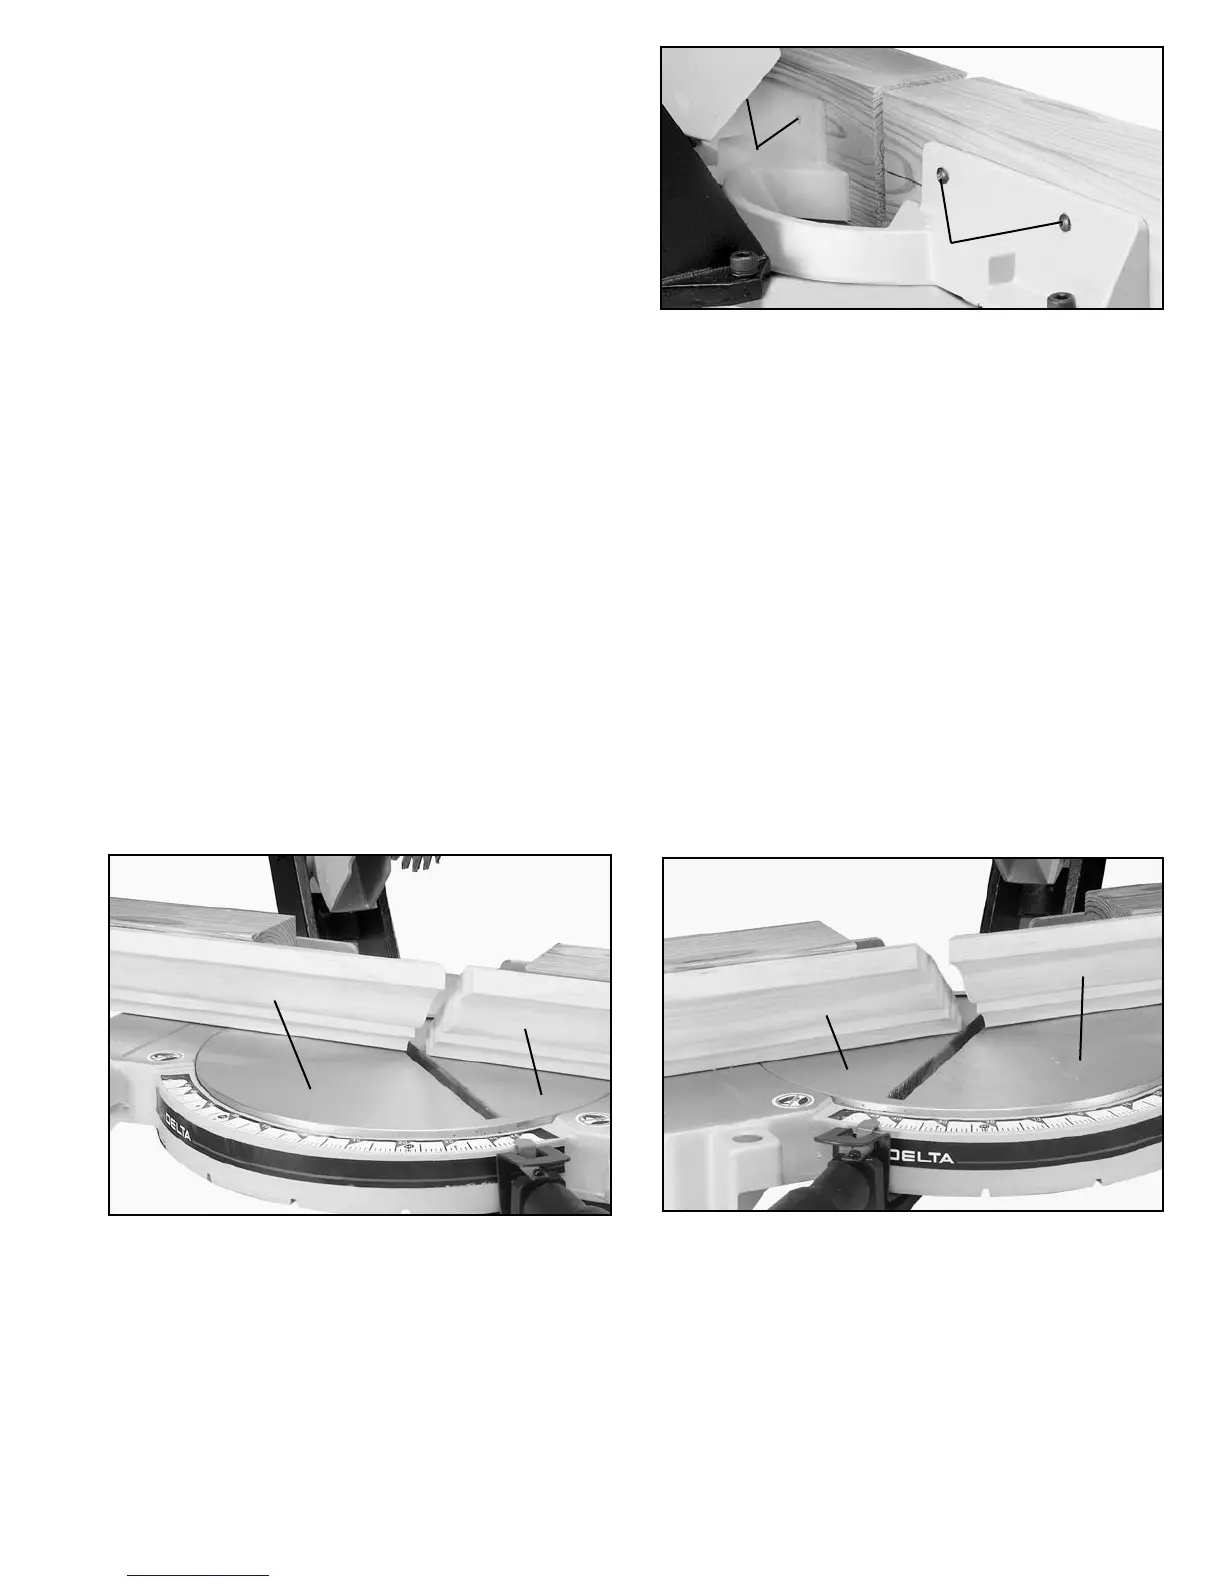
5. Fasten the filler blocks to the fence using wood
screws (A) through the two holes provided on each
fence half, as shown in Fig. 40. This enables you to eas-
ily remove the filler blocks when not in use and quickly
reassemble them to the fence when needed.
Fig. 42
Fig. 40
Fig. 41
6. Fig. 41, illustrates the miter saw arm in the 45 degree right miter position and the filler blocks fastened to the fence
so that the moulding will be in the same position as it would be when nailed between the ceiling and wall.
When making this cut the moulding (B) on the left of the saw blade will be for an outside corner and the moulding (C)
on the right of the saw blade will be for an inside corner.
To cut the mating pieces for mouldings (B) and (C) Fig. 41, simply rotate the miter saw arm to the 45 degree left miter
position and make the cut, as shown in Fig. 42. In this case the moulding (D) on the left of the saw blade will be for an
inside corner and the moulding (E) on the right of the saw blade will be for an outside corner.
A
A
C
E
B
D

 Loading...