18
A
Pull Away
to Release
Riving Knife
Upper Position
Detents on Pins
Lower
Position
Detents
Locked
Adjust
The height of the riving knife should be adjusted based
on the type of cut being made. For all through cuts
(when the wood is completely severed), it should be
in the raised position, with anti-kickback fingers and
guard installed. For non-through cuts (when the blade
does not penetrate the top of the workpiece), the
riving knife should be in the lowered position and anti-
kickback fingers and guard removed.
1. Remove throat plate.
2. Raise blade to full height above table.
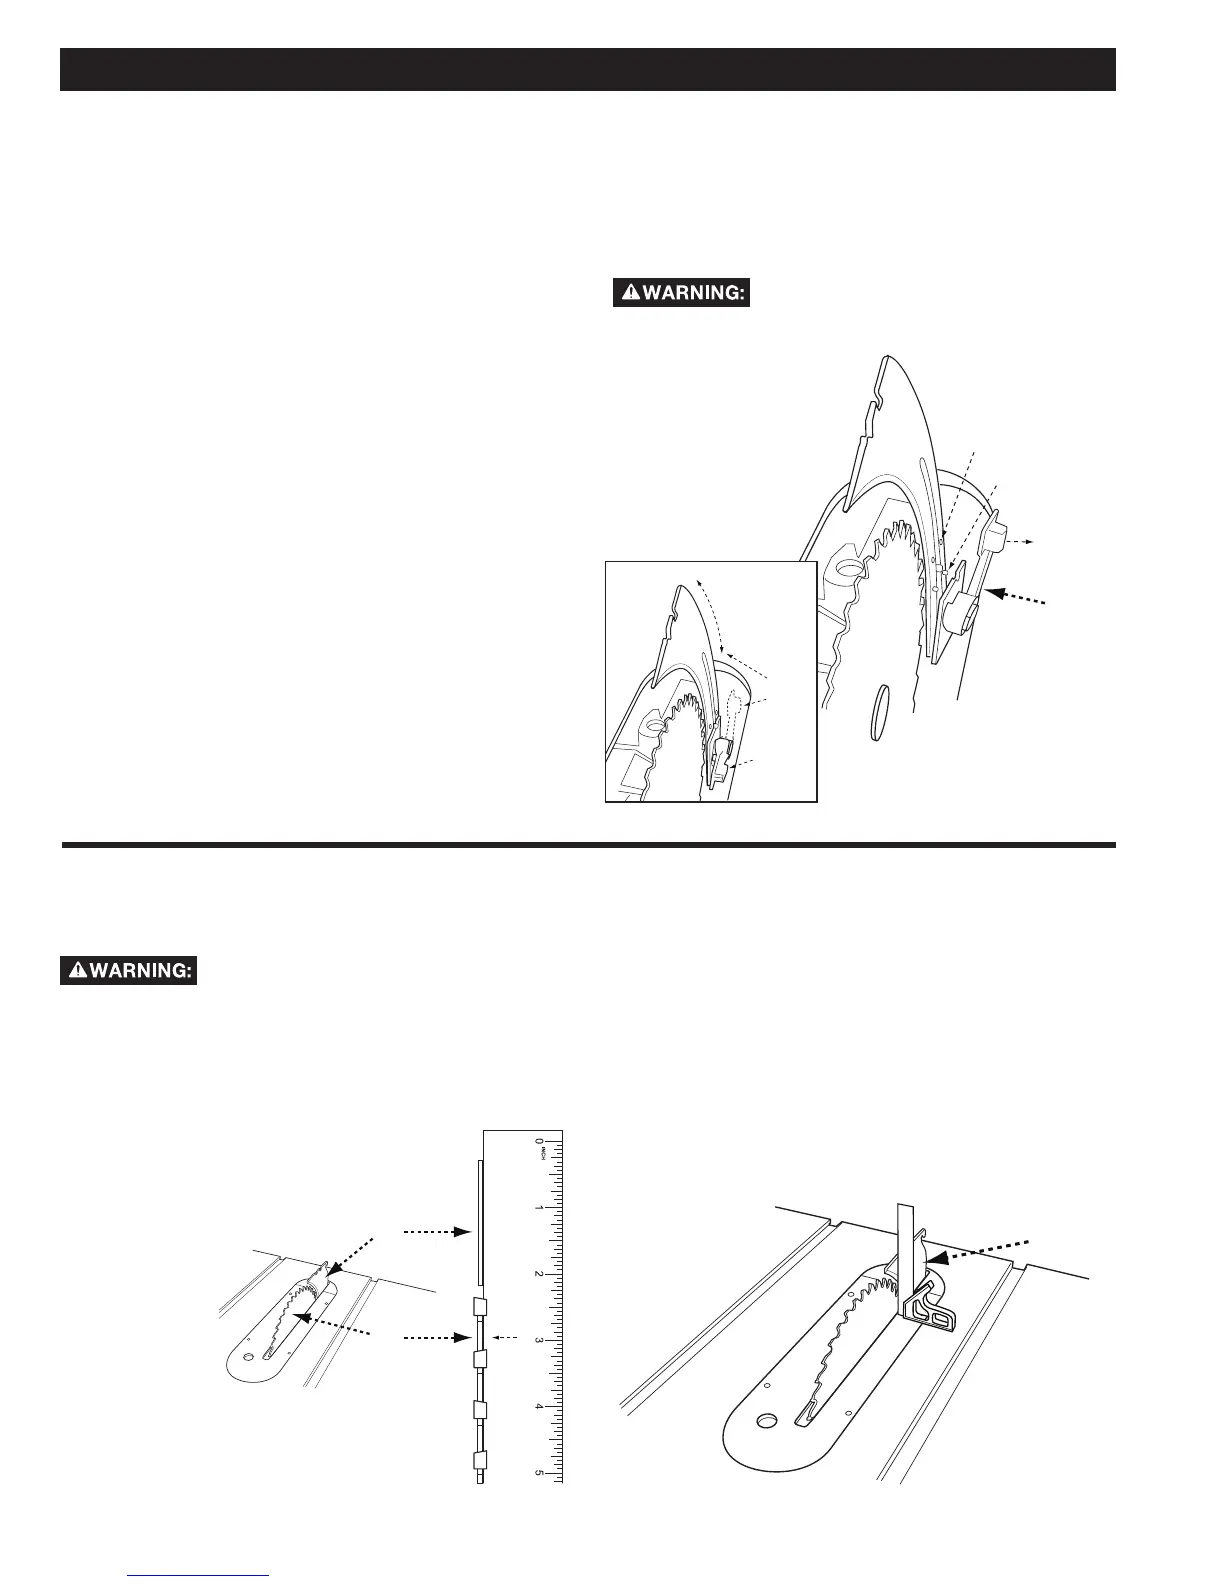
3. Pull riving knife release lever (A) up to release riving
knife from clamping mechanism. See Figure 16.
4. Push riving knife and release lever to the arbor side
of the blade to disengage riving knife from pins.
a. To adjust the riving knife into the through-cut
position, pull riving knife up to lower detent
pins.
b. To move the riving knife into the non-through
cut position, push it down to upper detent
pins.
1. Release lever and pull on riving knife to make sure it
is properly seated in the raised or lowered position.
2. Securely clamp riving knife by pushing riving
knife clamping lever back down to the horizontal
position.
3. Replace throat plate.
1. : Lay a
straight edge on the table against
blade face (A) and make sure
it extends out along the
riving knife (B),
as shown
in Figure
17a. The
riving knife
should just
touch the
straight
edge.
Be sure the straight edge
goes between the teeth and
rests on the blade face and
the riving knife for proper
alignment.
1. : Place a carpenter’s square on
the table and against the blade face and make sure
it extends up along the riving knife (B) as shown in
figure 17b. The riving knife and blade should touch
the carpenter’s square with no gaps. Be sure the
straight edge goes between the teeth and rests
on the blade face and the riving knife for proper
alignment.
If the riving knife and blade are out of horizontal or
vertical alignment, refer to riving knife alignment
instructions on page 28 of this manual.
B
 Loading...