31
Do not enlarge the wiring compartment conduit openings as the
wiring box enclosure will be damaged which will void the inverter
warranty.
N’élargissez pas les ouvertures du conduit du compartiment de
câblage, boîtier de câblage risque d’être endommagé et la garantie
de l’onduleur invalidée.
CAUTION!
PRUDENCE!
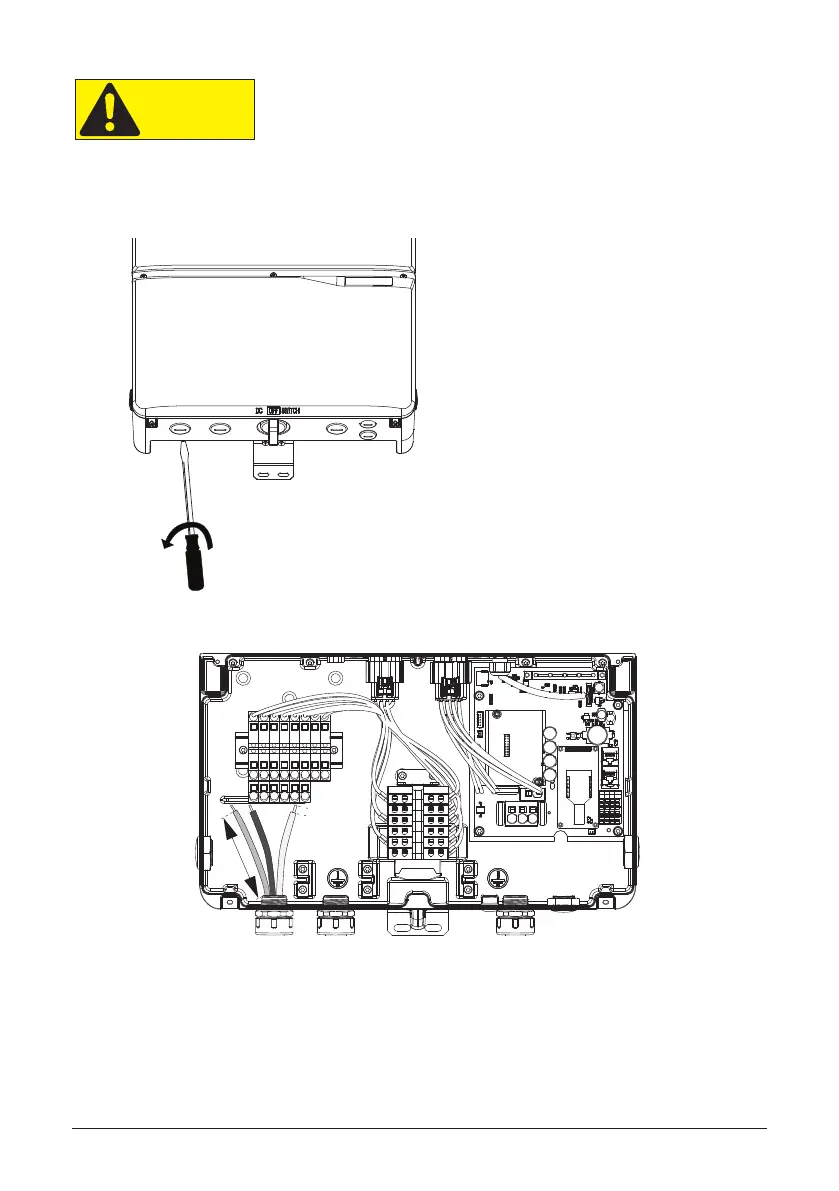
Figure 25: Wiring box conduit plug removal (illustration showing
the removal of a conduit plug)
The conduit plugs are removed by pla-
cing a at blade screwdriver in the slot
on the conduit plug face and turning
while gripping the nut on the inside
of the enclosure to ensure it does not
slip. Unscrew the nut from the conduit
plug and slip the conduit plug out of
the conduit opening.
Figure 26: Conduit installation and wiring routing
Conduit ttings need to be water tight with either NEMA 4, 4X, 6, or 6X rated, and insulated type
preferred.
Once conduit and ttings are installed, route wiring thru conduit and tting and allowing a 6 inch
strain relief loop within the wiring box compartment.
6 inchs
0.7 inchs
 Loading...