Operating DENON audio components
3
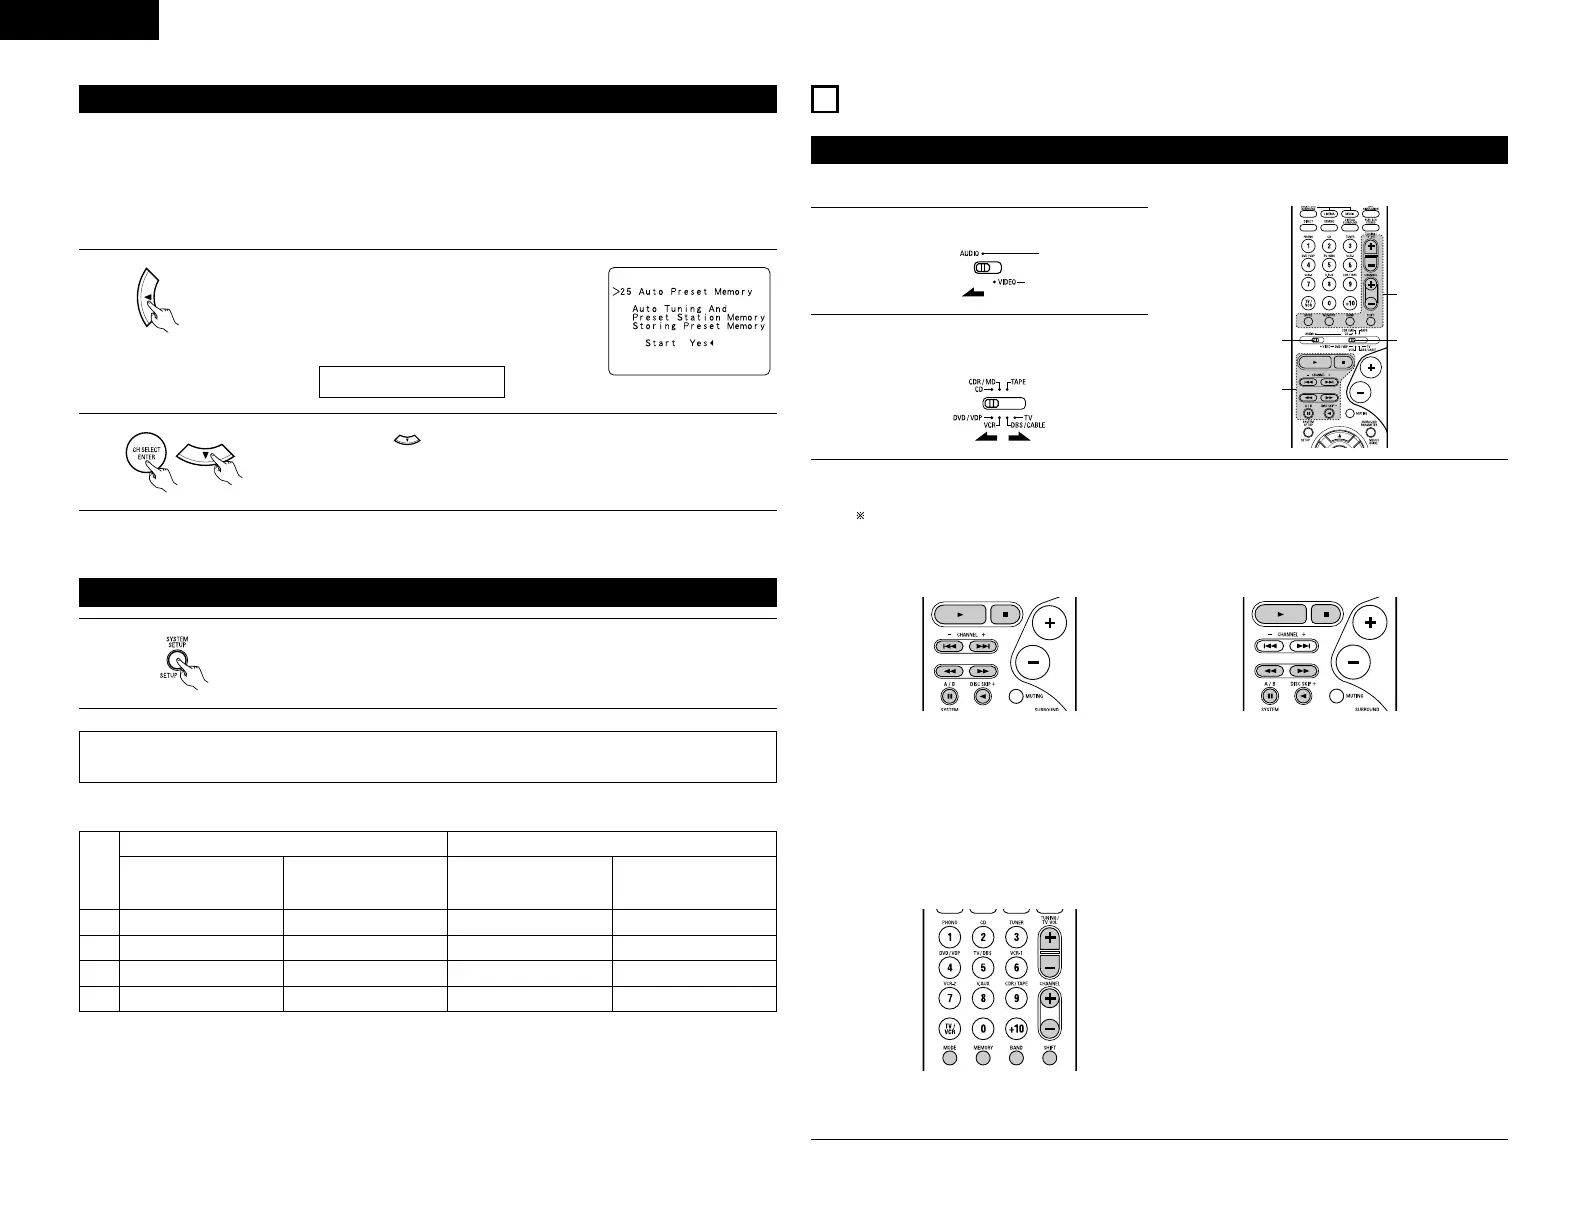
Operate the audio component.
• For details, refer to the component’s operating instructions.
While this remote control is compatible with a wide range of infrared controlled components, some
models of components may not be operated with this remote control.
1. CD player (CD) and CD recorder and MD
recorder (CDR/MD) system buttons
2. Tape deck (TAPE) system buttons
6, 7 : Manual search
(forward and reverse)
2 : Stop
1 :Play
8, 9 : Auto search (cue)
3 : Pause
DISC SKIP + : Switch discs
(for CD changers only)
6 : Rewind
7 : Fast-forward
2 : Stop
1 : Forward play
0 : Reverse play
A/B : Switch between decks A and B
• Turn on the power of the different components before operating them.
1
Set mode switch 1 to “AUDIO”.
2
Set mode switch 2 to the position for the
component to be operated. (CD, CDR/MD or
Tape deck)
3. Tuner system buttons
SHIFT : Switch preset channel range
CHANNEL +, – : Preset channel up/down
TUNING +, – : Frequency up/down
BAND : Switch between the AM and FM
bands
MODE : Switch between auto and mono
MEMORY : Preset memory
NOTE:
• TUNER can be operated when the switch is at “AUDIO” position.
Auto Tuner Presets
• Use this to automatically search for FM broadcasts and store up to 40 stations at preset channels A1 to 8, B1
to 8, C1 to 8, D1 to 8 and E1 to 8.
NOTE:
• If an FM station cannot be preset automatically due to poor reception, use the “Manual tuning” operation to
tune in the station, then preset it using the manual “Preset memory” operation.
1
Use the CURSOR button to select “Yes”.
“Search” flashes on the screen and searching
begins.
“Completed” appears once searching is completed.
The display automatically switches to screen.
2
Press the ENTER or (down) button if you want to start the settings over from
the beginning.
• On-screen display signals
Signals input to the AVR-1804
VIDEO signal input jack
(yellow)
E
C
E
C
1
2
3
4
S-video signal input jack
E
E
C
C
Video signal output to
VIDEO MONITOR OUT jack
(yellow)
C
C
C
E
On-screen display signal output
(C: Signal E: No signal) (C: On-screen signals output E: On-screen signals not output)
Video signal output to S-
Video MONITOR OUT jack
C
C
C
C
 Loading...