ENGLISH
4
Fittings
Install a male fitting on the tool which is free flowing
and which will release air pressure from the tool when
disconnected from the supplysource.
Hoses
Air hoses should have a minimum of 150 p.s.i.g.
(10.6kg/cm²) working pressure rating or 150 percent of
the maximum pressure that could be produced in the air
system. The supply hose should contain a fitting that will
provide “quick disconnecting” from the male fitting
4
on
thetool.
Supply Source
Use only clean regulated compressed air as a power source
for this tool. NEVER USE OXYGEN, COMBUSTIBLE GASES, OR
BOTTLED GASES, AS A POWER SOURCE FOR THIS TOOL AS
TOOL MAYEXPLODE.
Regulator
A pressure regulator with an operating pressure of
0–125p.s.i.g. (0–8.79 kg/cm²) is required to control the
operat iing pressure for safe operation of this tool. Do not
connect this tool to air pressure which can potentially
exceed 200 p.s.i.g. (14 kg/cm²) as tool may fracture or burst,
possibly causinginjury.
Operating Pressure
Do not exceed recommended maximum operating pressure
as tool wear will be greatly increased. The air supply must
be capable of maintaining the operating pressure at the
tool. Pressure drops in the air supply can reduce the tool’s
driving power. Refer to Tool Specifications for setting the
correct operating pressure for thetool.
Filter
Dirt and water in the air supply are major causes of
wear in pneumatic tools. A filter will help to get the best
performance and minimum wear from the tool. The
filter must have adequate flow capacity for the specific
installation. The filter has to be kept clean to be effective
in providing clean compressed air to the tool. Consult the
manufacturer’s instructions on proper maintenance of your
filter. A dirty and clogged filter will cause a pressure drop
which will reduce the tool’sperformance.
Oil Free Motor
The nailer is designed to be used without the need to add
any air tool oil and still deliver long life. If air tool oil is added
tool it will still functionproperly.
Tool-Free Depth Adjustment (Fig. A, B–D)
You pin nailer features tool-free depth adjustment for
adjusting the driving depth ofpins.
To Adjust the Depth
1. Disconnect the air supply from tool.
2. Depress the magazine release lever
5
and pull the
magazine
6
back to stop pinfeeding.
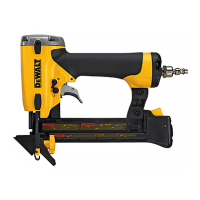
3. Grab the small tabs on each side of the nose cover
8
and pullup.
Fig. B
8
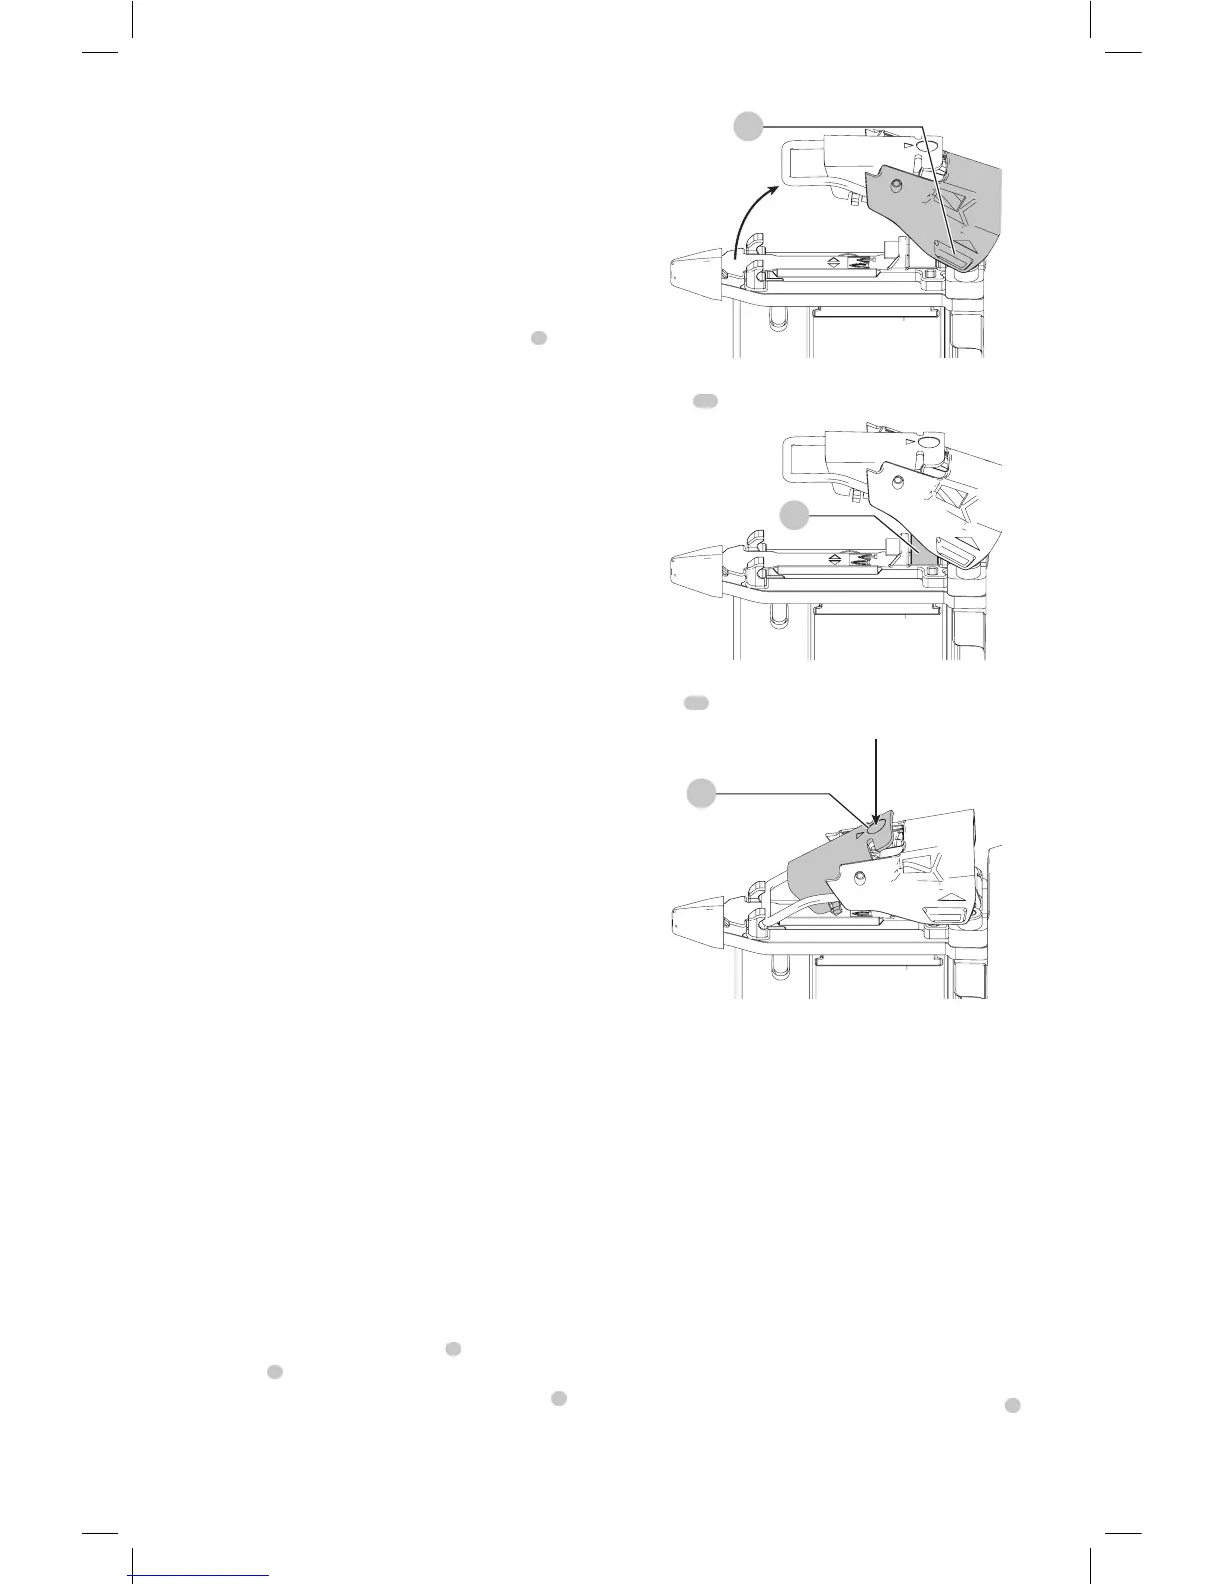
4. With the nose cover lifted, turn the depth adjustment
wheel
10
to adjust thedepth.
Fig. C
10
5. After adjusting to the desired depth, push the pinch
lever
11
down to lock the mechanism back to
operating position .
Fig. D
11
6. Close the magazine and reconnect the airsupply.
Low Pin Lock Out
The nailer is equipped with a low pin lock out which
prevents the tool from actuating when the magazine is
nearly empty. When approximately 10 to 12 pins remain in
the magazine, the tool ceases to operate. Refer to Loading
the Tool to reload a stick of collatedpins.
OPERATION
Proper Hand Position (Fig. E)
WARNING: To reduce the risk of serious personal injury,
ALWAYS use proper hand position as shown.
WARNING: To reduce the risk of serious personal
injury, ALWAYS hold securely in anticipation of a
suddenreaction.
Proper hand position requires one hand on the handle
1
.
 Loading...