12. REGULATION OF TEMPERATURE
16. CLEANING
With the appropriate thermostat knob set at number 3 or 4, the cabinet
will automatically maintain a suitable temperature for ordinary food
storage. Usually, no further adjustment will be needed, but in hot
weather. or when more cooling is required, the knob must be turned to
a higher figure. If less cooling is required, the knob should be turned
to a lower figure.
Clean the refrigerator thoroughly, as necessary, particularly when it is to
be out of use for any period.
First, defrost the cabinet as described in the previous item, then
clean the shelves, cabinet interior and door with a clean cloth wrung
out in warm water to which a little mild, non-scented washing-up liquid
detergent has been added. Wipe over with a clean cloth and dry
thoroughly.
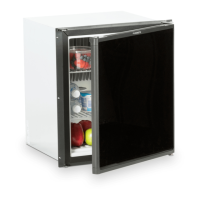
13. STORING FOOD IN THE REFRIGERATOR
To prevent drying out and the transfer of flavors from one food to
another, foods should always be stored in covered dishes, plastic
bags or wrapped in foil of
waxed
paper. NEVER PUT HOT FOOD
INTO THE REFRIGERATOR.
Do not wash any plastic parts in water that is more than hand hot,
and do not expose them to dry heat.
Avoid using large dishes and do not stack food or food containers
too closely as this interferes with the circulation of cold air within
the cabinet. The lower cabinet shelf has a retaining rail at the front
which can be slid back to help hold containers etc. when the vehicle
is on the move.
The outside of the cabinet should be wiped with a clean, damp
cloth, and polished with a clean, soft duster.
NEVER USE STRONG CHEMICALS OR ABRASIVE CLEANING
MATERIALS ON ANY PART OF THE REFRIGERATOR.
17. TO SHUT DOWN THE REFRIGERATOR
Switch off the electricity or turn off the valve controlling the gas
supply to the refrigerator, as applicable.
14. ICE-MAKING
Fill the ice-tray with water to within
1/8"
from the top, and place it
on the upper shelf in the frozen food compartment. When ice has
formed, the ice-tray can be released from the shelf by lifting one
corner. Do not use a lever. Any unwanted ice should be left in the
divider and replaced in the tray. empty spaces being refilled with water.
When not in use, the refrigerator should be emptied. cleaned and
dried and rhe door left slightly open by using the alternative position
of
the
travel catch, so that fresh air
can
circulate inside. The ice-tray
should also be emptied, dried, and left handy on a shelf in the cabinet.
POINTS TO REMEMBER
Ice will be made more quickly when the appropriate thermostat
knob
is set
to one of the higher numbers or ‘MAX’. When ice has formed,
be sure to turn back the knob to its normal setting, otherwise the
food in the cabinet may become too cold.
If the trailer has been out of use for a period, make sure all air vents
are free from obstructions
(e.g.
birds’ nests, etc.) before starting the
refrigerator. Also check connections for gas leaks using soapy water,
-
see item 9.
15. DEFROSTING
Never cover or partially cover the air vents with cardboard or any
thing else.
Frost will form gradually on the cooling fins and in and on the frozen
food compartment. It is a mistake to assume that an accumulation of
frost gives a colder cabinet; for the most efficient and economical
operation, the refrigerator should be defrosted regularly,
-
about every
ten to fourteen
days
depending on the particular conditions of use.
Remember to level the trailer when stopping for more than about
an hour otherwise the cooling unit could be permanently damaged
due to overheating if it is left ‘on’.
To defrost, turn off the gas valve or switch off the electricity supply
to the refrigerator, depending upon which is being used, remove the
ice-tray, empty the frozen food compartment and leave the cabinet
door open. The frost will melt and run
through
the tube at the back
to the outside.
If possible, start the refrigerator some hours before putting in the
food to allow time for the interior to be cooled. It is then pre-
ferable to load the refrigerator with food which has been pm-cooled
in your household refrigerator, or in the market.
Any remaining drips in and on the frozen food compartment, and
in the refrigerator should be wiped up with a clean cloth.
When defrosting is completed refill the ice-tray with fresh water,
place it in its shelf in the frozen food compartment and restart the
refrigerator.
Before moving the trailer, make sure all containers are tightly
covered to avoid spills, and see that the sliding retainer on the
lower cabinet shelf is positioned to restrict movement of containers
etc. If required, crumpled paper may also be packed between
bottles and other items to prevent shifting while under way.
Note:
Do not attempt to defrost more quickly by means of any
form of heat otherwise theplasticsurfaces may be damaged.
Engage the travel catch at the top front corner of the door before
moving off. The travel catch has two alternative positions; the first
holds the door tightly closed for use when traveling. and the second
keeps the door slightly open,
-
useful when the cabinet is out of
use so that
fresh
air can circulate inside.
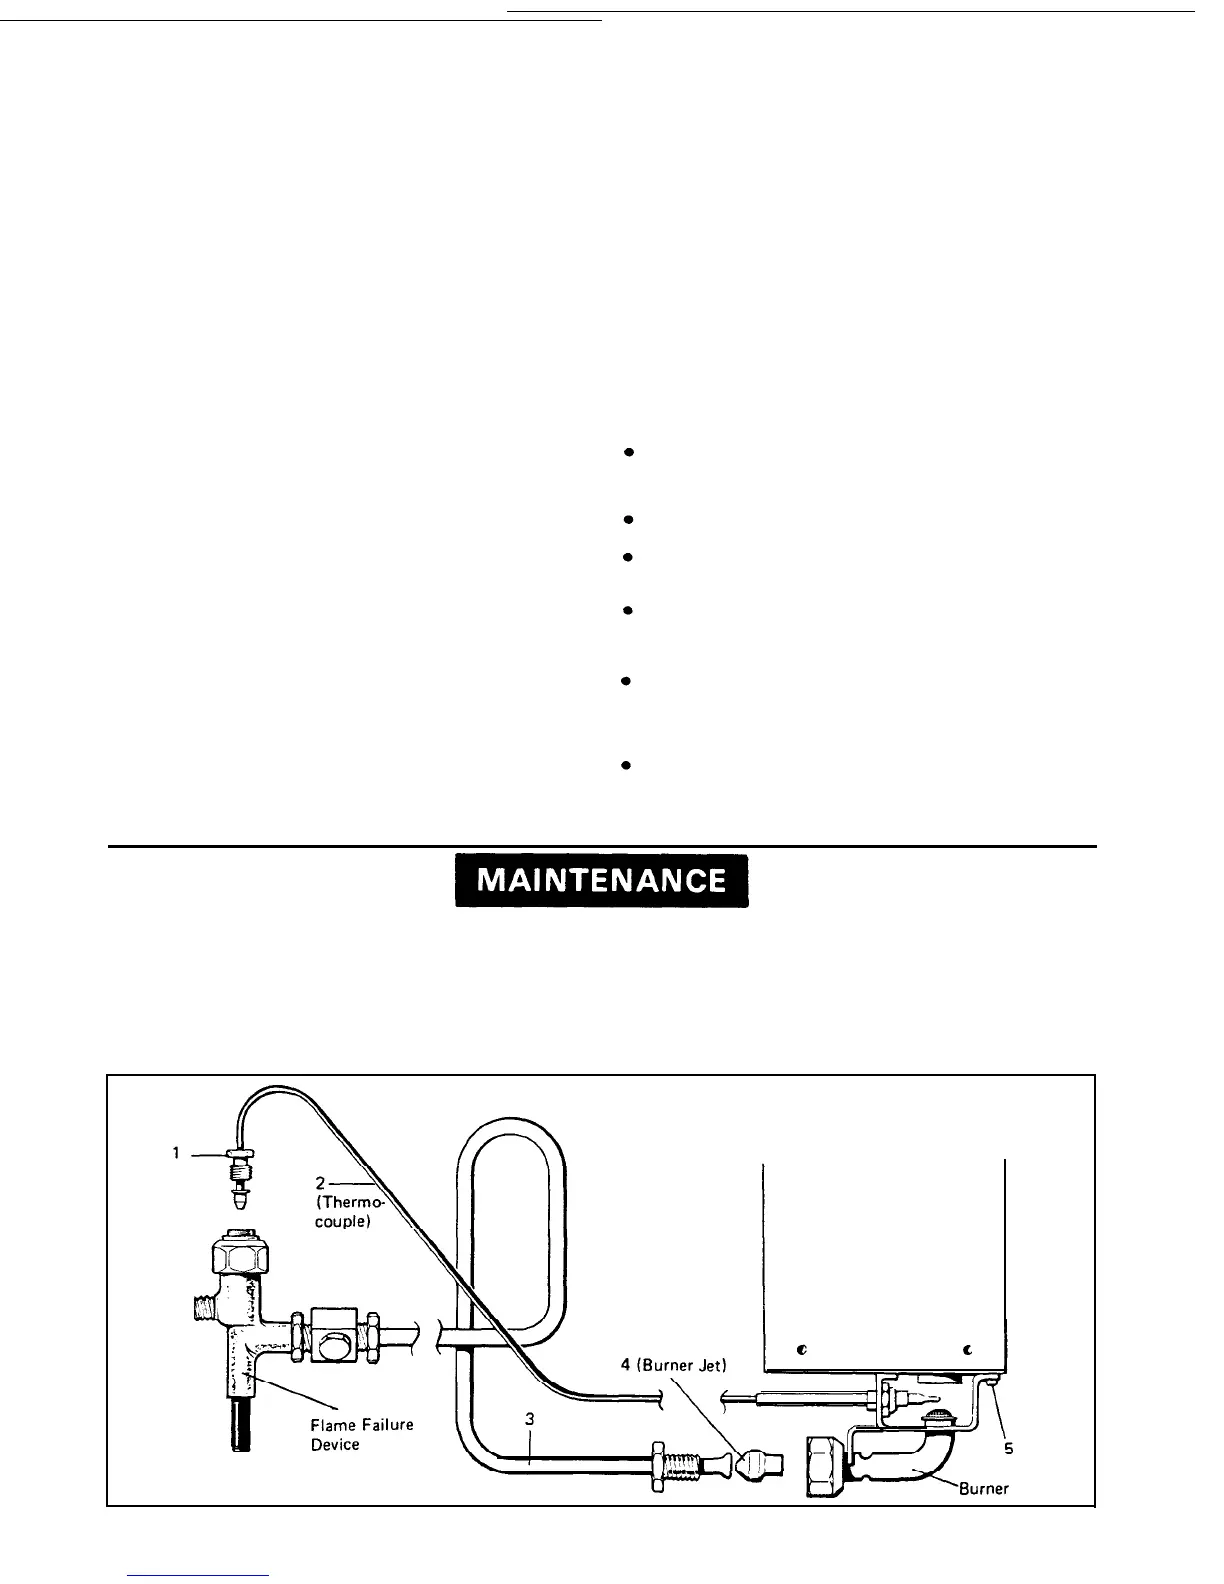
18. L.P. GAS EQUIPMENT
(a)
Flue Baffle
The flue baffle is suspended in the flue tube of the cooling unit on a
length of stainless steel wire and is positioned so that the bortom
edge of the baffle is 3 inches above the’ bottom of the flue tube.
To
gain
access to the’baffle. the flue top must be lifted off (note
retaining strip dver back
edge
and the support wire will be seen.
The flue baffle is correctly positioned during manufacture and
should not normally become displaced.
(b) The Burner and Thermostat
By-Pass
Screw
The burner is fitted with a size 4 jet
(4,
fig.
6)
which is suitable for
use on Propane or Butane gas at a supply pressure of 11 inches
water gauge. The orifice in the jet is very small, and must never be
cleaned bv means of a pin or similar instrument. as this could
damage the orifice. Should, for some reason, the jet require cleaning,
it should be washed in alcohol and blown through with air.
The hexagonal headed (brass) thermostat by-pass screw is located
under the thermostat body but should not be disturbed unless
necessary
-
see item 20 (e) iii.
FIG.
6
Boiler
Casing

 Loading...