Page 25
9PX 1-3 KVA US_EN
ENGLISH
3. Installation
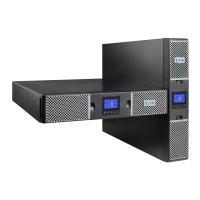
3.8 UPS connection without HotSwap MBP module
Check that the indications on the name plate located on the back of the UPS correspond to the AC-power
source and the true electrical consumption of the total load.
15
1
16
19
7
6
5
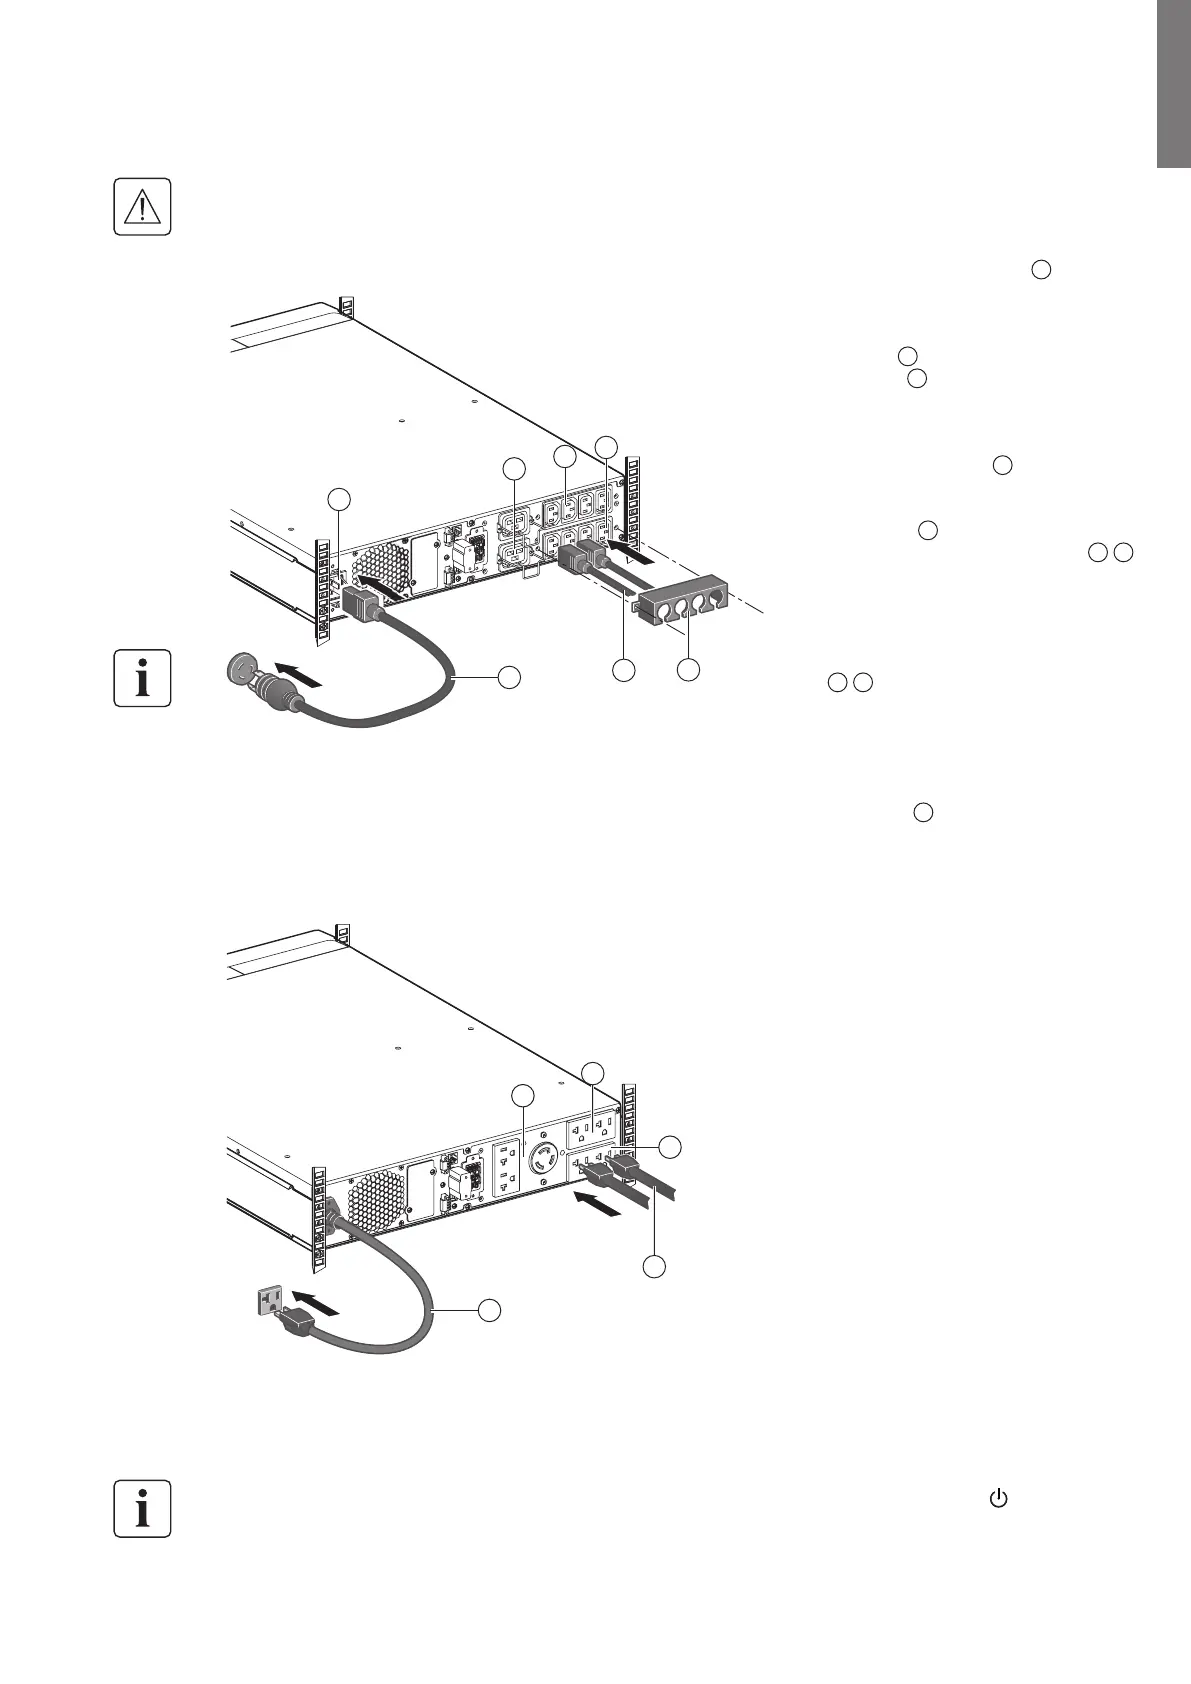
1. 9PX 2000RT / 3000RT : connect
the UPS input socket
1
to the
AC-power source.
9PX 2200GRT / 3000GRT /
3000GLRT: connect the supplied
cable
15
(250 V - 16 A) to the
socket
1
, then to the AC-power
source.
2. Connect the loads to the UPS
using the cables
16
.
It is preferable to connect the
priority loads to the outlets
marked
5
and the non-priority
loads to the outlets marked
6
7
that can be programmed.
Connect any high-power devices
to the 16 A outlet.
To program shutdown of outlets
6
7
during operation on battery
power and thus optimise
the available backup time,
please check the in/out settings.
3. For G models, fit the cable locking
system
19
that prevents the plugs
from being pulled out accidentally.
Note. The UPS charges the battery as soon as it is connected to the AC-power source, even if
button
is not pressed.
Once the UPS is connected to the AC-power source, eight hours of charging are required before the
battery can supply the rated backup time.
15
7
16
6
5
 Loading...