2
EATON IB528001EN Installation instructions
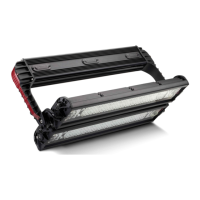
Installation Instructions - Arena Series
ote:N Charge the provided laser battery before installation begins.
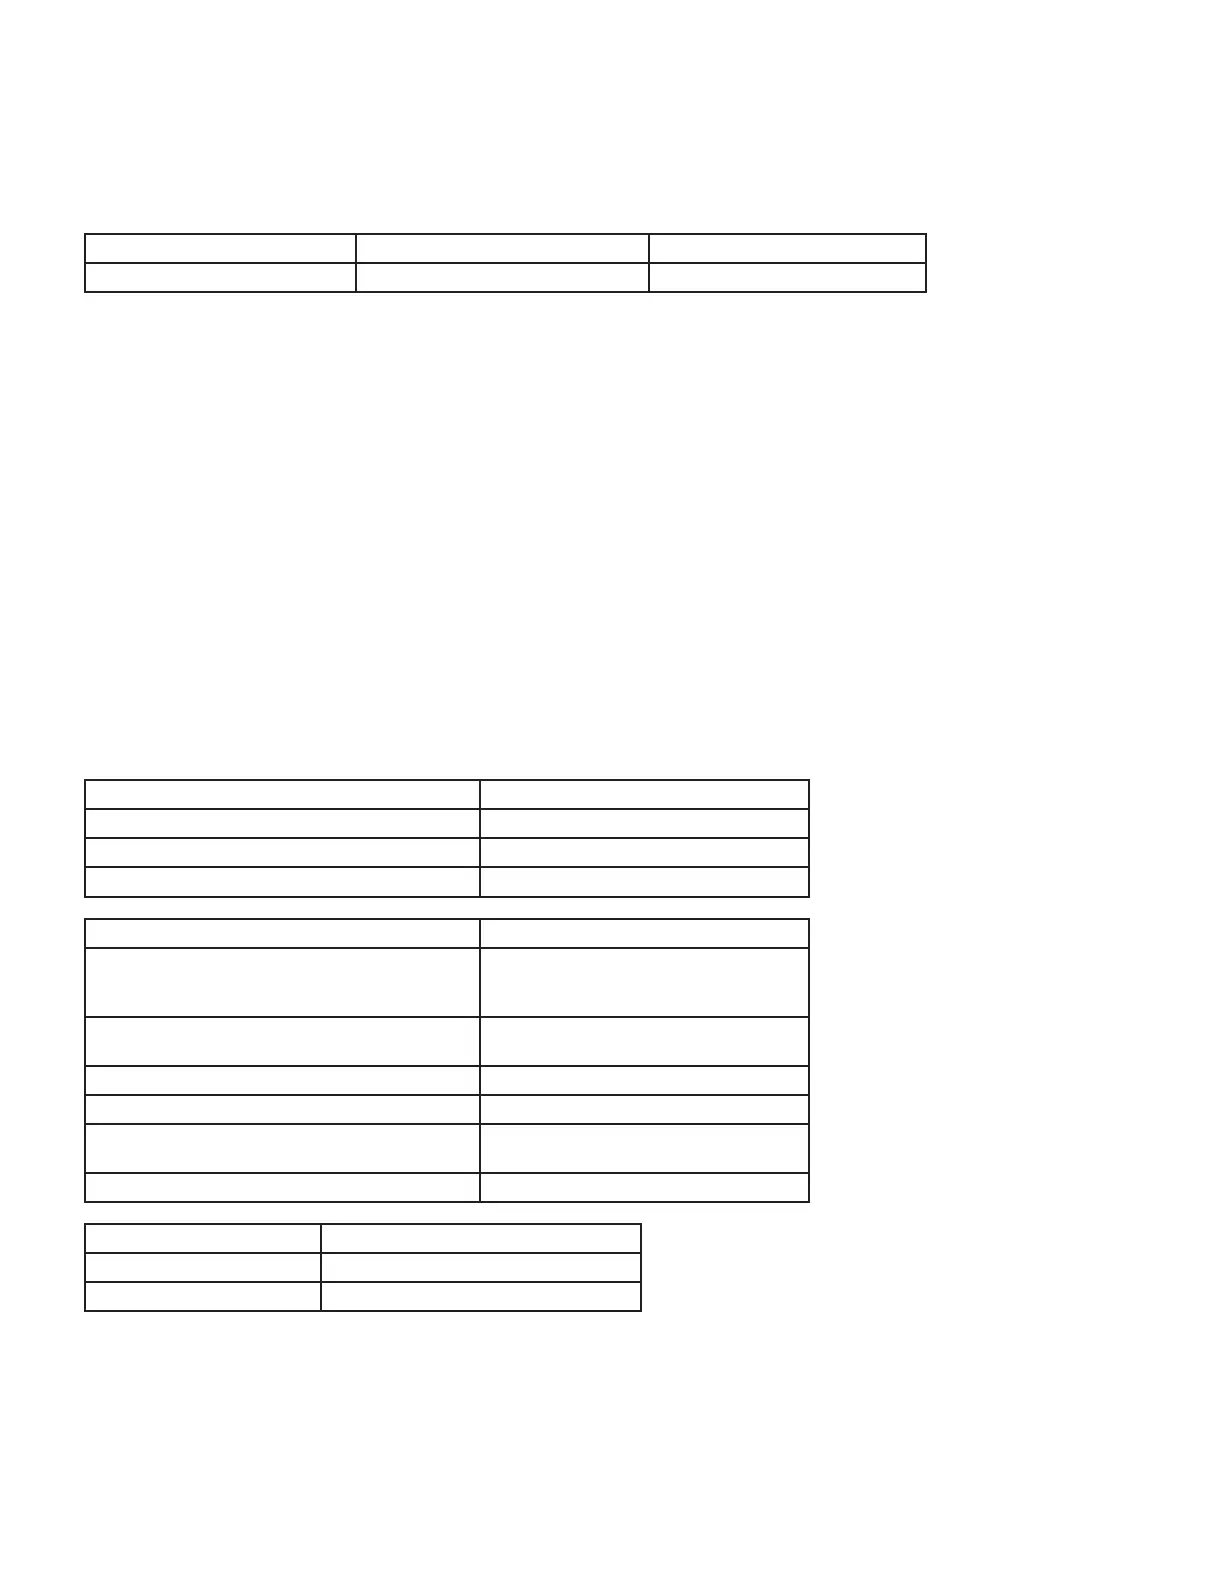
Required Material Installer shall provide: For more information refer to Section:
Mounting Hardware for multi-mount fixtures Step 1 - Mount the Luminaires
Electrical splicing connectors Step 3 - Make Electrical Connections
Cable ties or wire management Step 4 - Aim the Luminaires
Required Tools Installer shall provide: For more information refer to Section:
Socket wrenches and/or crescent wrenches
sized to fit mounting hardware ( 1 5/16” for
center stud mounting)
Step 1 - Mount the Luminaire
DMX Tester/RDM Controller (for Airburst/
Landburst controls)
Step 3 – Electrical Connections
3/8” Hex driver for side aiming bolt Step 4 – Aim the Luminaire
Torque wrench rated to a minimum of 35 ft-lbs Step 4 – Aim the Luminaire
Torque driver with 3/8” hex bit rated to a
minimum of 35 in-lbs
Step 4 – Aim the Luminaire
Calibrated light meter Step 4 – Aim the Luminaire
TABLE OF CONTENTS
Safety Instructions .................................................................................................................................................................1
Required Materials & Tools ....................................................................................................................................................2
Supply Power Specifications ..................................................................................................................................................3
Installation .............................................................................................................................................................................. 4
Step 1 – Mount the Luminaires .......................................................................................................................................4
Step 2 – Label the Luminaires (If Required) ....................................................................................................................6
Step 3 – Make Electrical Connections .............................................................................................................................7
Step 4 – Aim the Luminaires ...........................................................................................................................................9
Step 5 – Finishing Touches .............................................................................................................................................14
Care and Maintenance .........................................................................................................................................................14
Troubleshooting ....................................................................................................................................................................14
Tools Provided by Ephesus: For more information refer to Section:
Aiming Laser Step 4 – Aim the Luminaire
Aiming Mount Step 4 – Aim the Luminaire
Required Materials & Tools
Store luminaires in a clean, dry place, protected from dirt, water, and sunlight. See table for required storage and operating
conditions:
Storage Temperature Operating Temperature Humidity
-40°C to +75°C (-40°F to 167°F) -40°C to +55°C (-40°F to 131°F) 5% to 95% non-condensing
Storage and Operating Conditions
 Loading...