Bushing removal and replacement
1. Verify that tank is grounded. De-energize transformer
from a remote upstream source. Ground all bushings
and terminals before performing maintenance on
bushings.
2. Open tank by removing tank cover or manhole/
handhole cover as outlined in Tank Cover Removal
and Installation section of this manual.
3. Lower insulating liquid level as outlined in Insulating
Liquid Maintenance section of this manual. Lower liq-
uid level to completely expose the bushing.
4. Disconnect all internal and external cable and leads.
Note position of all nuts, flat washers, spring washers,
etc., so they can be re-installed in same locations.
5. Remove all bushing clamp hardware, noting position of
all nuts, flat washers, spring washers, etc., so they can
be re-installed in same locations.
6. Remove external bushing clamp, bushing, and gasket.
7. Install a new bushing and gasket. Center bushing
and gasket to obtain an effective seal. Install exterior
bushing clamp and clamp hardware. Tighten clamp nuts
per torque specified in Table 1.
8. Re-connect all external and internal cables and leads.
Replace all nuts, flat washers, spring washers, etc., in
their original position. Tighten all connections per torque
specified in Table 1.
9. Restore insulating liquid to appropriate level as outlined
in Insulating Liquid Maintenance section of this
manual. Close, reseal, and leak test tank as outlined
in the Tank Cover Removal and Installation section of
this manual. Inspect bushing-to-tank seal for leaks or
seepage.
Cabinet removal and installation
Cabinet removal
1. Verify that tank is grounded. De-energize transformer
from a remote upstream source. Ground all bushings and
terminals before performing maintenance on cabinet.
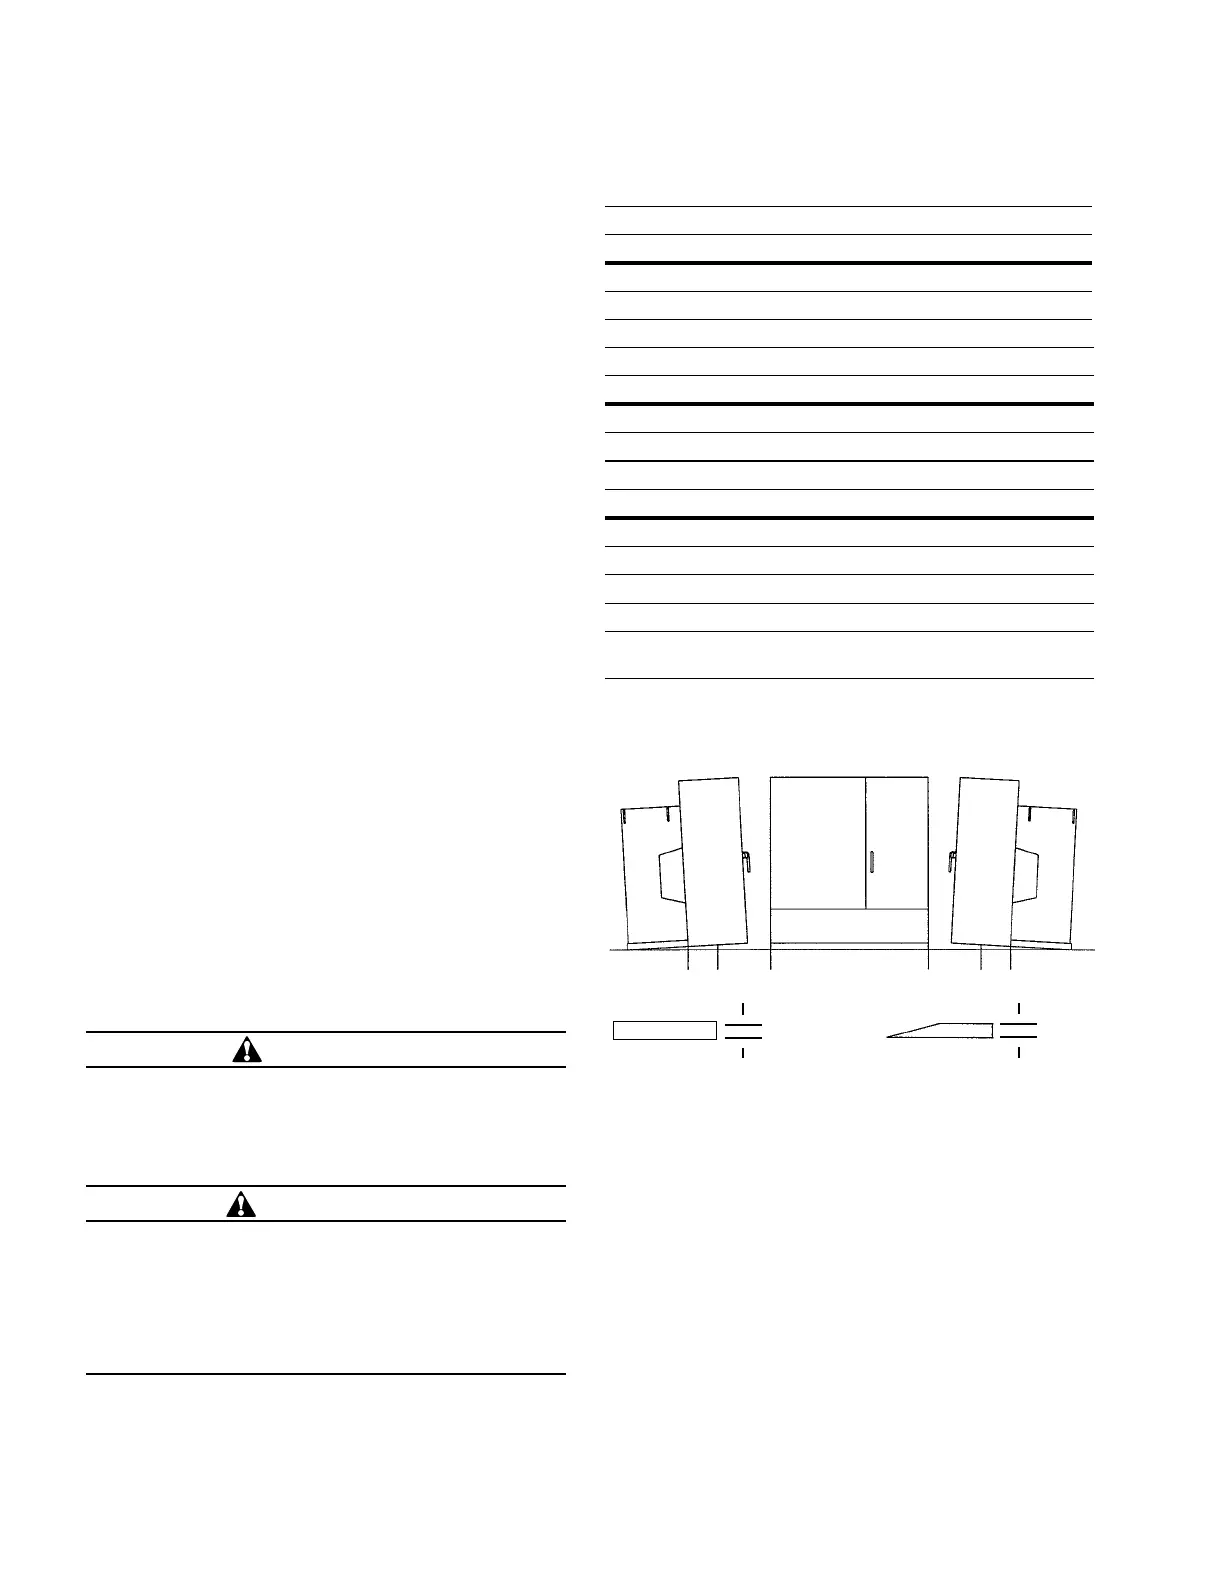
2. Place one 1/4 to 3/8 inch shim directly below faceplate
on both sides of tank at points A and A’ (see Figure 28).
3. Place one 1 1/2 inch wedge under each side of cabinet
at points B and B’ to relieve strain on the cabinet.
4. Note position and orientation of gasket that is between
top of cabinet and tank so it can be re-installed in same
fashion.
5. Disconnect HV-LV barrier from vertical bracket of face-
plate.
Bushing Clamps
Clamp Type Hardware Tightening Torque
Cast Aluminum Clamp 70-80 in-lbs.
Molded Polymer Tri-Clamp 40-60 in-lbs.
All other 3 & 4 hole Clamps 40-60 in-lbs.
Table 1. Bushing Hardware Tightening Torque
Bushings With Internal Spade Connections
Bushing Hardware Hardware Tightening Torque
1/2” Steel (Grade 8) 50 ft-lbs.
3/8” Steel (Grade 8) 50 ft-lbs.
Bushings With Internal Stud Connections
Bushing Hardware Hardware Tightening Torque
3/8”-16 Brass Nuts 16 ft-lbs.
5/8”-11 Aluminum Nuts 60 ft-lbs.
5/8”-11 Brass Nuts 75 ft-lbs.
1”-14 Brass Nuts 121 ft-lbs.
Bushing Lead Block,
1/2” Steel Hardware
110 ft-lbs.
Right
Side
of
Cabinet
Left
Side
of
Tank
Front of Cabinet
Right
Side
of
Tank
A B A B A’ B’ B’ A’
Left
Side of
Cabinet
Shim 1 1/2 inch
1/4 to 3/8 inch
Wedge
Figure 28. Cabinet removal diagram.
CAUTION
Potential Falling Object. Can cause personal injury or
damage to transformer. Do not open cabinet doors
when cabinet is removed from transformer tank.
Opening cabinet doors will cause cabinet to fall
forward.
WARNING
Hazardous voltage. Can cause severe injury, death, or
damage to equipment. De-energize transformer from
a remote upstream source before opening cabinet
and doing cabinet interior inspection or maintenance.
Check that all transformer terminals and bushings have
zero voltage. Ground transformer following industry
accepted safe grounding practices.
22 Three-phase pad-mounted compartmental type installation and maintenance instructions MN202001EN August 2015

 Loading...


