13
Replacement of Cover Gasket for Padmount Switchgear Side-Hinge-2 Models
FIELD SERVICE INSTRUCTIONS MN285009EN April 2019
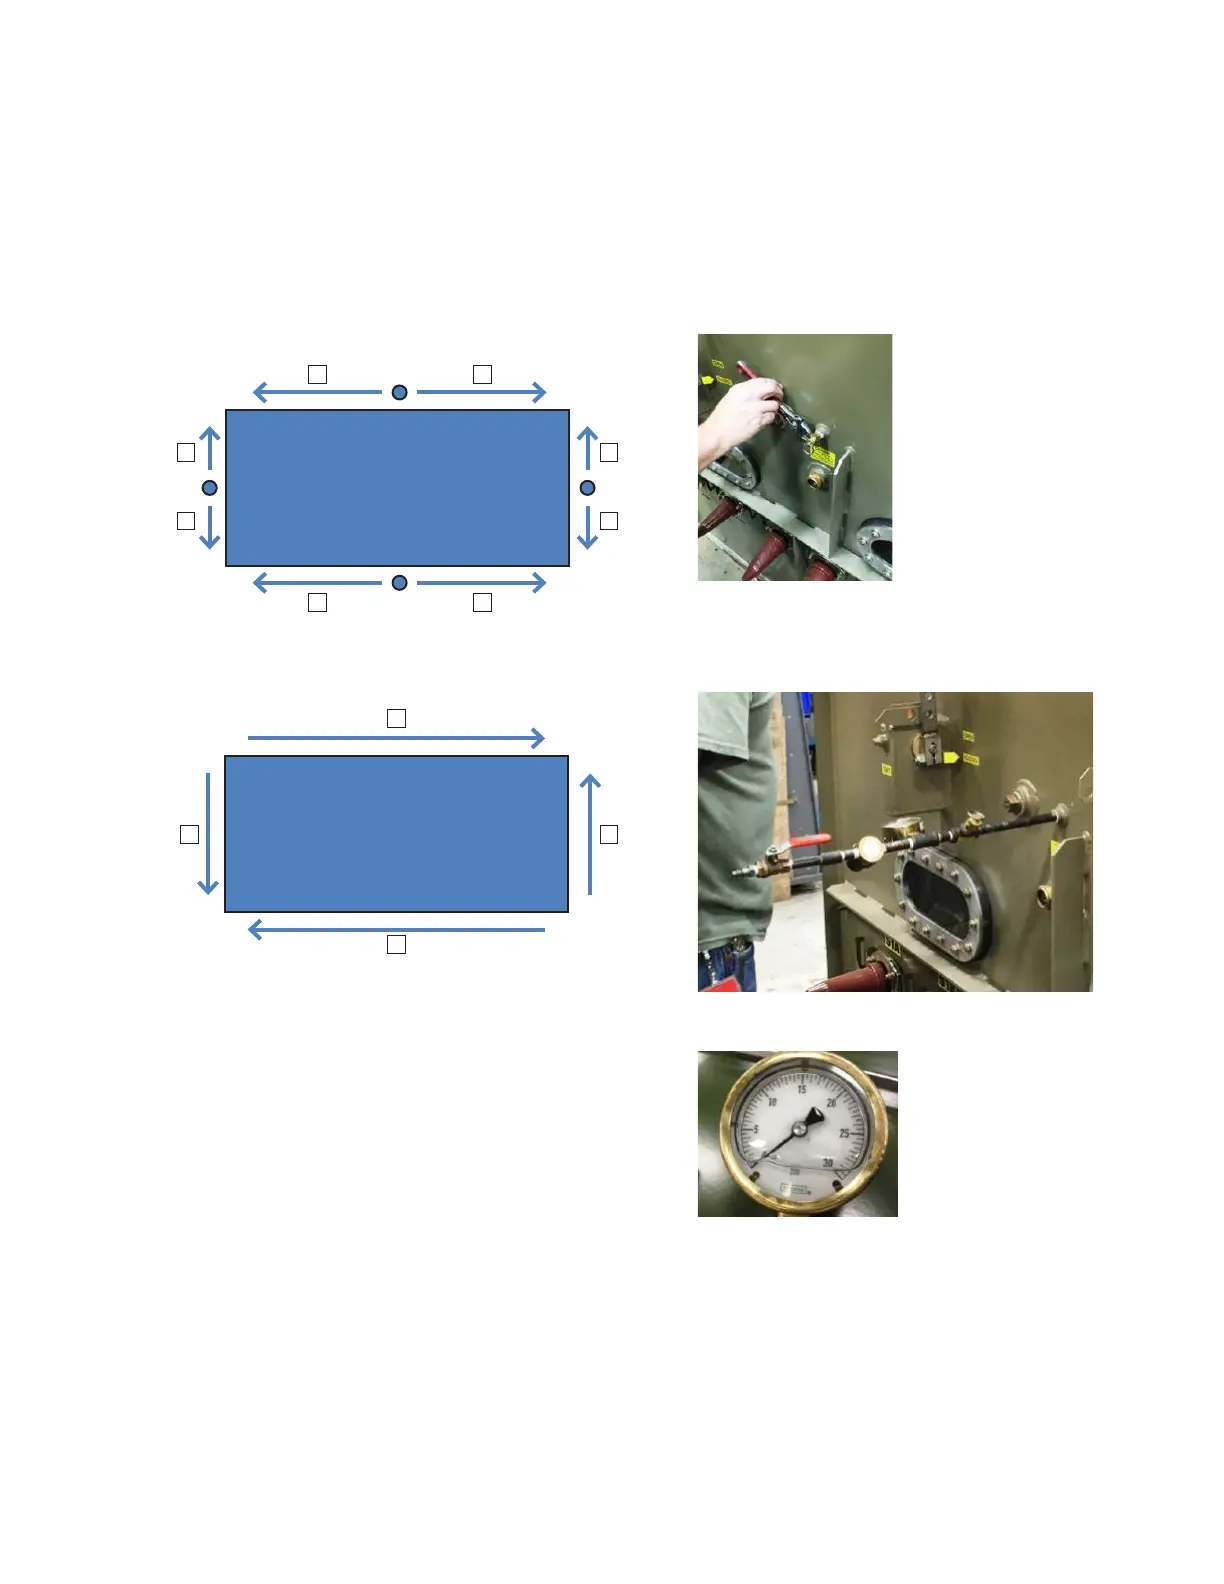
11.5 Cover Bolt Torque Pattern
11.5.1 For the first round of torqueing use the pattern
shown below. Start by torqueing down the
middle bolt on one of the long sides and work
your way to the end. Go to the opposite side
starting at the middle and go the opposite
direction from the other side. Follow the
remaining pattern below.
#1
#3
#4
#2
#8#6
#7#5
Figure 59.
11.5.2 Torque each set of hardware a second time
using the pattern shown below:
#2 #4
#1
#3
Figure 60.
12. Perform a leak test
12.1 Connect the leak-test assembly:
12.1.1 Using an adjustable wrench, remove the
pressure-relief valve from the front face-plate
(Figure 61).
Figure 61.
12.1.2 Install the leak-test assembly as shown in
Figure 62.
Figure 62. Leak-test assembly installed
Figure 63. Close-up of pressure gauge
12.1.3 For units with two pressure relief valves
(one per side): Remove the other pressure
relief valve and replace it with a 1/4-inch NPT
Pipe Plug during this test.

 Loading...


