10
A
B
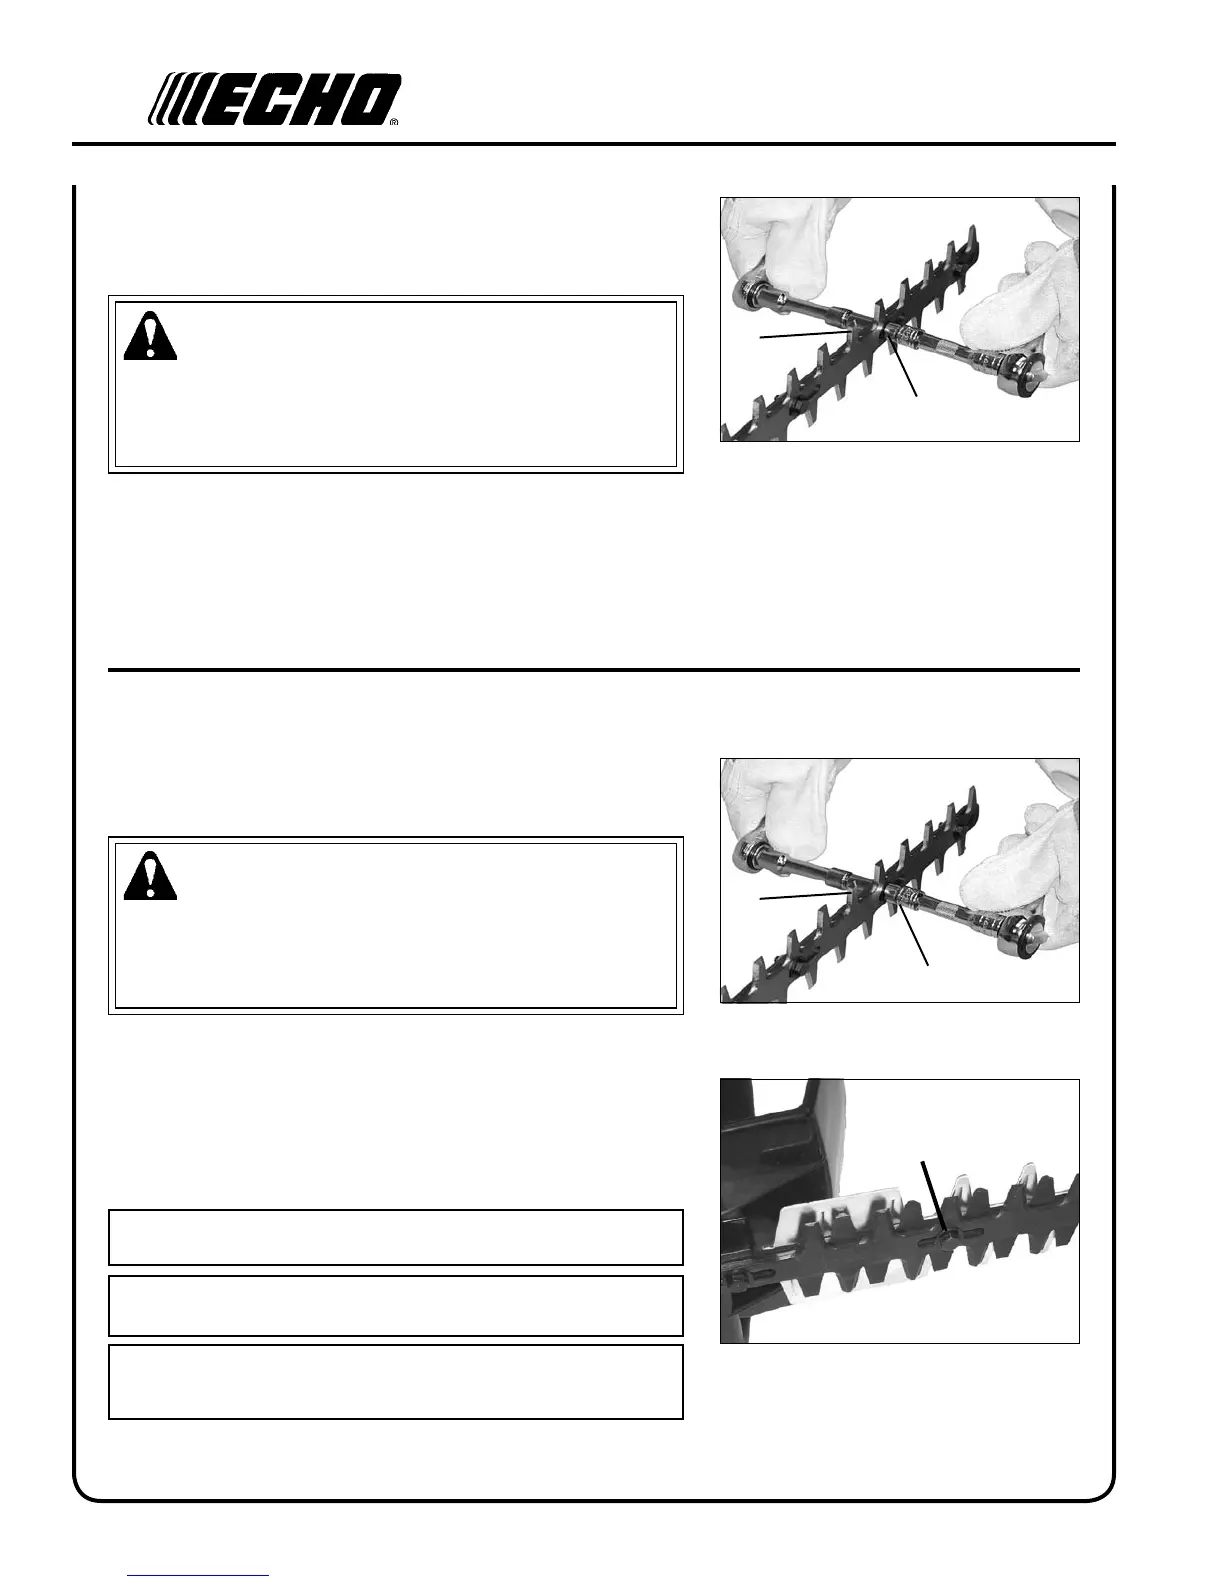
InsTall blade guard
1. Move stop switch to stop position.
2. Disconnect spark plug wire.
WARNING
Hedge clipper blades are very sharp. Touching them may lead to
severe personal injury. Use a socket and extension when adjust-
ing blade bolts or blade locknuts in order to keep hands at a safe
distance from sharp blades.
3. Lay unit on mufer side and hold securely in place.
4. Remove rst four blade locknuts (A) and washers in front of
front handle/guard. Do not remove blade bolts.
5. Tighten blade bolts (B) until snug. Install blade guard, then washers.
6. Loosen blade bolts ½ turn. Secure blade guard with new locknuts
(A). Hold blade bolts from turning using a 10mm wrench.
NOTE
Use new locknuts every time blade guard is installed.
IMPORTANT
If blade guard is damaged or show signs of wear, replace it.
NOTE
Washers (C) should be movable by hand after blade bolts are ad-
justed properly.
C
blade guard removal
1. Move stop switch to stop position.
2. Disconnect spark plug wire.
WARNING
Hedge clipper blades are very sharp. Touching them may lead to
severe personal injury. Use a socket and extension when adjust-
ing blade bolts or blade locknuts in order to keep hands at a safe
distance from sharp blades.
3. Remove blade guard locknuts (A) and washers. Do not remove
blade bolts.
4. Remove blade guard.
5. Tighten blade bolts (B) until snug, then loosen ½ turn.
6. Secure blades with new locknuts (A). Hold blade bolts from turning
using a 10mm wrench.
A
B
 Loading...