
Do you have a question about the ECS A790GXM-AD3 and is the answer not in the manual?
| Number of memory slots | 4 |
|---|---|
| Maximum internal memory | 32 GB |
| Processor socket | Socket AM3 |
| Processor manufacturer | AMD |
| USB 2.0 connectors | 3 |
| Power fan connector | Yes |
| Number of SATA connectors | 6 |
| Number of EATX power connectors | 1 |
| USB 2.0 ports quantity | USB 2.0 ports have a data transmission speed of 480 Mbps, and are backwards compatible with USB 1.1 ports. You can connect all kinds of peripheral devices to them. |
| Firewire (IEEE 1394) ports | 0 |
| Audio chip | Realtek ALC888 |
| Motherboard chipset | AMD 790GX |
| Audio output channels | 7.1 channels |
| Motherboard form factor | ATX |
| PCI Express x16 slots | 2 |
| Controller interface type | AMD SB750 |
| Controller 2nd interface type | JMB 361 |
| Graphics card | Radeon HD 3300 |
| RAID levels | 0, 1, 10 |
| LAN controller | Realtek RTL8111C |
| Networking features | Gigabit Ethernet |
| BIOS memory size | 64 Mbit |
| Depth | 244 mm |
|---|---|
| Width | 305 mm |
Information about publication rights, reproduction restrictions, and warranty limitations.
Lists registered trademarks of software and hardware companies.
Details FCC compliance for digital devices and potential interference.
States compliance with Canadian interference regulations for Class B digital apparatus.
Outlines the structure and content of the manual, listing chapters and their descriptions.
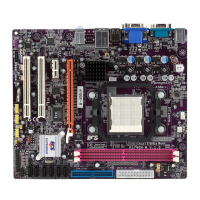
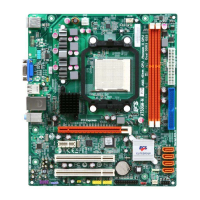
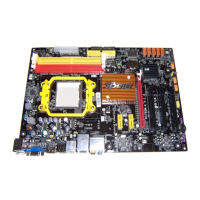
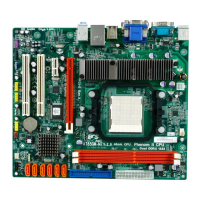
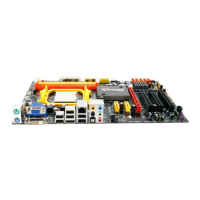
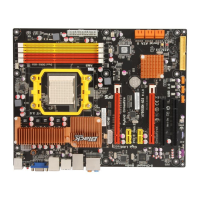
Overview of the A790GXM-AD3 motherboard and its key features and compatibility.
Details processor socket compatibility, HyperTransport, and Northbridge/Southbridge chipsets.
Covers DDR3 memory, audio capabilities, and onboard LAN controller specifications.
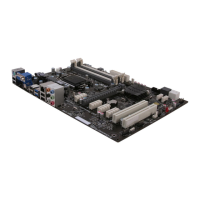
Lists expansion slots, connectors, and rear panel I/O port details.
Introduces the AMI BIOS and its role in system configuration and features.
Essential safety guidelines for handling components and selecting a compatible computer case.
Instructions on physically mounting the motherboard into the computer case securely.
Guidance on safely installing the CPU and heatsink, cautioning about potential damage.
Step-by-step guide for correctly installing the CPU, thermal grease, and cooling fan.
Instructions for installing DDR3 SDRAM modules into the motherboard slots.
Detailed steps for inserting DIMMs, aligning cutouts, and seating the modules correctly.
Guidance on optimal DIMM placement for performance and compatibility.
General instructions for installing expansion cards into PCI Express and PCI slots.
Details the six Serial ATA connectors for connecting storage drives.
Explains front panel USB headers and the SPDIF output header for case connectivity.
Details the Azalia header for connecting front panel microphone and line-out ports.
Covers IDE interface, connector, and master/slave configuration for drives.
Guides on connecting SATA drives using SATA cables and power connectors.
Identifies and describes the function of various rear panel I/O ports like PS/2, VGA, USB, HDMI, LAN.
Connects CPU fan, ATX power, and other power-related connectors to motherboard headers.
Guides connecting case switches, LEDs, speaker, and graphics card power.
Connects the Northbridge fan and auxiliary case power supply connector.
Details pin assignments for CPU_FAN and main ATX 24-pin power connectors.
Lists pinouts for PWR_FAN, SYS_FAN, and NB_FAN connectors for system fans.
Pinout details for internal speaker, auxiliary graphics power, and ATX 12V CPU power connectors.
Pinout and function for the front panel header connecting case switches and LEDs.
Explains connecting LEDs for hard drive activity, power status, and sleep mode.
Instructions for connecting momentary-contact switches for reset and power functions.
Overview of the BIOS Setup Utility, its functions, and system parameter configuration.
Discusses default settings, when to use the utility, and how to access it.
Describes the main menu structure and navigation keys within the BIOS Setup Utility.
Lists and explains the function of each key used for navigating the BIOS setup.
Covers viewing and adjusting system date/time and configuring IDE/SATA device parameters.
Explains IDE settings like Type, LBA Mode, PIO/DMA Modes, SMART, and BusMaster.
Configures AMD CPU features, system startup options, and boot device priority.
Controls APIC mode and defines the boot device priority for system startup.
Specifies the order of hard drives for booting the operating system.
Enables searching for OS on other devices if primary ones fail.
Configures onboard VGA mode, memory allocation, and primary display output.
Manages HDMI audio support and DRAM controller mode (DCT Unganged).
Enables/disables onboard IDE, SATA, Audio, LAN controllers, and USB functions.
Manages legacy USB support and the JMB361 controller mode.
Configures ACPI suspend states and system wake-up events from various sources.
Controls the assignment of IRQs to the PCI VGA graphics system.
Configures smart fan control, start PWM, and temperature thresholds.
Adjusts smart fan slope, PWM values, and sets shutdown temperatures.
Shows monitored system parameters like temperatures, voltages, and fan speeds.
Enables/disables CPU frequency control and configures DRAM frequency, timing, and interleaving.
Details DRAM timing modes, bank/channel interleaving, and clock settings.
Explains CPU/HT clock settings, spread spectrum, and advanced calibration.
Displays CPU speed, NB clock, and voltage function settings.
Option to load optimized default settings for the BIOS configuration.
Guides on installing or changing a supervisor password for system security.
Instructions for setting or changing a user password for BIOS access.
Explains how to save changes and exit the BIOS, or discard changes.
Step-by-step guide for downloading and installing updated BIOS versions.
Information about the support CD, its contents, and important notes before installation.
Guide for using the CD's autorun feature to install drivers and software on Windows XP/Vista.
Explains CD interface buttons and tabs for setup, browsing, and information.
Instructions for initiating the software installation process from the CD.
Guide on choosing software features during installation, with default recommendations.
Steps for installing ATI software, including driver installation sequence.
Details using "Run Blocked Program" for driver installation in Vista.
Explains disabling UAC for smoother driver installation in Vista.
Steps to access User Account settings via Classic View in Windows Vista Control Panel.
Instructions for manual installation using PATH.DOC and driver subfolders.
Information on available Windows-compliant utility software and licensing terms.
Steps to set HD Audio Output or HDMI Audio Output as the default device in XP.
Steps to set the HDMI Digital Output Device as default in Vista's sound settings.
Steps to set Speaker or SPDIF-Out as default playback devices.
Lists necessary hardware and software components for CrossFireX setup.
Guides on physically installing CrossFireX graphics cards and connecting them.
Details connecting multiple graphics cards and power for CrossFireX.
Instructions to enable Crossfire mode in BIOS setup for proper functionality.
Steps to enable CrossFireX functionality via the Catalyst Control Center software.
Explains how Hybrid Graphics boosts performance using integrated and discrete GPUs.
Guides setting up BIOS for Hybrid Graphics, including Surround View and Init Display First.
Verifying display adapters in Device Manager for Hybrid Graphics configuration.
Steps to enable Hybrid Graphics through Catalyst Control Center.
Overview of configuring a bootable RAID array using AMD SB750.
Steps to access and set SATA configuration to RAID in BIOS.
Instructions on how to access the AMD RAID BIOS utility via Ctrl-F.
Navigating the Define LD menu to create a new RAID array.
Choosing the RAID mode and stripe block size for the array configuration.
Steps to assign disks to the RAID array using the FastBuild utility.
Procedures for exiting the RAID utility and rebooting the system.
Instructions for copying RAID driver files to a floppy disk.
Steps to install RAID drivers using the F6 prompt during Windows XP setup.
Choosing the appropriate AHCI RAID controller driver for Windows XP installation.
Steps to complete Windows XP setup and install additional RAID management software.