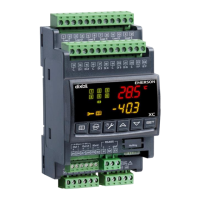
1592001440 XC645CX GB r3.4 31.10.2017.docx XC645CX 13/54
7. First installation
At first installation, it’s necessary the following:
1. Select the kind of gas.
2. Set the range of the pressure probes.
In the following paragraph a short cut for the above operations.
Chapters 11 Parameters programming and 17 will show in detail these operations.
7.1 How to set the kind of gas
The controller has memorized the relation between temperature and pressure for some gases.
The pre-set gas is: r404. (FtyP=r404)
If another gas is used, act as in the following:
1. Enter the Programming mode by pressing the Set and DOWN key for 3s.
2. Select the “Pr2” parameter. Then enter the password 3 2 1 0.
3. Select the FtyP, kind of gas, parameter.
4. Press the “SET” key: the value of the parameter will start blinking.
5. Use “UP” or “DOWN” to change the gas among the following: r22= R22; r134=134,
r404=R404A; - 407A = r407A; 407C= r407C; 407F= r407F; 410= r410; 507=R507; CO2=
CO2; r32 = r32; r290 = r290; r448 = r448A; r449 = r449A, r450 = r450A, r513= r513; 1234
= r1234ze
6. Press “SET” to store the new value and move to the following parameter.
To exit: Press SET + UP or wait 30s without pressing a key.
NOTE: the set value is stored even when the procedure is exited by waiting the time-out to expire.
7.2 How to set the range of the pressure probes
If an instrument with the following part number is used: XC645CX – xxxxF, it is pre-set to work
with pressure probe with the following range:
Probe 1: -0.5 ÷11.0 bar (relative pressure);
Probe 2: 0÷30.0 bar (relative pressure)
If the probes you’re using have a different range act as in the following:
To set the pressure range of the Probe 1 (suction probe) use the parameter:
PA04: Adjustment of read out corresponding to 4mA (0.5V)
PA20: Adjustment of read out corresponding to 20mA (4.5V)
Practically these parameters have to be set with the start and end scale of the probe range.
How to do:
1. Enter the Programming mode by pressing the Set and DOWN key for 3s.
2. Select the “Pr2” parameter. Then enter the password 3 2 1 0.
3. Select the PA04, adjustment of read out corresponding to 4mA (0.5V), parameter.
4. Press the “SET” key: the value of the parameter will start blinking.
5. Set the lower value of the probe range.
6. Push the SET key to confirm the value. The PA20: adjustment of read out corresponding
to 20mA (4.5V) parameter will be displayed.
7. Set the higher value of the range.
 Loading...