L365/L366,L360/L362,L310/L312,L220/L222,L130/L132 Series Revision A
Disassembly/Reassembly Routing FFCs/cables 50
Confidential
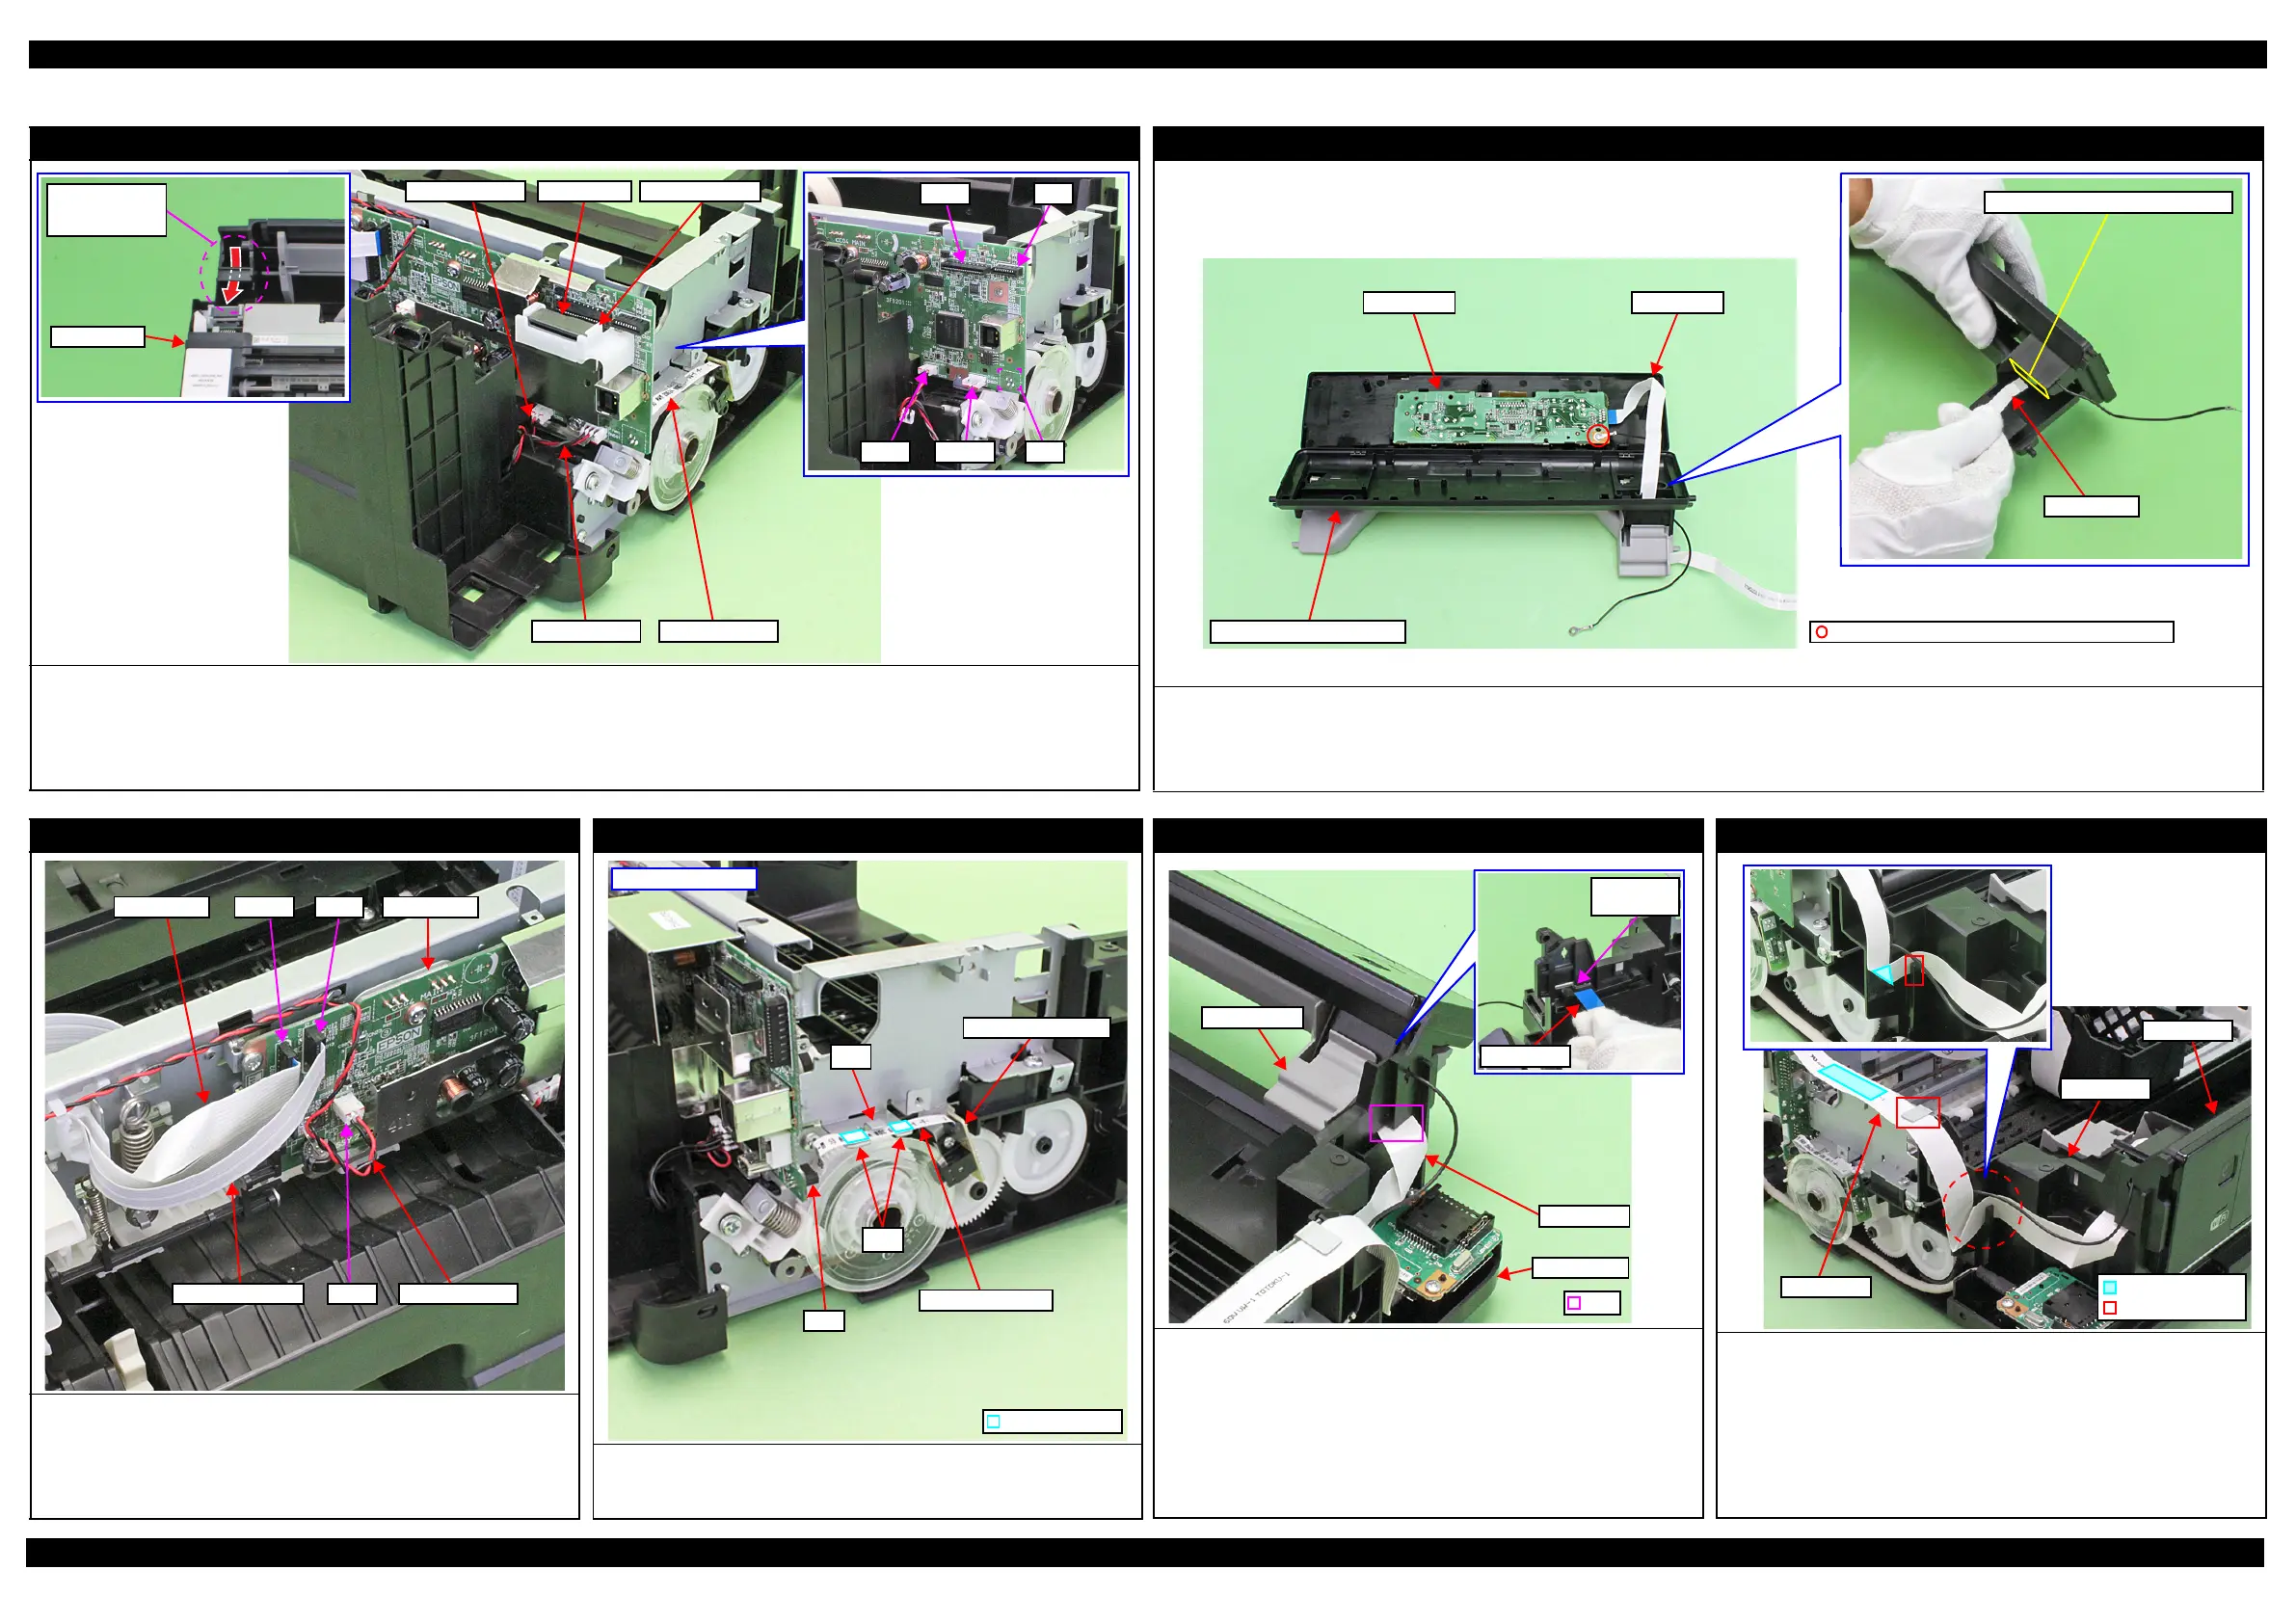
2.4 Routing FFCs/cables
Left side of Main Board
Connect the following cables/FFCs to the Main Board as shown in the figure above.
• PF Motor cable (CN13) • PS Unit cable (CN501) • PF Encoder FFC (CN7)
• Panel FFC (CN2: L365/L366,L360/L362,L220/L222 Series only) • Wireless LAN Module cable (CN4: L365/L366 Series only)
• Scanner FFC (CN11: L365/L366,L360/L362,L220/L222 Series only)
Attach the ferrite core to the FFC Holder MB, and route the FFC through the hole of the Housing Left and the ferrite core, and then connect it to the Main Board.
CN11 CN2
CN7CN13 CN501
Route Scanner
FFC through Hole
of Housing Left.
Housing Left
PF Encoder FFCPS Unit cable
PF Motor cable Ferrite core FFC Holder MB
Inside the Panel Unit (L365/L366,L360/L362,L220/L222 Series)
Route the Panel FFC through the hole of the Panel Housing Lower Assy with its terminal side upward as shown in the figure above.
Fold the Panel FFC aligning it with its folded lines, and then connect the FFC to the connector (CN1) on the Panel Board firmly.
Note: This product does not have any panel grounding wire. The above figure includes a grounding wire because an XP-400 Series photo is used, however, there is no difference
in this procedure.
C.B.P-TITE SCREW 3x10 F/ZN-3C (6 ± 1 kgf·cm)
Panel FFC
Hole of Panel Housing Lower Assy
Panel FFCPanel Board
Panel Housing Lower Assy
Right side of Main Board
Connect the following cables/FFCs to the Main Board as shown in the figure
above.
• CR Motor cable (CN12)
• CR Encoder FFC (CN61)
•Head FFC (CN102)
Main Board
CN12
CN102Head FFC
CR Encoder FFC
CN61
CR Motor cable
PF Encoder Sensor
Route the PF Encoder FFC through the ribs (x2) of the Main Frame and
connect it to the connector (CN7) on the Main Board, and then secure it with
double-sided tape (x2) on the positions shown in the figure above.
Left side of printer
PF Encoder Sensor
Rib
Ribs
CN7
PF Encoder FFC
Double Side Tape
Panel Unit (1) (
L365/L366,L360/L362,L220/L222 Series
)
Route the Panel FFC as follows before installing the Panel Unit.
• Route the Panel FFC through the hole of the Frame Base as shown
above with the side with the stiffener upward.
Before installing the Panel Unit, make sure that the Panel FFC is routed
correctly without any part getting caught.
Note: This product does not have any panel grounding wire. The above figure includes
a grounding wire because an XP-400 Series photo is used, however, there is no
difference in this procedure.
Hole
Frame Base
Panel Stand
Panel FFC
Hole for
Panel FFC
Panel FFC
Panel Unit (2) (
L365/L366,L360/L362,L220/L222 Series
)
After installing the Panel Unit, route the Panel FFC pulled out from the hole of
the Frame Base as follows.
Route Panel FFC through the ribs (x2) of the Frame Base and Main Frame
with folded along the fold line, and then secure it with double-sided tape
on the position shown in the figure above.
Note: This product does not have any panel grounding wire. The above figure includes
a grounding wire because an XP-400 Series photo is used, however, there is no
difference in this procedure.
Rib
Panel FFC
Double-sided tapePanel FFC
Frame Base
Panel Unit
 Loading...