29
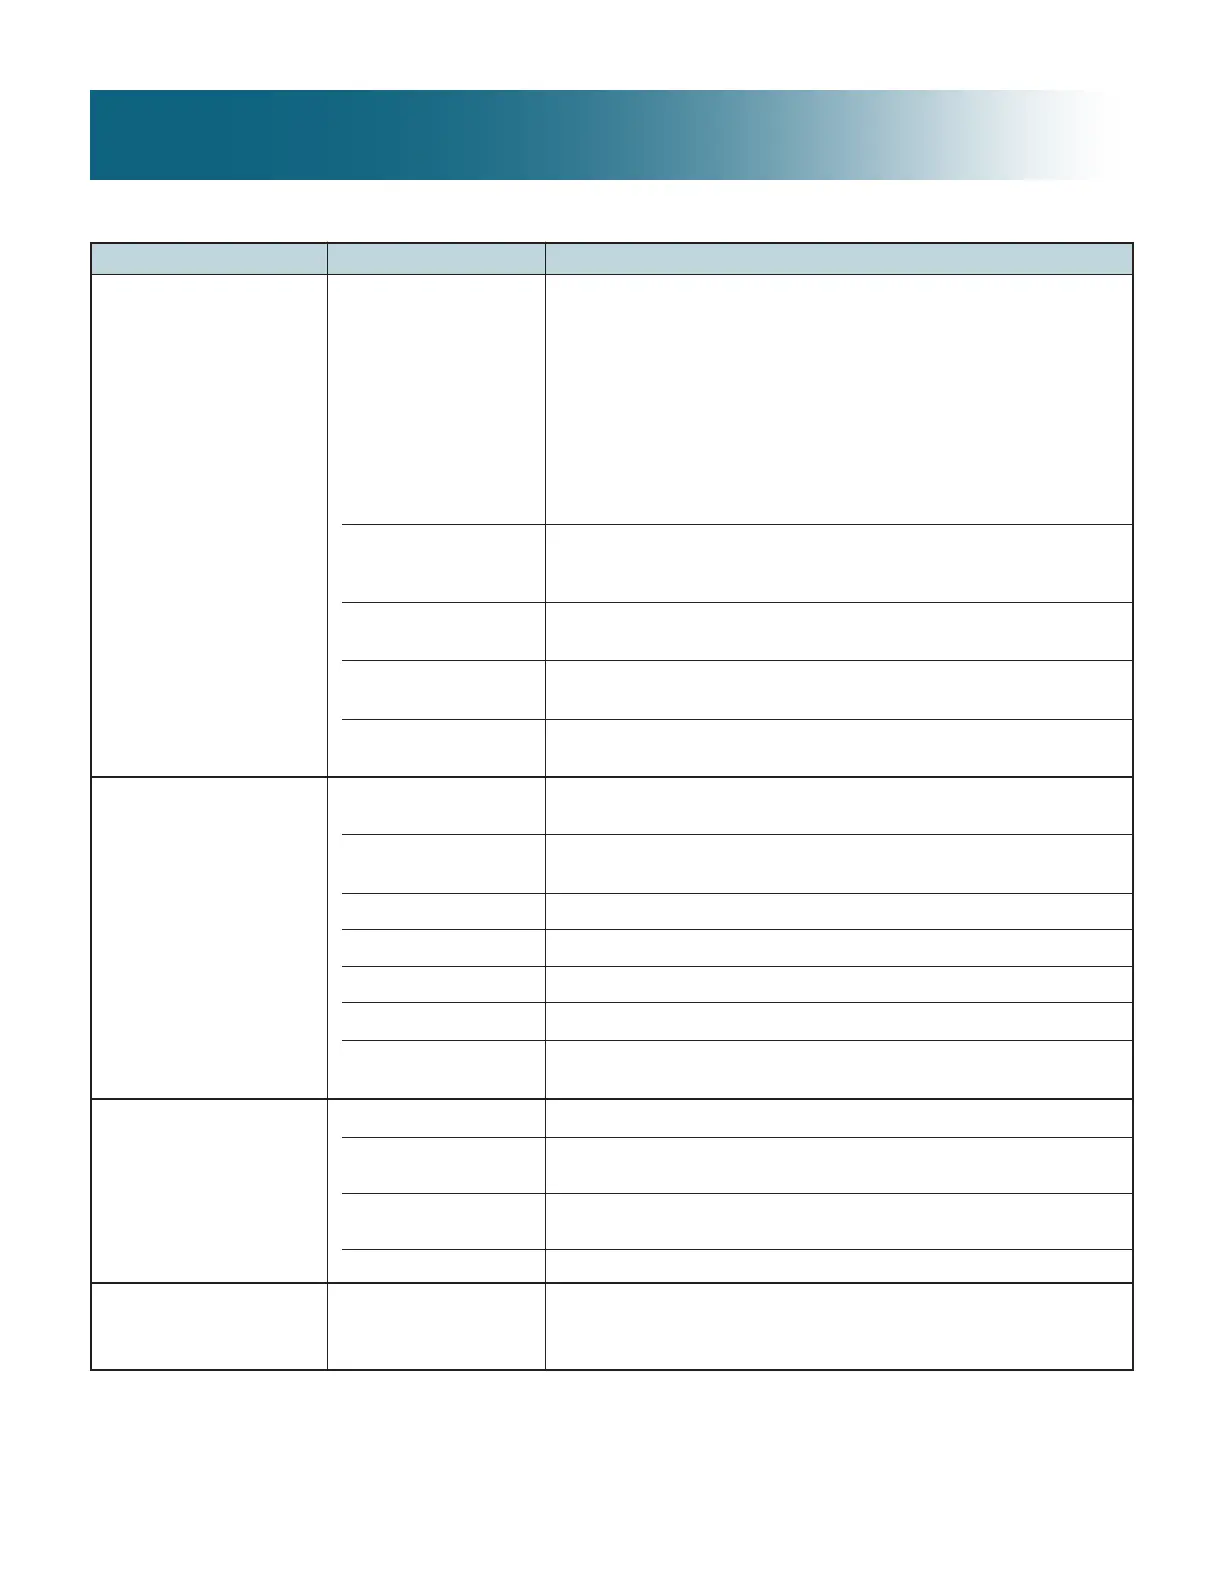
Problem Possible Cause Remedy
Reduction in air static
pressure
Electrical issue
Fan rotation
Mechanical failure
Belt tension
Motor running single-
phase
Motor leads connected
incorrectly
Bad bearings
Electrical unbalance
Air gap not uniform
Rotor unbalance
Cooling fan hitting end
bell guard
Nozzles clogged
Pump running backwards
Inadequate pump flow
for remote sump
Strainer clogged
Blade rubbing inside of
fan cylinder (induced
dra models)
1. On a forced dra unit verify that the pump is on, and water is flowing
over the coil. If the pump is off, and the unit was not sized for dry
operation, the motor may over-amp.
2. If the forced dra unit is ducted, verify that the design ESP matches
the actual ESP.
3. Verify the correct pump rotation direction. If the pump is rotating
incorrectly, it will result in less water flow, and therefore less overall
static pressure.
4. Check the basin water level against the recommended level.
Note: Air density directly affects AMP reading. Low air density
can cause the fans to spin faster, thus increasing the amp draw.
1. Check voltage across all three legs of the motor.
2. Verify that the motor is wired per the wiring diagram, and connections
are tight.
Verify that the fan is rotating in the correct direction. If not, switch the
leads so it runs correctly.
Verify that the fan and motor turn freely by hand. If not, there may be
damage to the internal motor components or bearings.
Check for proper belt tension. Extreme belt tension can cause the motor
to overamp.
Stop motor and attempt to start it. Motor will not start again if single
phased. Check wiring, controls and motor.
Check motor connections against wiring diagram on motor.
Check lubrication. Replace bad bearings.
Check voltage and current of all three lines. Correct if required.
Check and correct bracket fits or bearing.
Rebalance.
Reinstall or replace fan.
Remove nozzles and clean. Flush water distribution system.
Visually verify pump rotor rotation by turning pump off and then on.
Verify amp draw.
Confirm inlet pressure at header meets required values.
Remove strainer and clean.
Check fan, fan sha for proper alignment.
Adjust cylinder to provide blade tip clearance.
Overamping Fan Motors
Unusual Motor Noise
Incomplete Spray
Pattern
Fan Noise
Troubleshooting
 Loading...