Page 34
2008K
2
Preventive Maintenance Procedures
P/N 508138 Rev. J
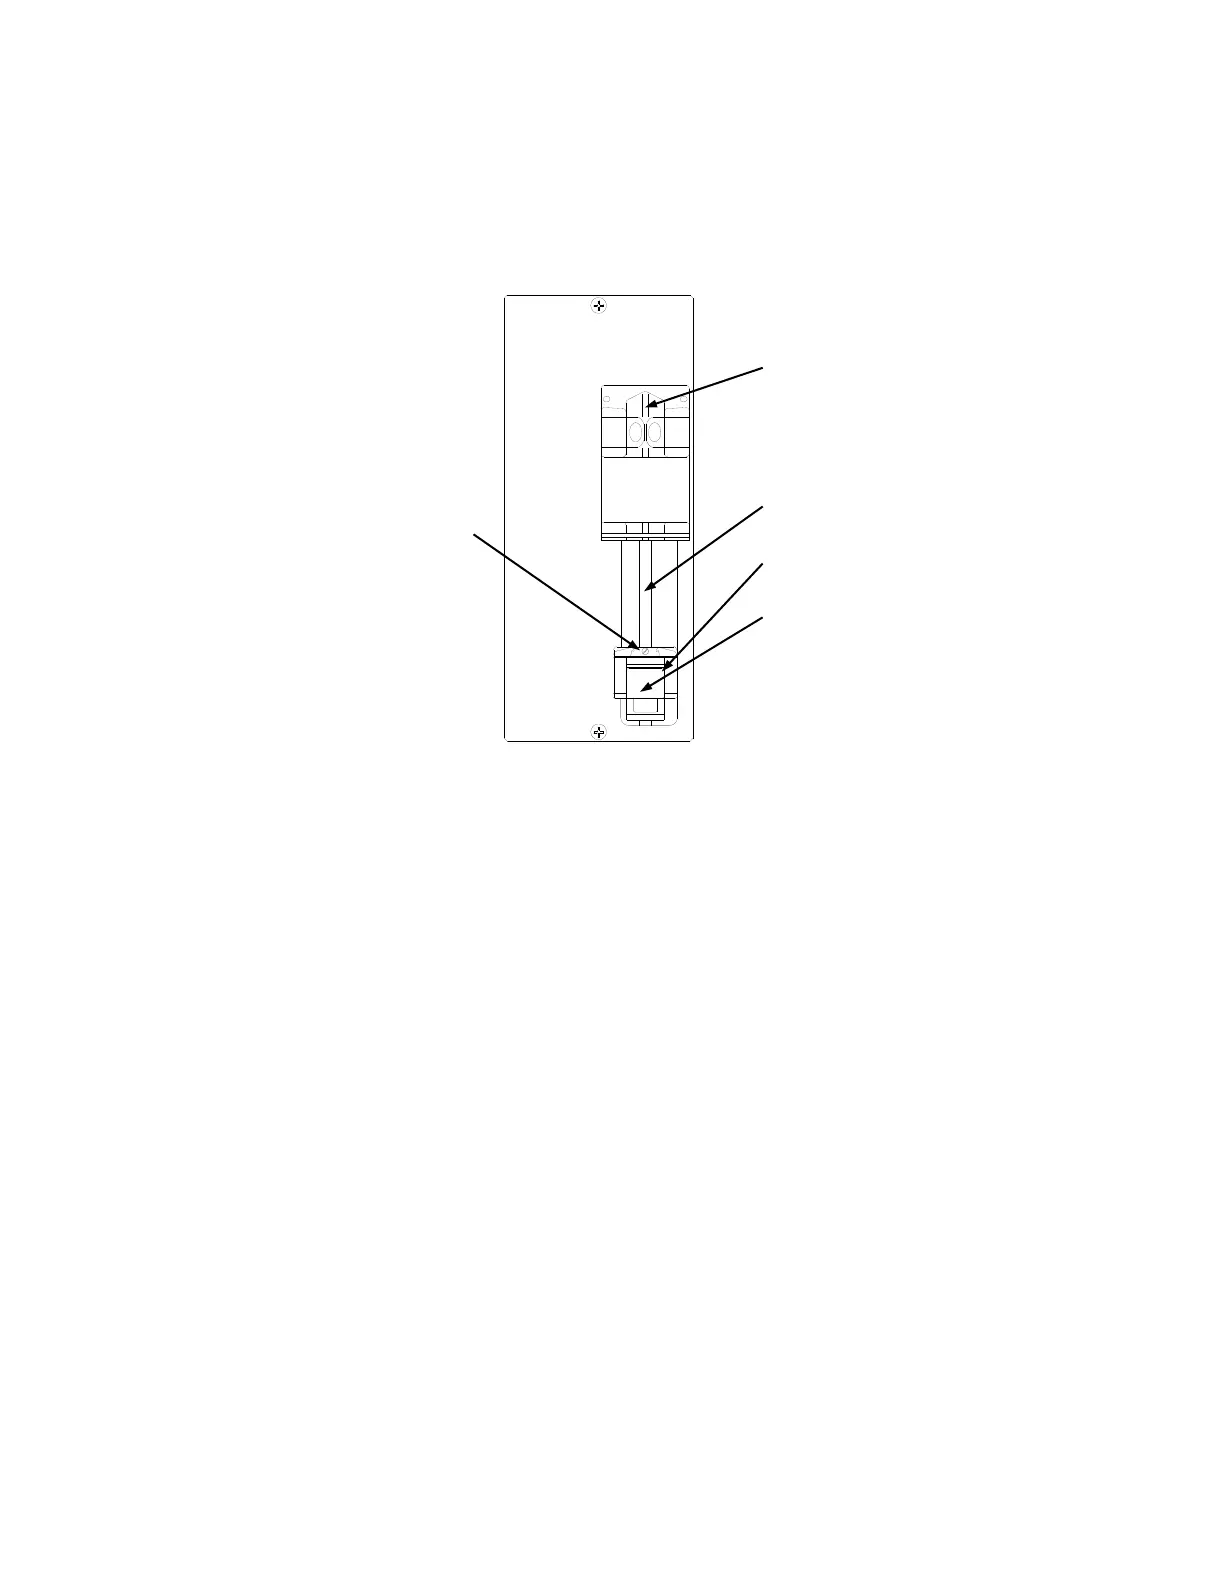
7. Extend the syringe plunger past the 10ml mark. Install the syringe into the
pump and latch the plunger handle into the carriage. If needed, squeeze the
carriage/plunger release lever to slide the carriage up to meet the plunger
handle. The syringe plunger should be at a position greater than 10ml.
Figure 7. Heparin Pump Module.
8. Select
1
the Heparin Prime button. Press and hold the [CONFIRM] key.
The plunger will start moving towards the 10ml mark. Release the
[CONFIRM] key as soon as the syringe plunger is aligned exactly with the
10ml mark on the side of the syringe body.
9. Select
1
the Bolus data button. Use the [] or [
▬
] data entry keys to set a
value of 5.0ml then press the [CONFIRM] key.
10. Select
1
the Total Infused data button. Press the [0] (zero) key and then the
[CONFIRM] key.
11. Select
1
the Infuse Bolus button. Press the [CONFIRM] key and start
timing the interval with the stopwatch.
1
Refer to Section 1.3 on the use of screen buttons.
RELEASE LEVER

 Loading...