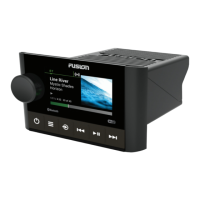
USB Source Settings
With the USB source selected, select .
REPEAT: Repeats the track or folder.
SHUFFLE: Shuffles the tracks in the folder, album, or playlist.
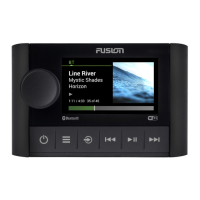
Radio
To listen to AM or FM radio, you must have a suitable marine
AM/FM antenna properly connected to the stereo and be within
range of a broadcasting station. For instructions on connecting
an AM/FM antenna, see the stereo installation instructions.
To listen to SiriusXM
®
radio, you must have the appropriate
equipment and subscriptions (SiriusXM Satellite Radio,
page 6). For instructions on connecting a SiriusXM Connect
Vehicle Tuner, see the stereo installation instructions.
To listen to DAB stations, you must have the appropriate
equipment (DAB Playback, page 8). For instructions on
connecting a DAB adapter and antenna, see the installation
instructions provided with your adapter and antenna.
Setting the Tuner Region
You must select the region you are in to receive AM and FM
stations properly.
If you are connected to a compatible SiriusXM tuner and
antenna, and have a subscription (USA only), you must select
the region you are in to receive SiriusXM stations properly.
NOTE: SiriusXM is not available in all regions.
If you are connected to a compatible DAB module and antenna
(not included), you must select the region you are in to receive
DAB stations properly.
NOTE: DAB stations are not available in all regions.
1
Select > SETTINGS.
2
Select the name of the connected stereo.
3
Select TUNER REGION.
4
Select the region you are in.
Changing the Radio Station
1
Select an applicable source, such as FM.
2
Select to select a tuning mode.
You can use AUTO mode to scan stations, MANUAL mode to
manually tune to a station, and PRESET mode to select the
next preset station.
3
Select or to tune to the station.
TIP: You can quickly save the selected station or channel as
a preset by holding .
Apple AirPlay
Connecting an Apple Device Using AirPlay
1
From the settings menu on your Apple device, connect to the
same wireless network as your compatible Fusion stereo.
NOTE: You can connect some Apple devices to the network
using a wired Ethernet connection, if applicable. Go to the
Apple website for more information.
2
On your Apple device, open the music app you want to
stream to the stereo.
3
From the music app or program, select or , and select
the name of the stereo.
4
If necessary, start playing music on the app.
The stereo changes to the AirPlay source automatically and
plays audio from your Apple device.
NOTE: If your Apple device is using AirPlay 2 software, you
can connect to multiple stereos on the same network.
NOTE: You cannot stream the AirPlay source to other
stereos on the network using the Fusion PartyBus network
(Fusion PartyBus Networking, page 9). Using AirPlay 2
software, you can play content on multiple stereos on the
network, but the stereos must not be grouped.
NOTE: On some AirPlay devices, adjusting the volume on
the device affects the volume level on the stereo.
Setting an AirPlay Password
You can set a password that a user must enter when connecting
to the stereo using the AirPlay feature.
1
Select > SETTINGS > AirPlay PASSWORD.
2
Enter a password.
NOTE: The AirPlay password is case-sensitive.
When connecting to this stereo using the AirPlay feature, the
user must enter the password on their Apple device.
Network UPnP Playback
This stereo can play content from Universal Plug and Play
(UPnP) devices connected to the network, such as computers
and media servers. You must connect your UPnP device to the
same network as the stereo using a wired or wireless
connection, and you must configure the device to share media
over the network. See the owner's manual from your UPnP
device for more information.
After you have connected your UPnP device to the network and
configured it to share media, the UPnP source appears on the
source selection screen of each stereo on the network
(Selecting a Source, page 2).
Connecting a UPnP Device
You must connect your stereo to a network to play media from a
UPnP device, such as a NAS device.
1
Connect your UPnP device to the same network as the
stereo, referring to the instructions provided with your UPnP
device and router if necessary.
2
Select the UPnP source on the stereo (Selecting a Source,
page 2).
You can browse and play media from the UPnP device.
Connecting an Auxiliary Device
You can connect various auxiliary devices to the stereo. These
devices have either RCA connectors, a line output, or a
headphone output jack.
1
Locate the auxiliary connectors on the wiring harness.
2
If necessary, connect an RCA-to-3.5 mm adapter cable to the
auxiliary device.
3
Connect the auxiliary device to the AUX IN RCA connectors
on the wiring harness.
4
Select the Aux source.
Optical Audio Connection
You can connect devices with an optical audio output to the
stereo using an optical audio cable. Televisions, DVD players,
CD players, and other devices may supply digital optical audio
output.
This stereo supports PCM audio only. You may have to change
the settings on your device to output PCM audio.
NOTE: Because streaming audio over the Fusion PartyBus
network introduces a slight delay, streaming content from a
Radio 5
 Loading...