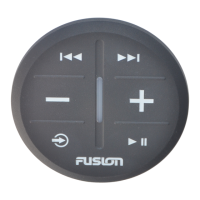
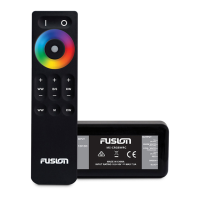
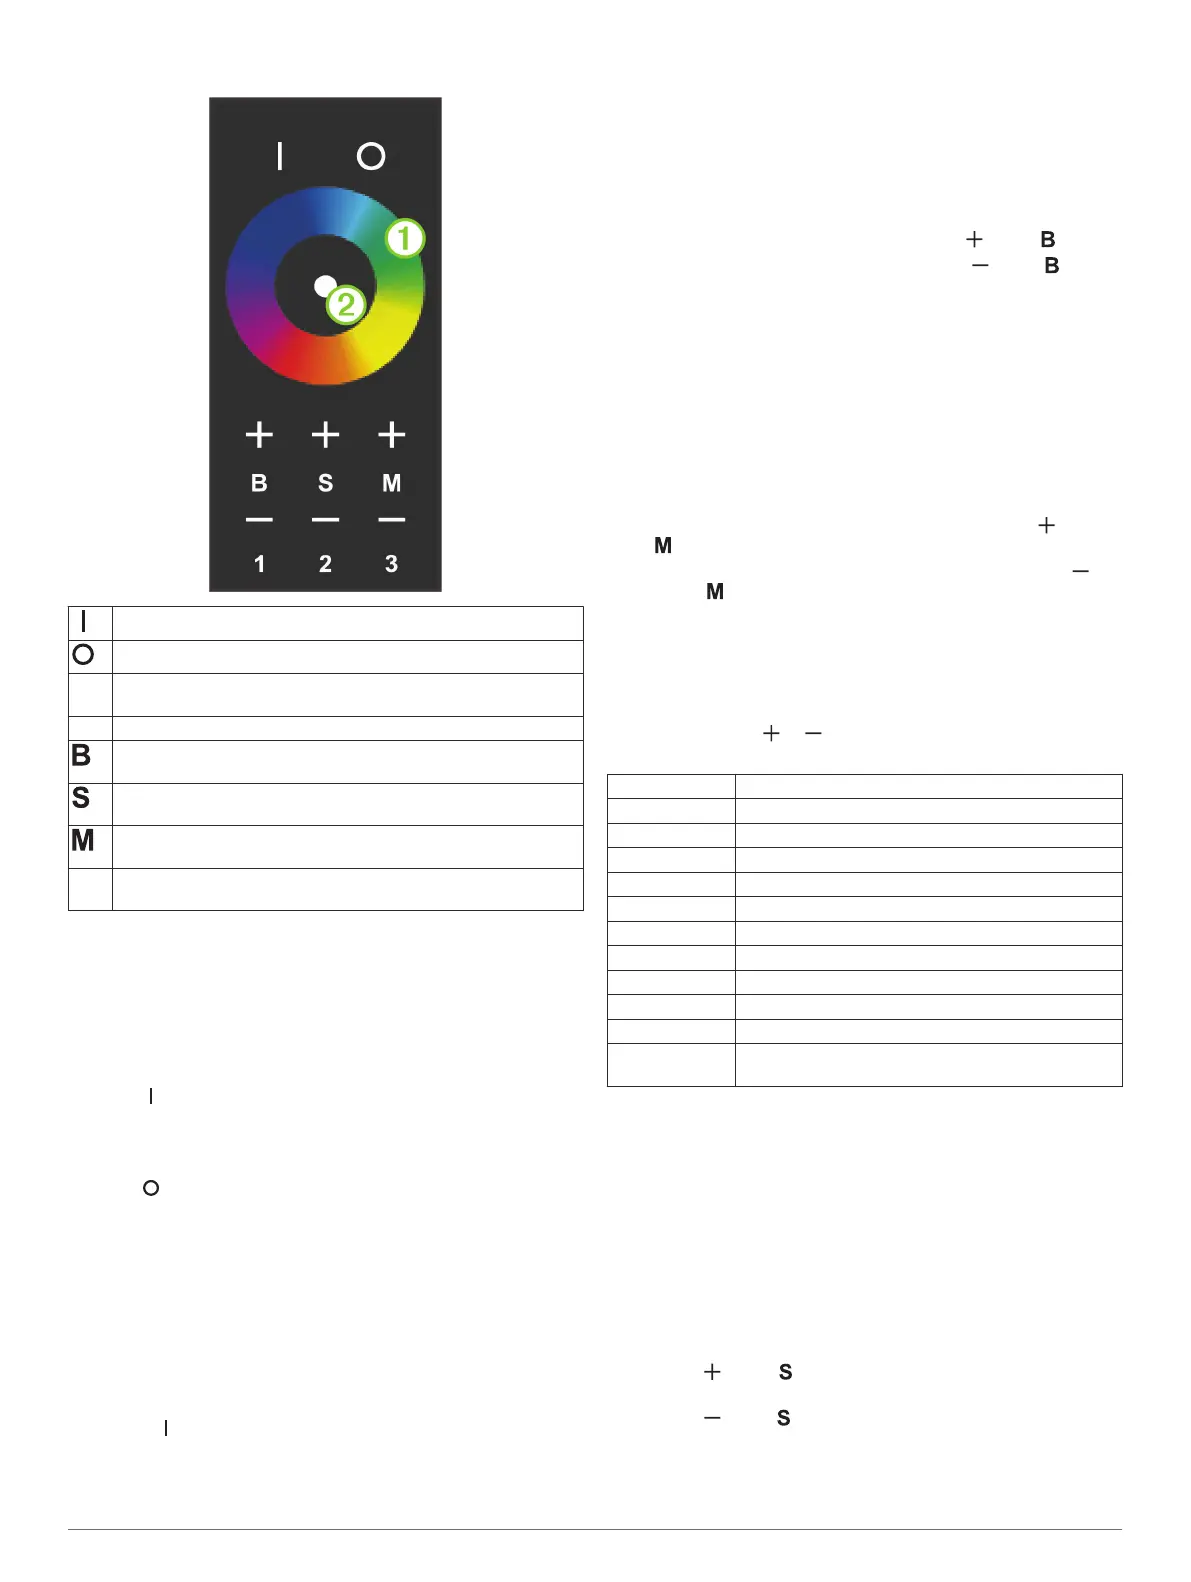
Remote Control Operation
LED power on (Turning the LEDs On and Off, page 3)
LED power off
À
LED color-selection wheel (Changing the Color of the LEDs,
page 3)
Á
Light: activates when the remote sends a signal to the receiver
LED brightness (Changing the Brightness of the LEDs,
page 3)
LED mode speed (Changing the Speed of a Display Mode
Pattern, page 3)
LED display mode (Changing the Display Mode of the LEDs,
page 3)
1 2 3 Remote control receiver selection (Pairing Additional Receivers
to the Remote, page 4)
Turning the LEDs On and Off
After you connect the remote control receiver to the speaker
LEDs, you must use the remote control to turn the LEDs on and
off.
1
If you installed more than one receiver, press the group
number to select the receiver to control (Pairing Additional
Receivers to the Remote, page 4).
2
Press .
The LEDs connected to the receiver turn on with the same
color and mode settings applied before the last time you
turned them off.
3
Press to turn off the LEDs connected to the receiver.
Changing the Color of the LEDs
1
If you installed more than one remote control receiver, press
the group number to select the receiver to control (Pairing
Additional Receivers to the Remote, page 4).
2
If necessary, turn on the LEDs for the speakers you want to
change.
3
Select an option:
• Touch the color wheel to select a new color, and slide
your finger to fine-tune it.
• Hold to change the LED color to white.
NOTE: If you installed more than one remote control
receiver, you can hold the group number to change the LED
color for that group to white.
Changing the Brightness of the LEDs
1
If you installed more than one receiver, press the group
number to select the receiver to control (Pairing Additional
Receivers to the Remote, page 4).
2
If necessary, turn on the LEDs for the speakers you want to
change.
3
Select an option:
• To increase the LED brightness, press above .
• To decrease the LED brightness, press below .
Changing the Display Mode of the LEDs
You can cycle through a pre-defined set of LED flashing,
breathing, or color-changing effectsDisplay Mode Options,
page 3.
1
If you installed more than one remote control receiver, press
the group number to select the receiver to control (Pairing
Additional Receivers to the Remote, page 4).
2
If necessary, turn on the LEDs for the speakers you want to
change.
3
Select an option:
• To select the next mode in the sequence, press above
(Display Mode Options, page 3).
• To select the previous mode in the sequence, press
below .
4
Touch a color on the color wheel to stop the display mode
and return to a solid color.
Display Mode Options
You can select among 12 different color and transition patterns.
When you reach the end or beginning of the cycle of display
modes by pressing or , the cycle loops to the beginning or
end.
Display mode 1 RGB jumping change
Display mode 2 RGB fading change
Display mode 3 7-color jumping change
Display mode 4 7-color flashing change
Display mode 5 7-color fading change
Display mode 6 7-color gradient change
Display mode 7 White only, fades in and out
Display mode 8 Red only, fades in and out, then flashes 3 times
Display mode 9 Green only, fades in and out, then flashes 3 times
Display mode 10 Blue only, fades in and out, then flashes 3 times
Display mode 11 White only, fades in and out, then flashes 3 times
Display mode 12 Automatically cycle through the previous 11 display
modes
Changing the Speed of a Display Mode Pattern
You can adjust the speed of the effects when using a display-
mode pattern.
1
If you installed more than one remote control receiver, press
the group number to select the receiver to control (Pairing
Additional Receivers to the Remote, page 4).
2
If necessary, turn on the LEDs for the speakers.
3
If necessary, select a the display mode (Changing the
Display Mode of the LEDs, page 3).
4
Select an option:
• To increase the speed of the display-mode-pattern effect,
press above .
• To decrease the speed of the display-mode-pattern effect,
press below .
Installation Instructions 3
 Loading...