4
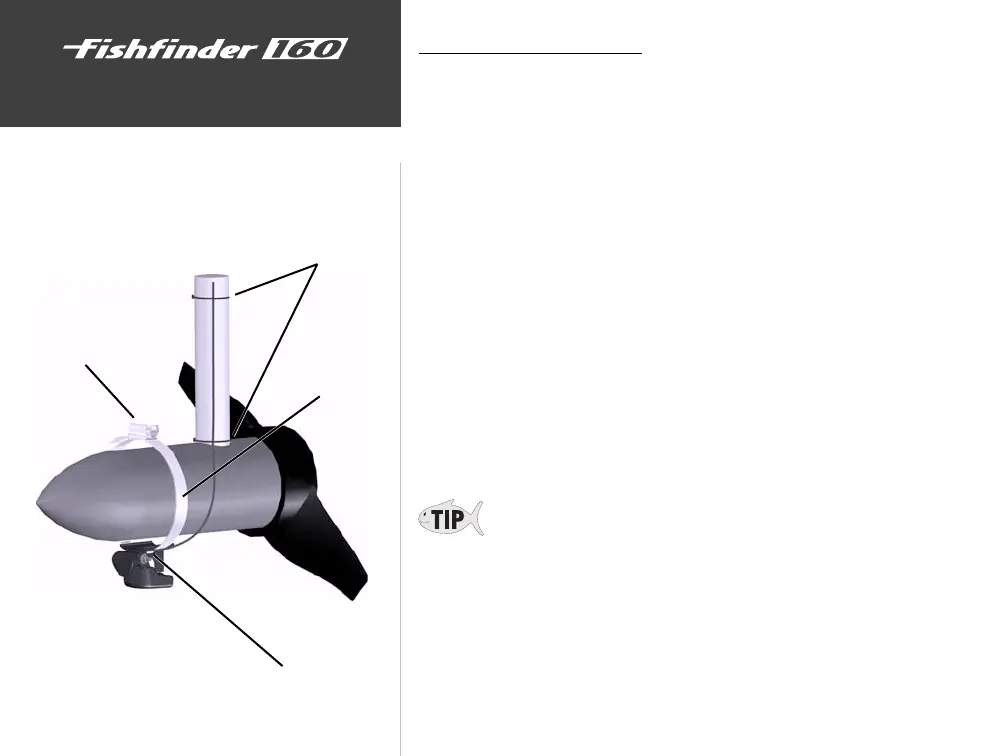
Installation
Slide clamp band through slot in bracket
Clamp Band
Cable Ties
Worm Gear
Mounting the Transducer
Trolling Motor Installation
Included in the 010-10251-00 transducer kit you should have:
• Worm Gear Clamp
• Cable Ties
• Transducer
Mounting the Transducer:
1. Loosen the Worm Gear Clamp until end of the band is clear of the worm
gear.
2. Slide the clamp band through the slots on the transducer.
3. Place the free end of the clamp band into the worm gear and tighten
until the band is through the worm gear.
4. Place the clamp and transducer over the body of the trolling motor.
Finish tightening the clamp to secure the transducer to the trolling
motor.
5. Secure the transducer cable to the trolling motor shaft using the sup-
plied cable ties.
If you are experiencing interference while the trolling motor is operating, try
installing the transducer cable at right angles to the trolling motor power
cables.
FF 160 update.indd 10/19/00, 2:17 PM4

 Loading...