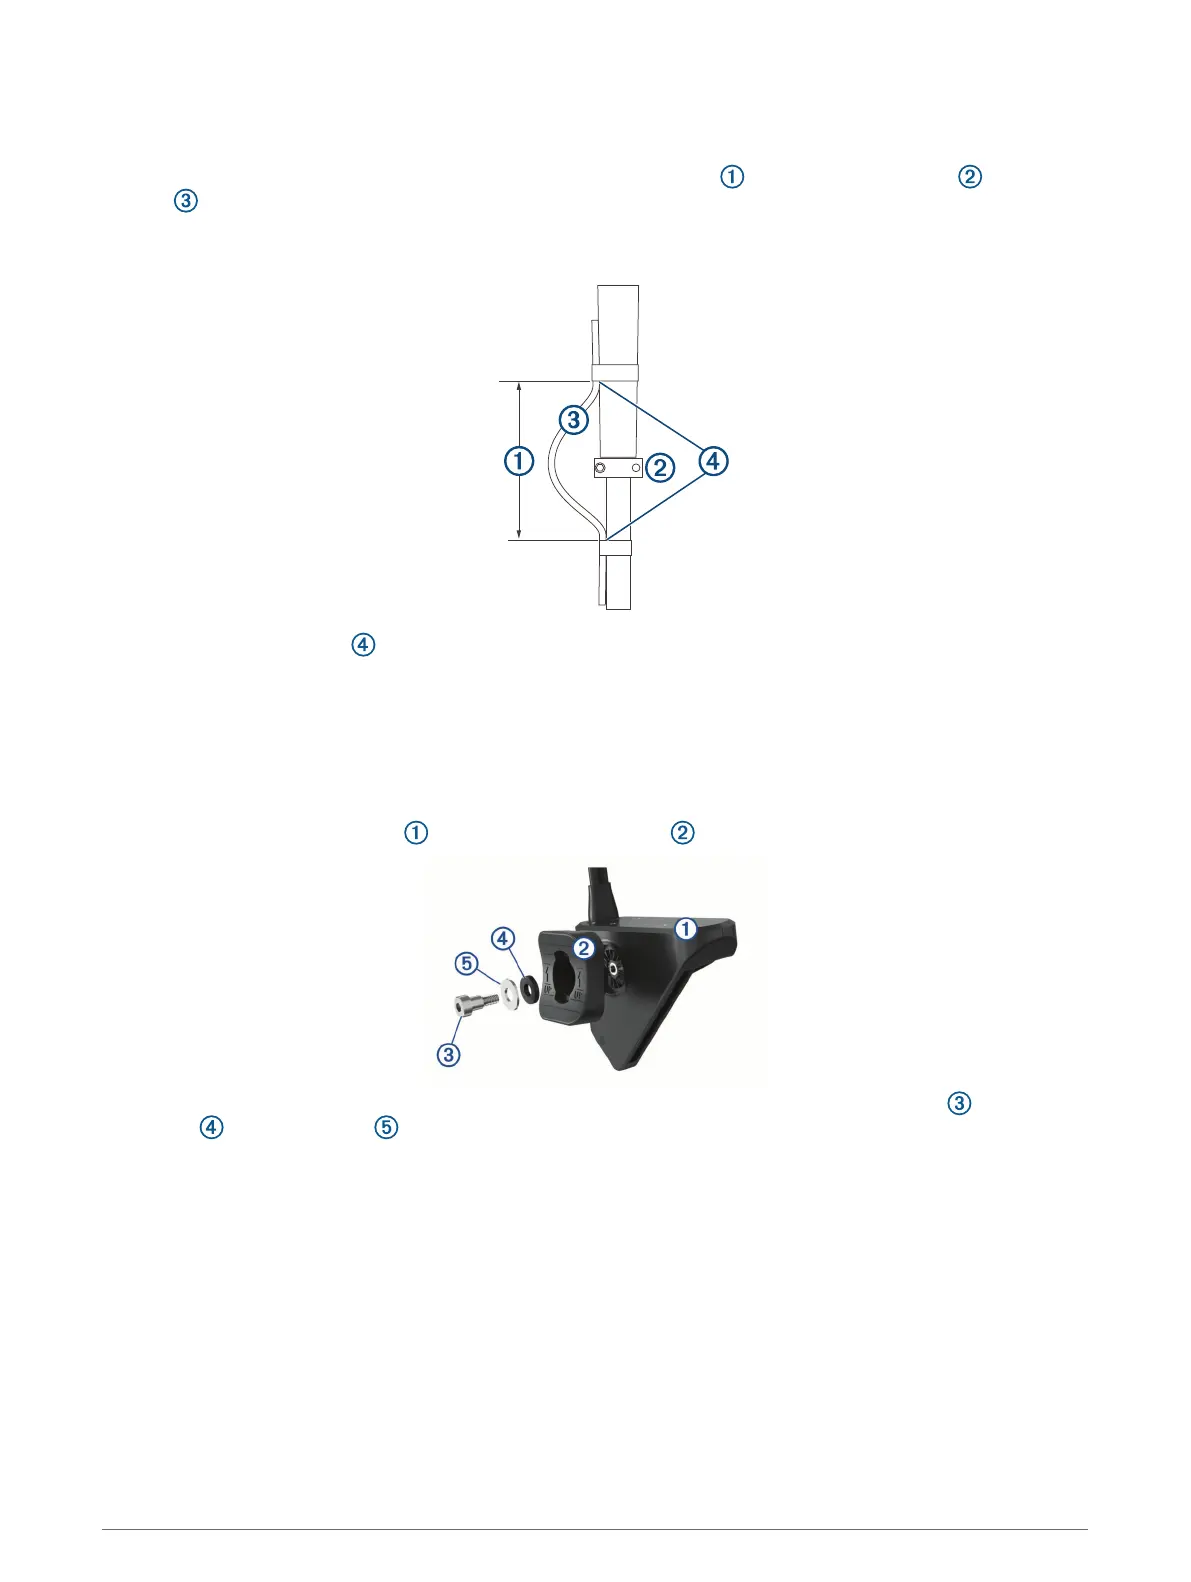
Routing the Transducer Cable
You should test-fit the transducer and cable before installation.
1 Allow a loose gap of at least 10 cm ( 4 in.) above and 10 cm (4 in.) below the rotating joint to create a
loop in the cable. The loop must be large enough to allow full rotation of the transducer in both
directions. Allow a minimum of 25 cm (10 in.) of cable to cover the 20 cm (8 in.) section between mounting
points.
2 Use black electrical tape to secure the transducer cable to the shaft.
3 Test the full rotation of the trolling motor to ensure the cable clears the rotating joint and is not pulled tight
due to tension during rotation.
Installing the Transducer on a Trolling Motor
Assembling the Trolling Motor Barrel Mount Hardware
1 Align the top of the transducer with the top of the bracket .
2 Using the included hex wrench, attach the bracket to the transducer with the shoulder screw , rubber
washer , and flat washer .
NOTE: You must fully tighten the mount to the transducer. The recommended torque applied to the shoulder
screw is 2.5 lb-ft. (3.4 N-m).
3
 Loading...