Installation instructions.
-.
Read completel~ then follow step by step.
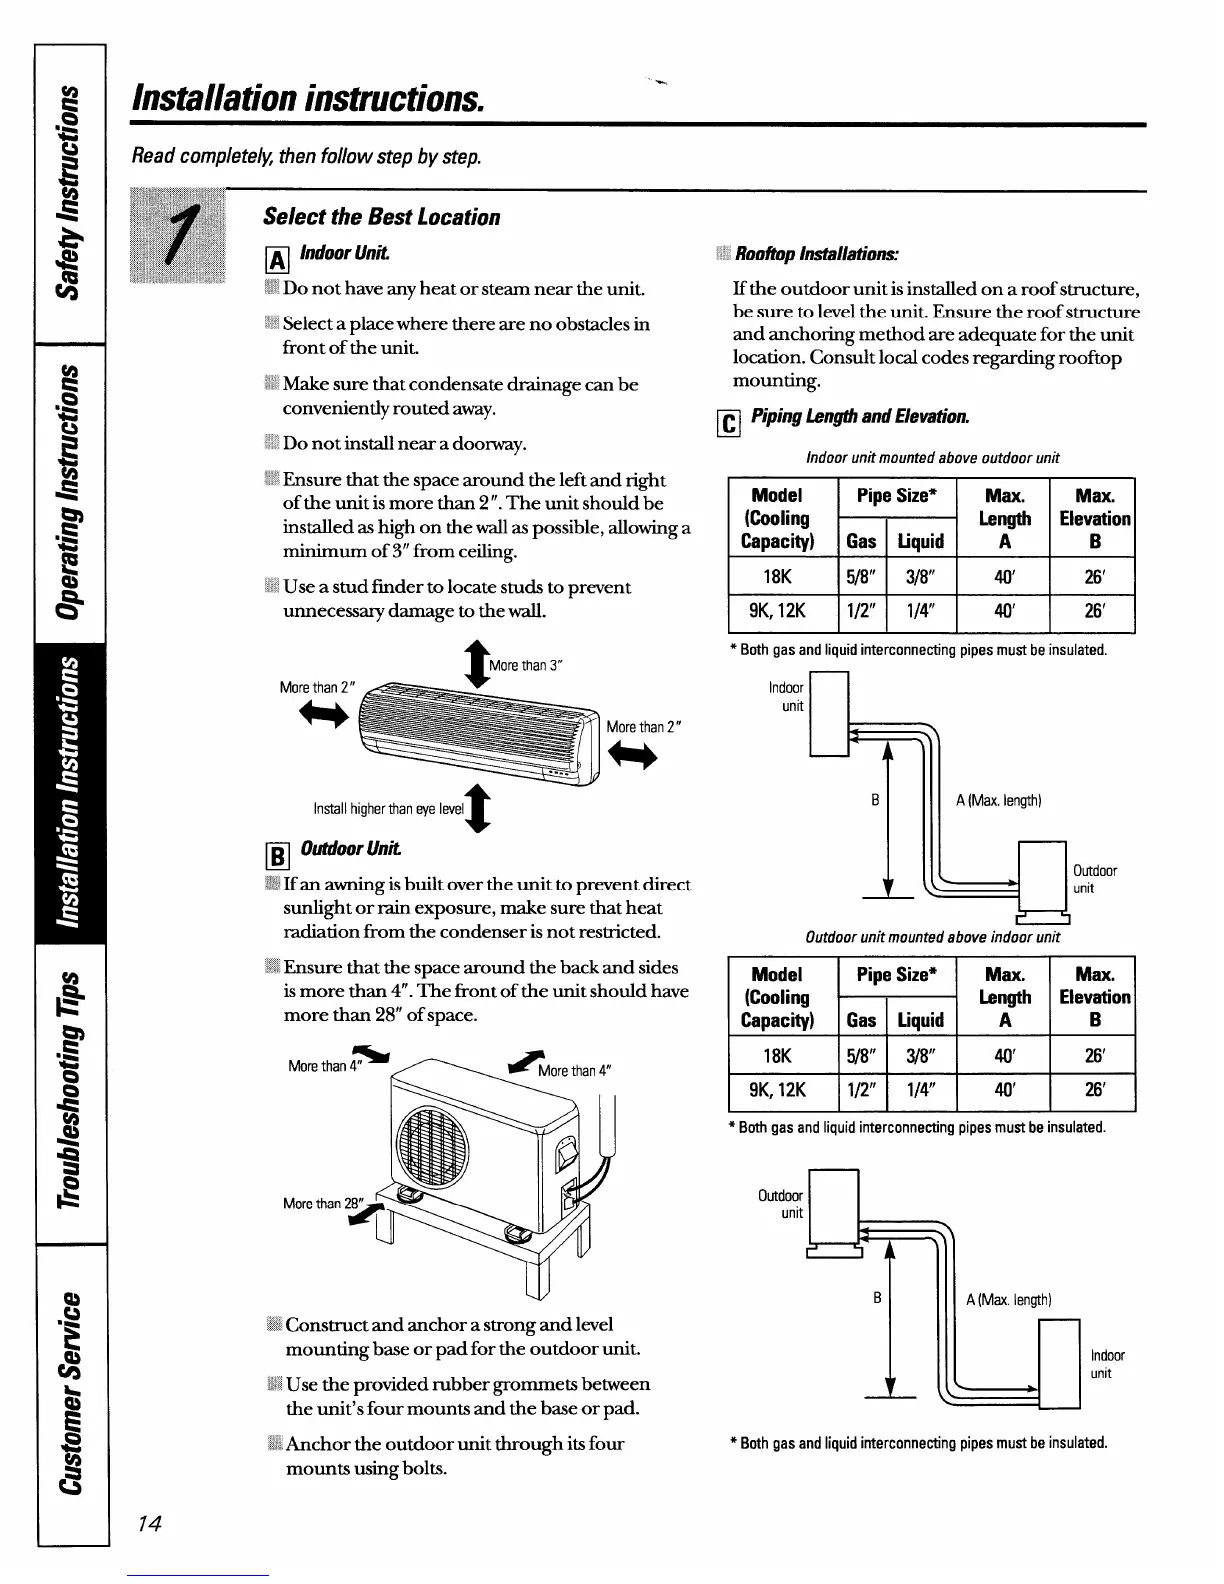
Select the Best Location
El
Indoor Unit
X Do not have any heat or steam near the unit.
“ ~Select a place where there are no obstacles in
front of the unit.
~ Make sure that condensate drainage can be
conveniently routed away.
“ Do not install near a doorway.
:’ Ensure that the space around the left and right
of the unit is more than 2”. The unit should be
installed as high on the wall as possible, allowing a
minimum of 3“ from ceiling.
: Use a stud finder to locate studs to prevent
unnecessary damage to the wall.
More than 2“
*
More than 2”
*
Install h
El
OutdoorUnit
M Ifan awning is built over the unit to prevent direct
sunlight or rain exposure, make sure that heat
radiation from the condenser is not restricted.
;~ Ensure that the space around the back and sides
is more than 4“. The front of the unit should have
more than 28” of space.
More than
:~:~Construct and anchor a strong and level
mounting base or pad for the outdoor unit.
~~~Use the provided rubber grommets between
the unit’s four mounts and the base or pad.
ii Anchor the outdoor unit through its four
mounts using bolts.
5 Rooftop Installations:
If the outdoor unit is installed on a roof structure,
be sure to level the unit. Ensure the roof structure
and anchoring method are adequate for the unit
location. Consult local codes regarding rooftop
mounting.
❑ pipin!lhn@andElevatio..
Indoor unit mounted above outdoor unit
Model
Pipe Size*
Max. Max.
(Cooling
Elevation
Capacity)
B
I
18K
I 5/8” I
3/8”
I
*,
I
26’
I
I
9K, 12K
I 1/2” I
1/4”
I
*,
I
26’
I
* Both gas and liquid interconnecting pipes must be insulated,
A (Max. length)
4
Outdoor
unit
I
I
r
7
Outdoor unit mounted above indoor unit
Model
Pipe Size*
Max.
Max.
(Cooling
Length
Elevation
Capacity)
Gas
liquid
A
B
18K 5/8”
3/8”
4$J,
26’
9K, 12K
1/2”
1/4”
40’ 26’
* Both gas and liquid interconnecting pipes must be insulated.
Outdoor
unit
b
1
B
1-
A (Max. length)
41
Indoor
unit
* Both gas and liquid interconnecting pipes must be insulated.
 Loading...