3
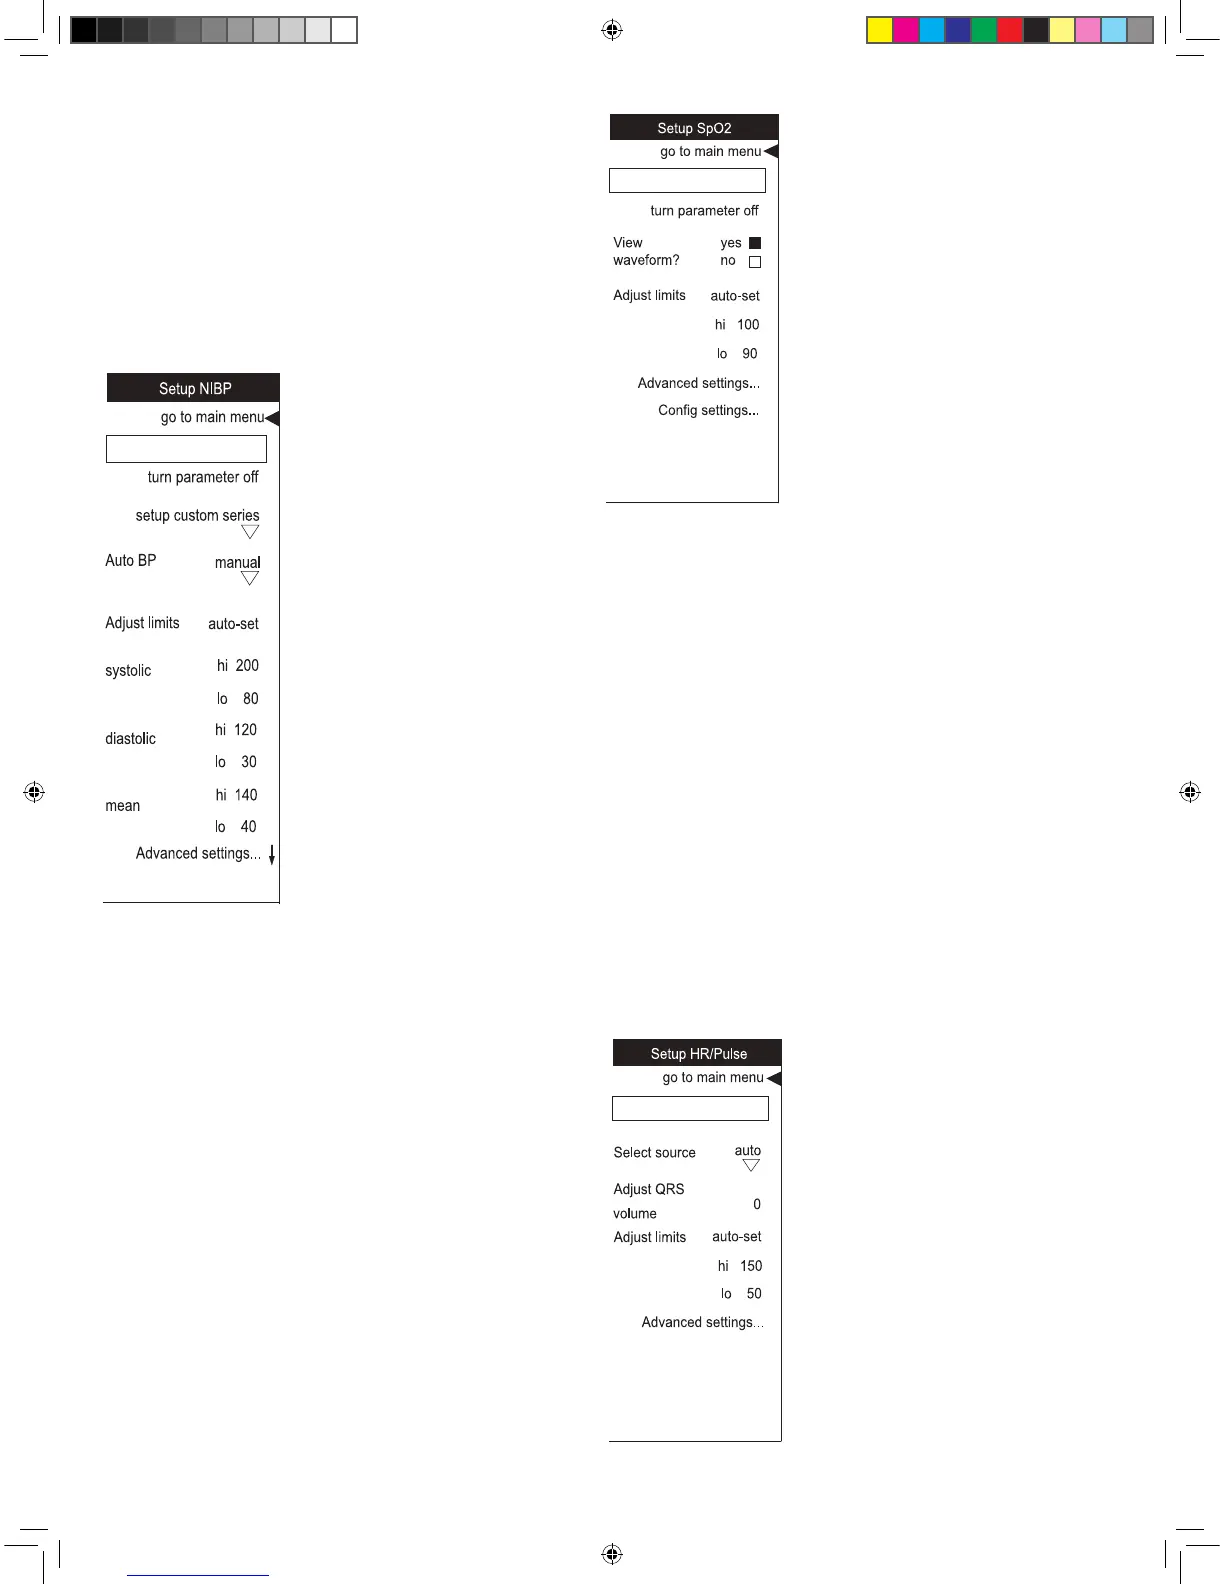
Suspend all monitoring and alarms for SpO
2
.
Choose whether or not the plethysmographic
waveform appear on the screen.
Adjust or auto-set alarm limits. Select hi
to change the high alarm limit and lo to
change the low alarm limit. The system
maintains appropriate separation between
the high and low limits.
NOTE: The auto-set option is not available for SpO
2
. You cannot
choose the auto-set option to set the alarm limits for oxygen
saturation. However, when SpO
2
is the source for HR/Pulse, using
auto-set in the Setup HR/Pulse menu will set the alarm limits
around the SpO
2
PR value.
Heart Rate
Heart rate/pulse (HR/Pulse) in the Dash 2500 Patient
Monitor can be derived from one of several sources. In
descending order of priority, they are ECG, pulse oximetry
(SpO
2
), and non-invasive blood pressure (NIBP). Instead of
choosing a single source of HR/Pulse, you can activate the
auto feature to choose the best available source.
• Preparepatient
• Connectmonitoringlines
• SelectHR/Pulse from the setup parameters option in
the Main Menu
• Setupmonitoringparameters
Choose the source of the HR/Pulse data to
be displayed on the screen.
Adjust the volume of the tone that sounds
each time a QRS complex is detected.
Adjust or auto-set alarm limits. Select hi
to change the high alarm limit and lo to
change the low alarm limit. The system
maintains appropriate separation between
the high and low limits. Choose auto-set to
usethepatient’scurrentreadingsinsetting
the high and low limits.
• Manualmode:pushtheNIBP Go/Stop hardkey once to
obtain immediate determination.
• SelectNIBP from the setup parameters option in Main
Menu to set or change limits or to set up auto mode.
• Automode:quick-pushtheNIBP Auto hardkey to begin
auto BP determinations.
• Statmode:push-and-holdtheNIBP Auto hardkey to
obtain continuous determinations for 5 minutes.
Suspend all monitoring and alarms for NIBP.
Configure a custom auto mode to meet the
needs of your clinical situation.
Set time-cycled (auto mode) NIBP
determinations.
Adjust or auto-set alarm limits. Choose hi to
change the high alarm limit and lo to
change the low alarm limit. You can set
high and low limits individually for systolic,
diastolic, and mean values. The system
maintains appropriate separation between
the high and low limits. Choose auto-set to
usethepatient’scurrentreadingsinsetting
the high and low limits.
SpO
2
The SpO
2
parameter in the Dash 2500 Patient Monitor is
available in two different leading technologies: Nellcor
®
and
MASIMO SET
®
.
• Selectsensor
• PlugsensorconnectorintoSpO
2
port
• Applysensor
• SelectSpO
2
from the setup parameters option in the
Main Menu
• Setupmonitoringparameters
NOTE: Attach the SpO
2
sensor to the limb opposite the one
with the blood pressure cuff.
NOTE: Remove nail polish and artificial nails.
Quick guide-new.indd 4 12-7-17 9:33

 Loading...