Installation Instructions
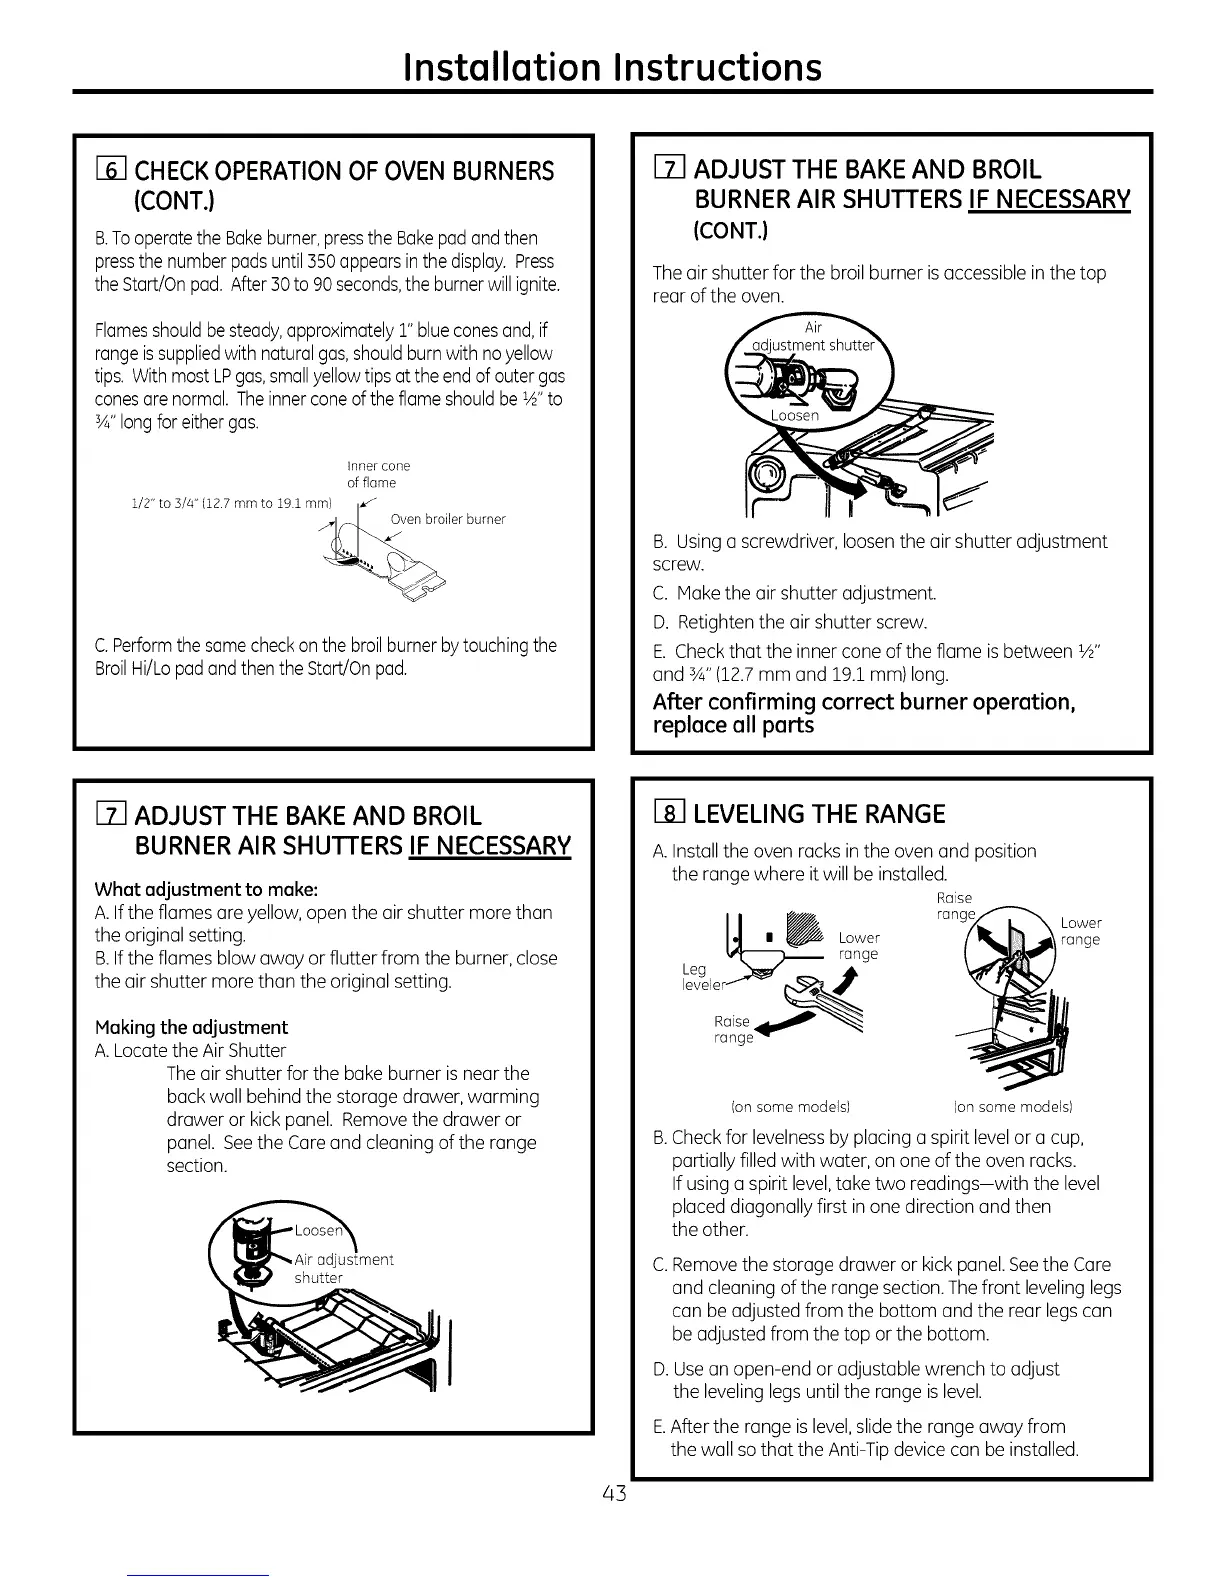
[] CHECKOPERATION OF OVEN BURNERS
(CONT.)
B.Tooperatethe Bukeburner,pressthe Bukepodund then
pressthe numberpodsuntil350uppeursinthedisplay.Press
theSturt/Onpod. After30to 90 seconds,the burnerwill ignite.
Flumesshouldbesteady,approximately1" blueconesand,if
rungeissuppliedwith natural gas,shouldburnwith noyellow
tips. With most LPgas,smullyellowtipsut the endof outer gas
conesore normul. Theinnerconeof the flumeshouldbe 1A"to
3A"longforeithergas.
Inner cone
of flame
Oven broiler burner
C.Performthesomecheckon the broilburnerby touchingthe
BroilHi/Lopod andthen the Start/Onpod.
[] ADJUST THE BAKE AND BROIL
BURNER AIR SHUTTERS IF NECESSARY
(CONT.)
Theair shutter for the broil burner is accessible in the top
rear ofthe oven.
B. Using o screwdriver, loosen the air shutter adjustment
screw.
C. Make the air shutter adjustment.
D. Retightenthe air shutter screw.
E. Checkthat the inner cone of the flume is between 1A"
and sA"(12.7mm and 19.1mm)long.
After confirming correct burner operation,
replace all parts
ADJUST THE BAKE AND BROIL
BURNER AIR SHUTTERS IF NECESSARY
What adjustment to make:
A.Ifthe flumes ore yellow, open the air shutter more than
the original setting.
B.Ifthe flumes blow owoy or flutter from the burner, close
the air shutter more than the original setting.
Making the adjustment
A.Locate the Air Shutter
Theair shutter for the bake burner is near the
buck wall behind the storage drawer, worming
drawer or kickpanel. Removethe drawer or
panel. Seethe Core and cleaning of the range
section.
\
ustment
shutter
I
[] LEVELING THE RANGE
A.Installthe oven rocksin the oven and position
the range where it will be installed.
Raise
range
Leg _ A
leveler"'"_ _
Raise J
range_
Lower
range
Ion some models) Ion some models)
B.Checkfor levelnessby placing o spirit level or o cup,
partially filled with water, on one of the oven rocks.
If using o spirit level,take two readings-with the level
placed diagonally first inone direction and then
the other.
C.
D.
Removethe storage drawer or kick panel.Seethe Core
and cleaning of the range section.Thefront leveling legs
con be adjusted from the bottom and the rear legs con
be adjusted from the top or the bottom.
Use on open-end or adjustable wrench to adjust
the leveling legs until the range is level.
After the range is level,slide the range owoy from
the wall so that the Anti-Tipdevice con be installed.
43
 Loading...