26
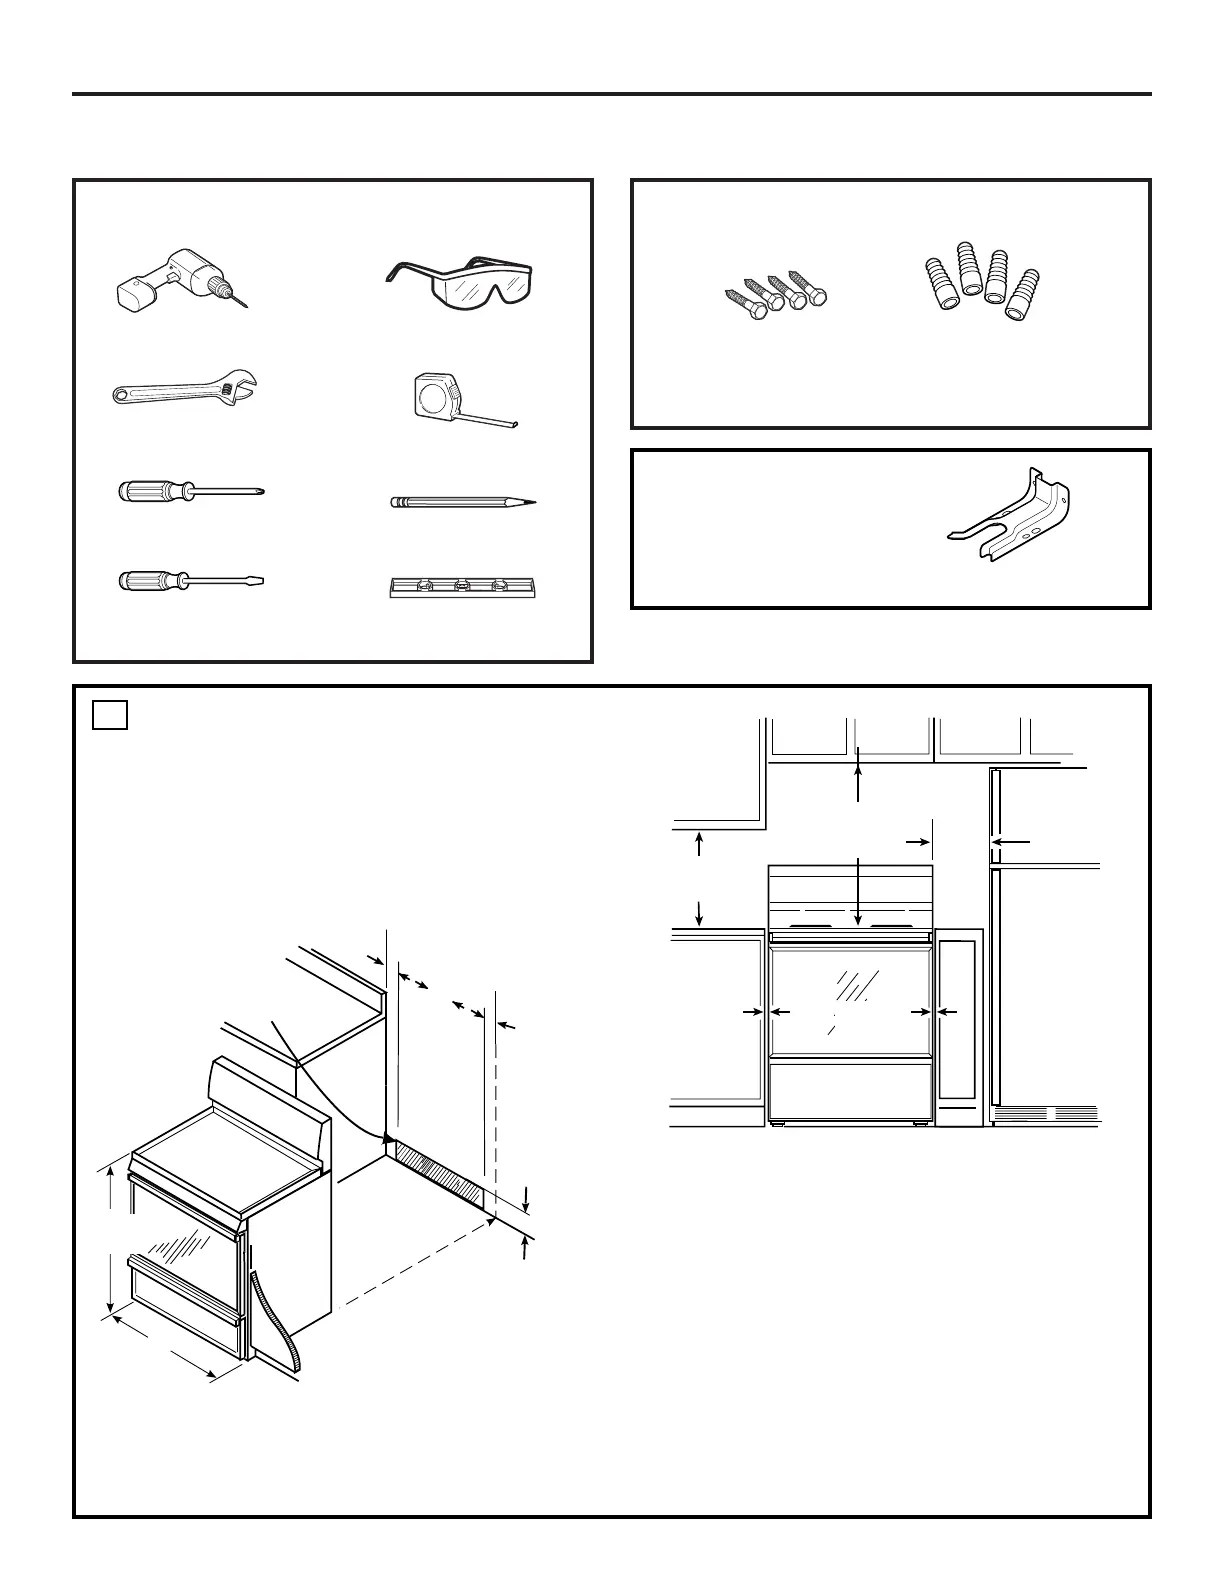
TOOLS YOU WILL NEED
Installation Instructions
PREPARE TO INSTALL THE RANGE
MATERIALS YOU MAY NEED
Anchor Sleeves
Lag Bolts
(For Anti-Tip Bracket Mounted
on Concrete Floors Only)
Adjustable Wrench
Level
Phillips Screwdriver
Drill with 1/8” Bit
Pencil
Safety Glasses
Tape Measure
Flat-blade
Screwdriver
PARTS INCLUDED
Anti-Tip Bracket Kit
PREPARE THE OPENING
See illustrations for all rough-in and spacing
dimensions.
The range must be placed with 12 mm (1/2”)
minimum clearance at the back wall and side
walls of the cabinet.
MINIMUM DIMENSIONS BETWEEN COOKTOP,
WALLS AND ABOVE THE COOKTOP:
*** Make sure the wall covering, countertop and
cabinets around the range can withstand the
heat (up to 93.3°C [200°F]) generated by the
range.
*** Allow 76.2 cm (30”) minimum clearance
between surface units and bottom of
unprotected wood or metal cabinet, and
38 cm (15”) minimum between countertop
and adjacent cabinet bottom.
*** Recommended spacing to heat-sensitive
surfaces.
1
Acceptable electrical
outlet area.
Orient the electrical
receptacle so the length
is parallel to the floor.
7.6 cm
(3″)
7.6 cm
(3″)
19 cm
(7
1
⁄2″)
63 cm
(25″)
76.2 cm
(30″)
91.4 cm
(36″)
*12 mm
(
1
⁄2″) min.
**38 cm
(15″) min.
**76.2 cm
(30″) min.
***14.25 cm
(6″) min.
*12 mm
(
1
⁄2″) min.
 Loading...