CONNECTING DUCTWORK
19
3
Pop
corn
Convenience Cooking
Express Cook
Potato
S
tart
Pa
use
Cancel
Off
Bev
erage
R
eh
eat
S
et
Clo
ck
Tu
rnt
able
Su
rface
Light
Vent
Add
30
S
ec.
Pow
e
r
L
evel
0
8
5
2
7
4
1
9
6
3
Coo
k
T
ime
Defrost
Weight/T
ime
Timer
O
n
/Off
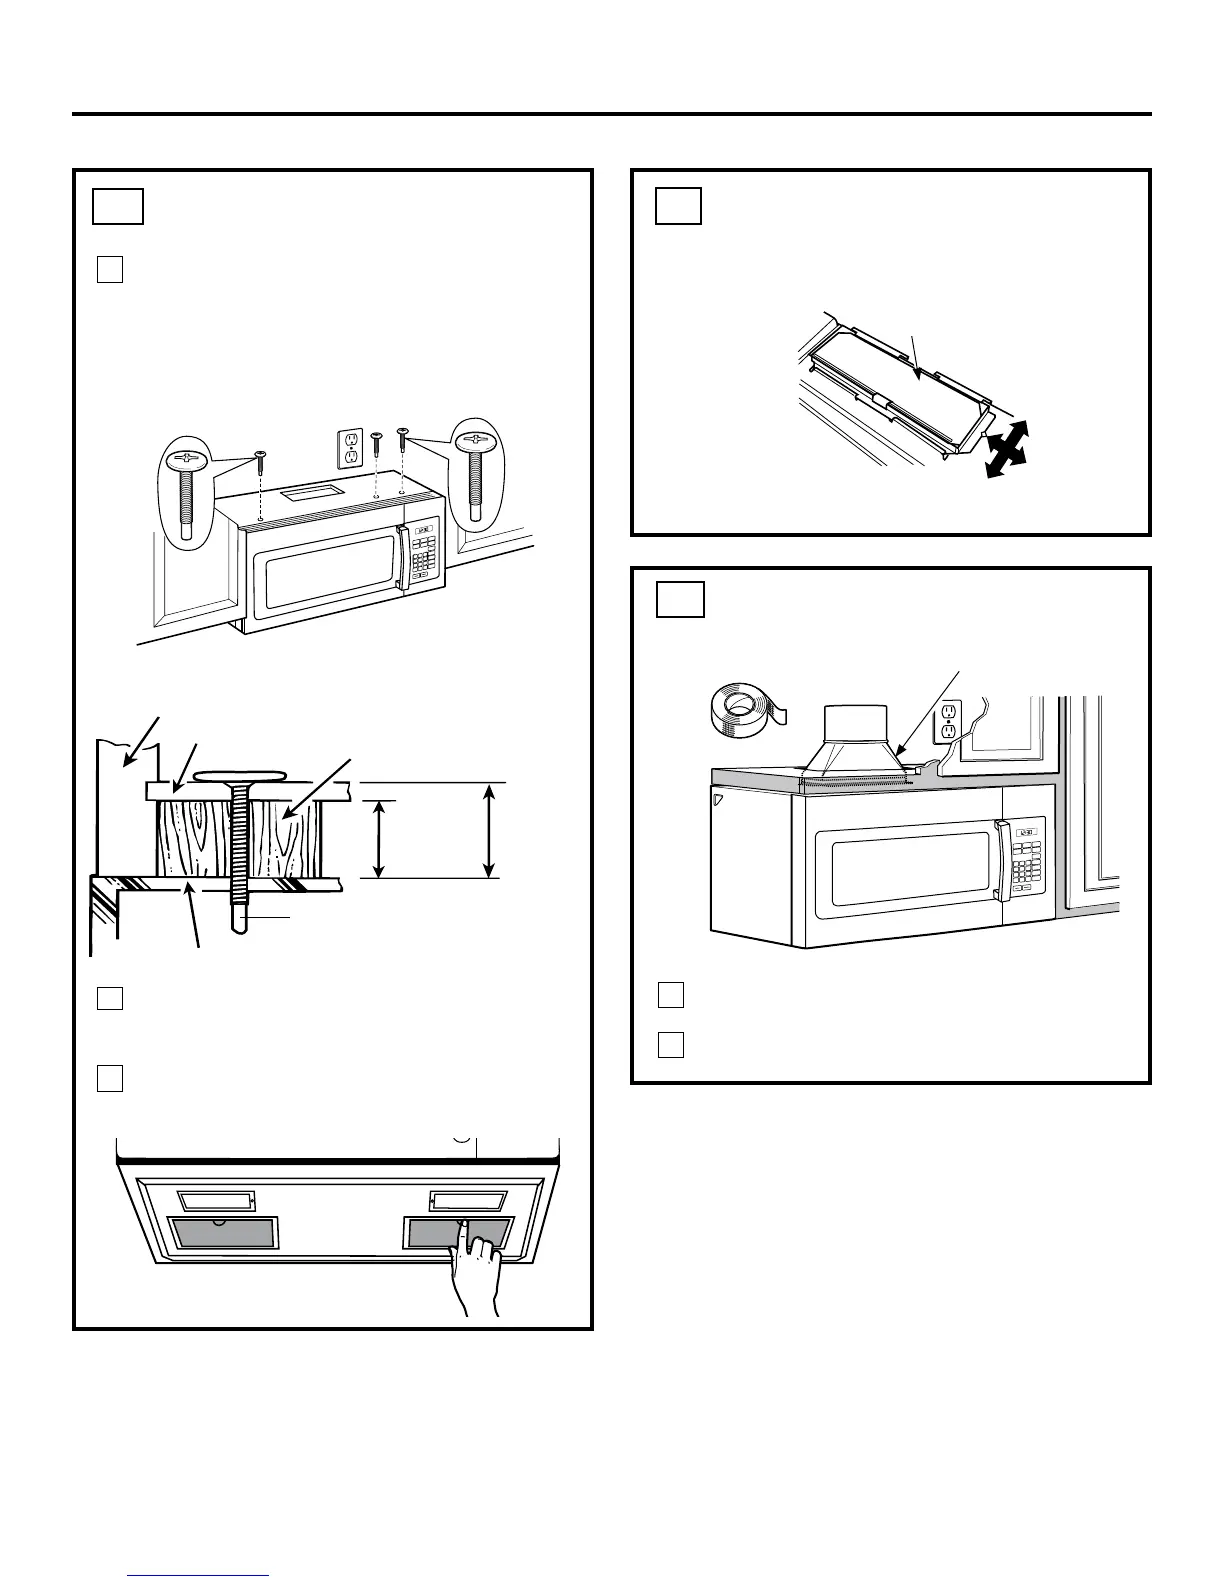
Cabinet Front
Cabinet Bottom Shelf
Filler Block
Microwave Oven Top
Equivalent
to Depth
of Cabinet
Recess
Insert a self-aligning screw through top-center
cabinet hole. Temporarily secure the microwave
oven by turning the screw at least two full
turns after the threads have engaged. (It will be
completely tightened later.) Insert 2 self-aligning
screws (
1
⁄4″-28 x 2
1
⁄4
″
) through outer top cabinet
holes. Turn two full turns on each screw.
Tighten the three screws to the top of the microwave
oven. (While tightening screws, hold the microwave
oven in place against the wall and the top cabinet.)
Install grease filters. See the Owner’s Manual packed
with the microwave oven.
Popcorn
Convenience Cooking
Express Cook
Potato
Start
Pause
Cancel
Off
Beverage
Reheat
Clock
Turntable
Surface
Light
Vent
Fan
Add
30 Sec.
Power
Level
0
8
5
2
7
4
1
9
6
3
Time
Cook
Defrost
Time/Weight
Timer
On/Off
5
4
Installation Instructions
ADJUST THE EXHAUST ADAPTOR
A5
Open the top cabinet and adjust the exhaust adaptor
to connect to the house duct.
Back of
Microwave
Oven
Damper
1
2
Extend the house duct down to connect to
the exhaust adaptor.
Seal exhaust duct joints using duct tape.
Popcorn
Convenience Cooking
Express Cook
Potato
Start
P
ause
Cancel
Off
Be
verage
Reheat
S
et
Clock
Turntable
Su
rface
Ligh
t
Vent
Add
30 Sec.
Power
Level
0
8
5
2
7
4
1
9
6
3
Coo
k
Time
Defrost
Weight/T
ime
Timer
O
n/Off
House Duct
Self-Aligning Screw
MOUNT THE MICROWAVE OVEN
(cont.)
B5
A6
This distance
can NOT
exceed 2”
to ensure
proper
installation
1” = 2.5 cm; 1’ = 0.3 m

 Loading...