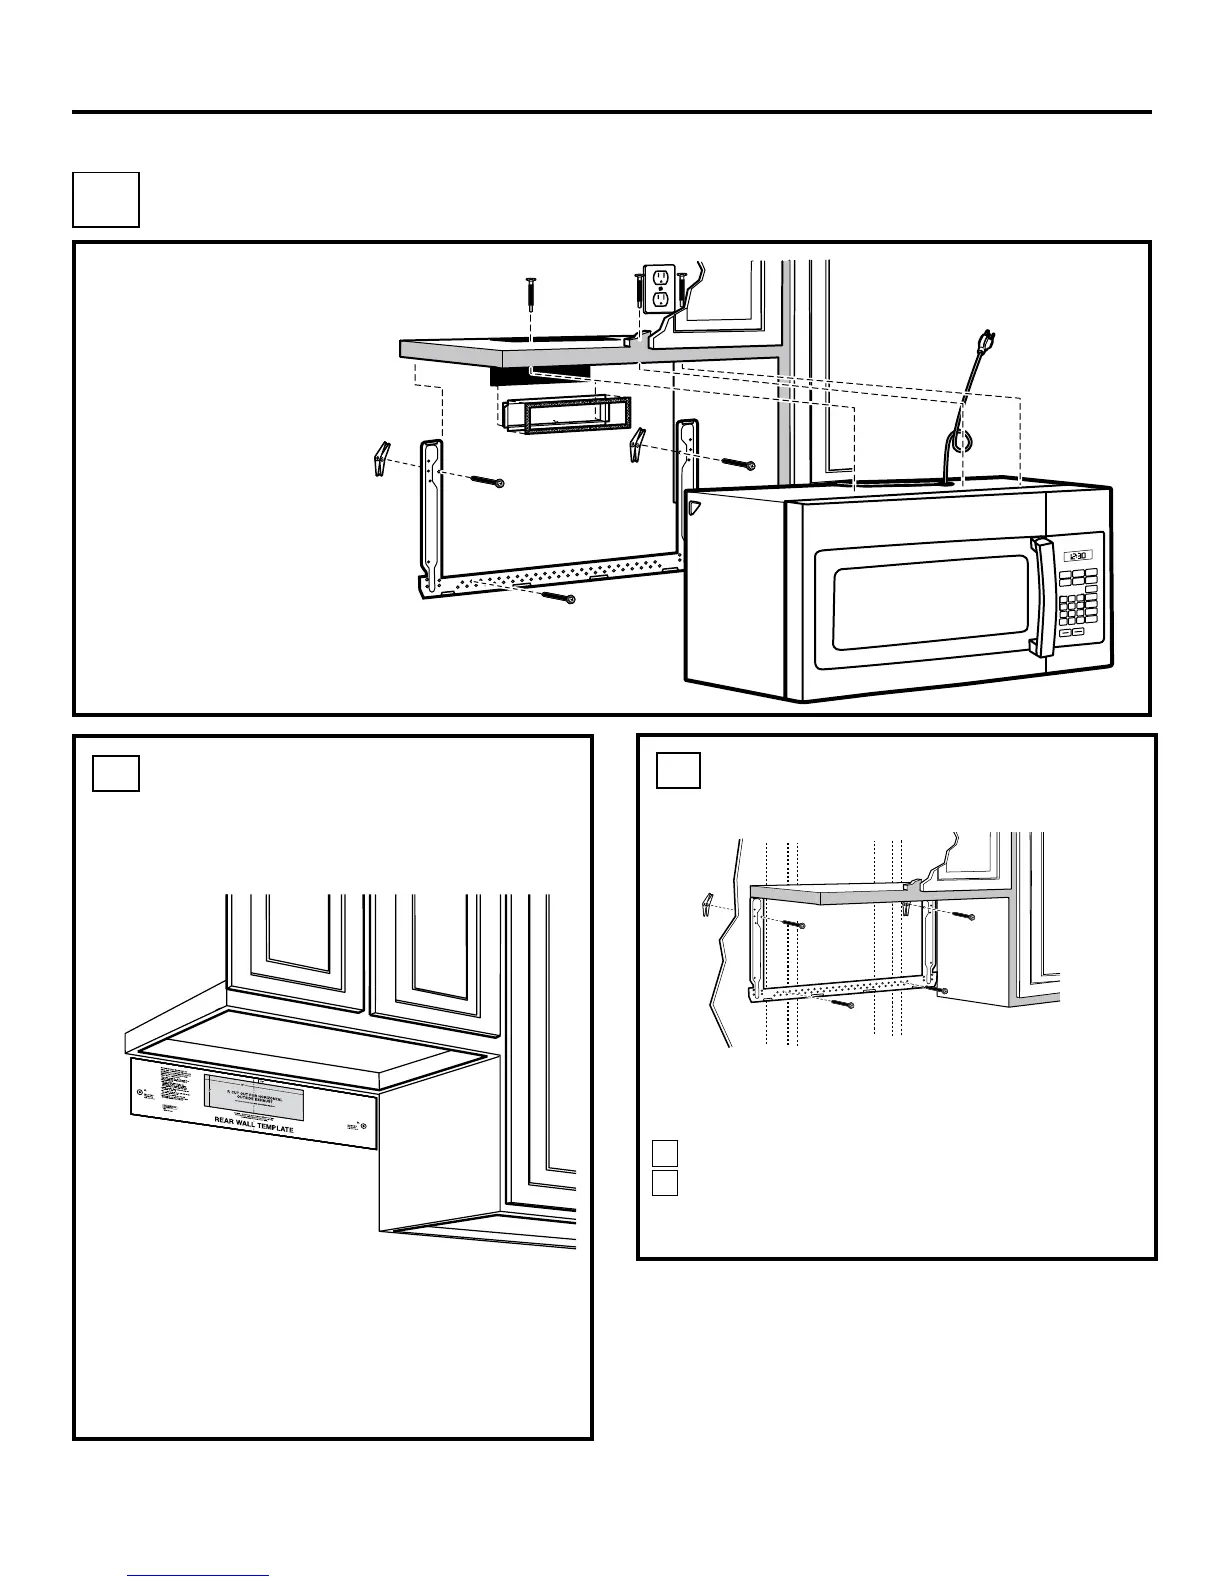
OUTSIDE BACK EXHAUST
(Horizontal Duct)
PREPARING THE REAR WALL
FOR OUTSIDE BACK EXHAUST
C1
Popc
orn
Conv
enience Cooking
E
xpr
ess Cook
P
otato
S
tart
Pause
C
a
ncel
O
ff
Beverage
Re
heat
Set
Clock
T
urntable
Surface
Light
V
ent
Add
3
0 Sec.
Power
Level
0
8
5
2
7
4
1
9
6
3
C
ook
Time
Defr
ost
W
e
igh
t/Time
T
imer
O
n
/O
f
f
INSTALLATION OVERVIEW
C1. Prepare Rear Wall
C2. Attach Mounting Plate to Wall
C3. Prepare Top Cabinet
C4. Adjust Blower
C5. Mount the Microwave Oven
Installation Instructions
C
20
ATTACH THE MOUNTING PLATE
TO THE WALL
C2
Attach the plate to the wall using toggle bolts. At least
one wood screw must be used to attach the plate to
a wall stud.
Remove the toggle wings from the bolts.
Insert the bolts into the mounting plate through
the holes designated to go into drywall and reattach
the toggle wings to
3
⁄4″ onto each bolt.
1
2
You need to cut an opening in the rear wall for outside
exhaust.
• Read the instructions on the REAR WALL TEMPLATE.
• Tape it to the rear wall, lining up with the holes
previously drilled for holes A and B in the mounting
plate.
• Cut the opening, following the instructions of the
REAR WALL TEMPLATE.
1” = 2.5 cm; 1’ = 0.3 m

 Loading...