21
OUTSIDE BACK EXHAUST
(Horizontal Duct)
PREPARING THE REAR WALL
FOR OUTSIDE BACK EXHAUST
C1
Po
p
c
o
r
n
Co
n
v
e
ni
e
n
ce
Co
o
k
i
ng
E
x
p
r
e
ss
Co
o
k
P
o
t
a
to
S
t
a
rt
Pa
us
e
C
a
nce
l
O
ff
B
evera
g
e
R
e
h
eat
S
et
C
l
o
c
k
T
u
rn
t
a
b
l
e
Surf
a
c
e
Li
g
h
t
V
en
t
A
d
d
3
0
Sec
.
Po
wer
L
evel
0
8
5
2
7
4
1
9
6
3
C
o
o
k
T
i
me
D
ef
r
o
s
t
W
e
ig
h
t
/
T
im
e
T
i
me
r
O
n
/
O
f
f
INSTALLATION OVERVIEW
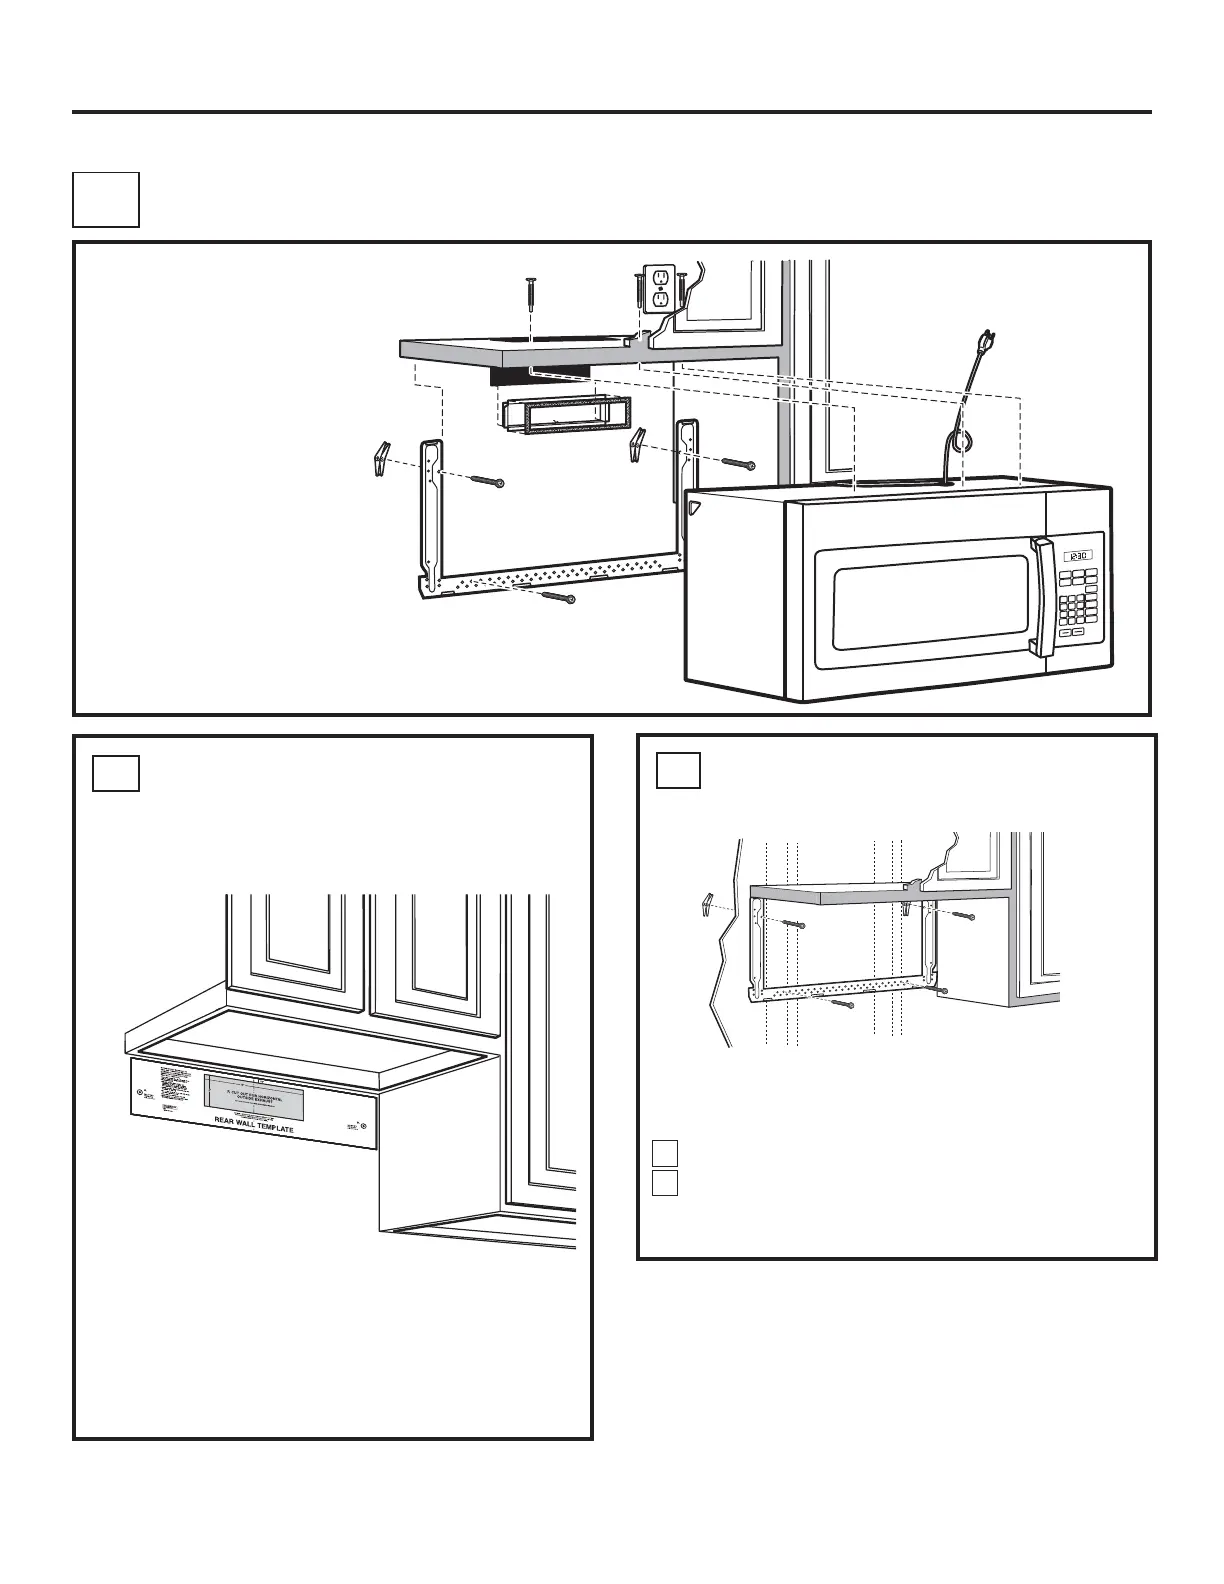
C1. Prepare Rear Wall
C2. Attach Mounting Plate to Wall
C3. Prepare Top Cabinet
C4. Adjust Blower
C5. Mount the Microwave Oven
Installation Instructions
C
ATTACH THE MOUNTING
PLATE TO THE WALL
C2
Attach the plate to the wall using toggle bolts. At least
one wood screw must be used to attach the plate to
a wall stud.
Remove the toggle wings from the bolts.
Insert the bolts into the mounting plate through
the holes designated to go into drywall and
reattach the toggle wings to
3
»4s onto each bolt.
1
2
You need to cut an opening in the rear wall for
outside exhaust.
• Read the instructions on the REAR WALL
TEMPLATE.
• Tape it to the rear wall, lining up with the holes
previously drilled for holes A and B in the
mounting plate.
• Cut the opening, following the instructions of the
REAR WALL TEMPLATE.

 Loading...