Chapter 3 Appendix
Before you begin, please prepare the following items:
• At least two SATA hard drives or SSDs.
(Note 1)
(To ensure optimal performance, it is recommended that you
use two hard drives with identical model and capacity).
(Note 2)
• Windows setup disc.
• Motherboard driver disc.
• A USB thumb drive.
Conguring the Onboard SATA Controller
A. Installing SATA hard drive(s) in your computer
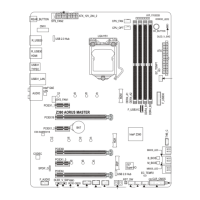
Install the hard drives/SSDs in the Intel
®
Chipset controlled connectors on the motherboard. Then connect the
power connectors from your power supply to the hard drives.
B. Conguring SATA controller mode in BIOS Setup
Make sure to congure the SATA controller mode correctly in system BIOS Setup.
Steps:
1. Turn on your computer and press <Delete> to enter BIOS Setup during the POST (Power-On Self-Test). Go
to Settings\IO Ports\SATA And RST Conguration, make sure SATA Controller(s) is enabled. To create
RAID, set SATA Mode Selection to Intel RST Premium With Intel Optane System Acceleration. Then
save the settings and restart your computer. Note: When using a PCIe SSD, make sure to set the Use RST
Legacy OROM item under Settings\IO Ports\SATA And RST Conguration to Disabled and RST Control
PCIe Storage Devices to Manual. Then depending the M.2 connector you use, set the corresponding PCIe
Storage Dev On Port XX item to RST Controlled. Finally, save the settings and exit BIOS Setup. If you want
to use NVMe PCIe SSDs to congure RAID, make sure to set NVMe RAID mode to Enabled.
2. To use the EZ RAID feature, follow the steps in "C-1." To congure UEFI RAID, follow the steps in "C-2." To
enter the legacy RAID ROM, refer to "C-3" for more information. Finally, save the settings and exit BIOS Setup.
3-1 Conguring a RAID Set
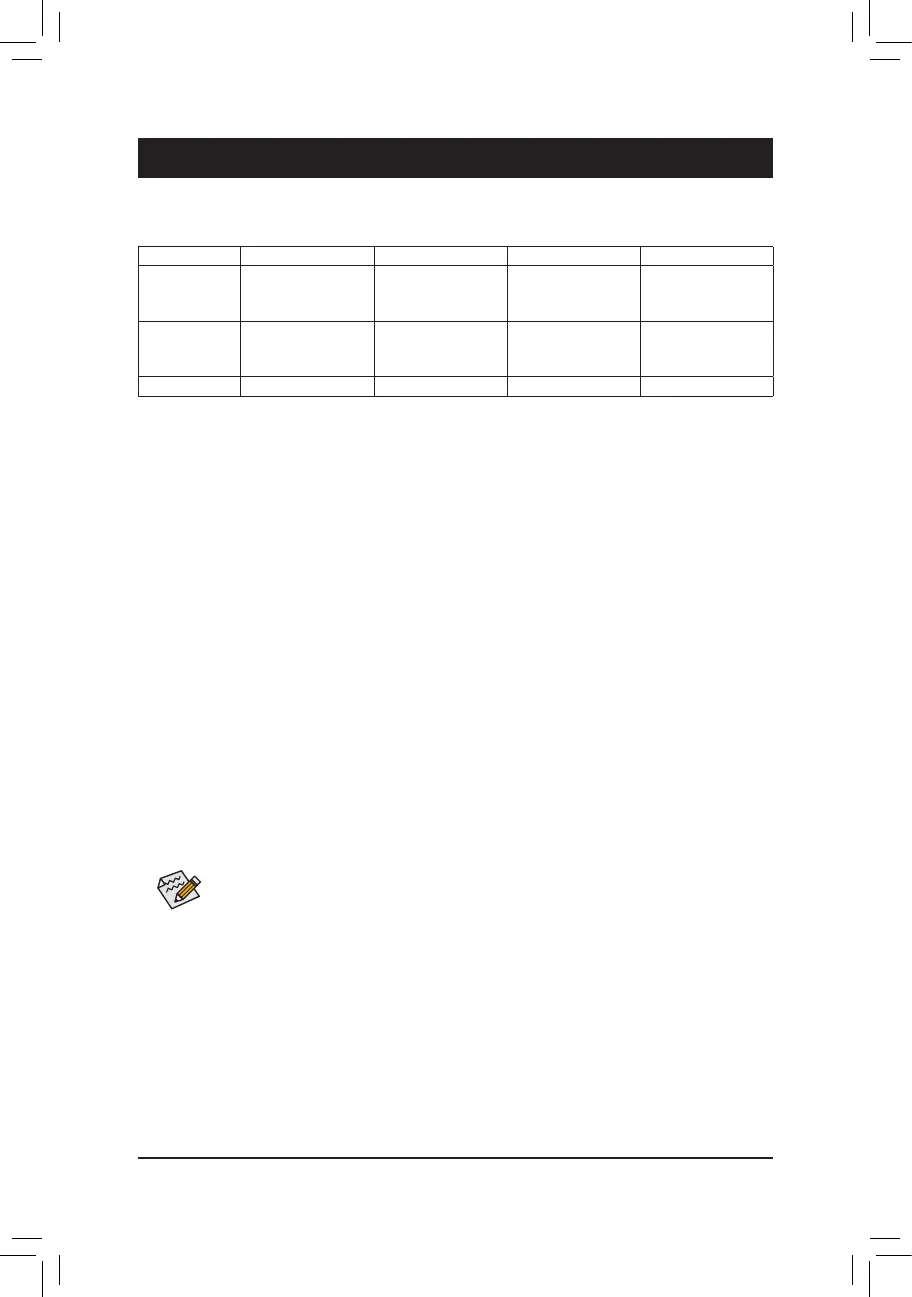
RAID Levels
(Note 1) An M.2 PCIe SSD cannot be used to set up a RAID set either with an M.2 SATA SSD or a SATA hard drive.
(Note 2) Refer to "Internal Connectors," for the installation notices for the M.2 and SATA connectors.
C-1. Using EZ RAID
GIGABYTE motherboards provide you with the EZ RAID feature, allowing you to quickly congure a RAID
array with simplied steps.
Steps:
1. After restarting the computer, enter the BIOS Setup and go to Settings\EZ RAID. Press <Enter> on the EZ
RAID item. Select the type of hard drives you use for RAID in the Type tab and then press <Enter>.
2. Go to the Mode tab to select a RAID level. RAID levels supported include RAID 0, RAID 1, RAID 10, and RAID 5
(the selections available depend on the number of the hard drives being installed). Then press <Enter> to
move to the Create tab. Click Proceed to begin.
RAID 0 RAID 1 RAID 5 RAID 10
Minimum
Number of Hard
Drives
≥2 2 ≥3 4
Array Capacity Number of hard
drives * Size of the
smallest drive
Size of the smallest
drive
(Number of hard
drives -1) * Size of
the smallest drive
(Number of hard
drives/2) * Size of the
smallest drive
Fault Tolerance No Yes Yes Yes
The BIOS Setup menus described in this section may differ from the exact settings for your
motherboard. The actual BIOS Setup menu options you will see shall depend on the motherboard
you have and the BIOS version.
- 44 -
 Loading...