4. Comm. & Monitoring 4. Comm. & Monitoring
.31..30.
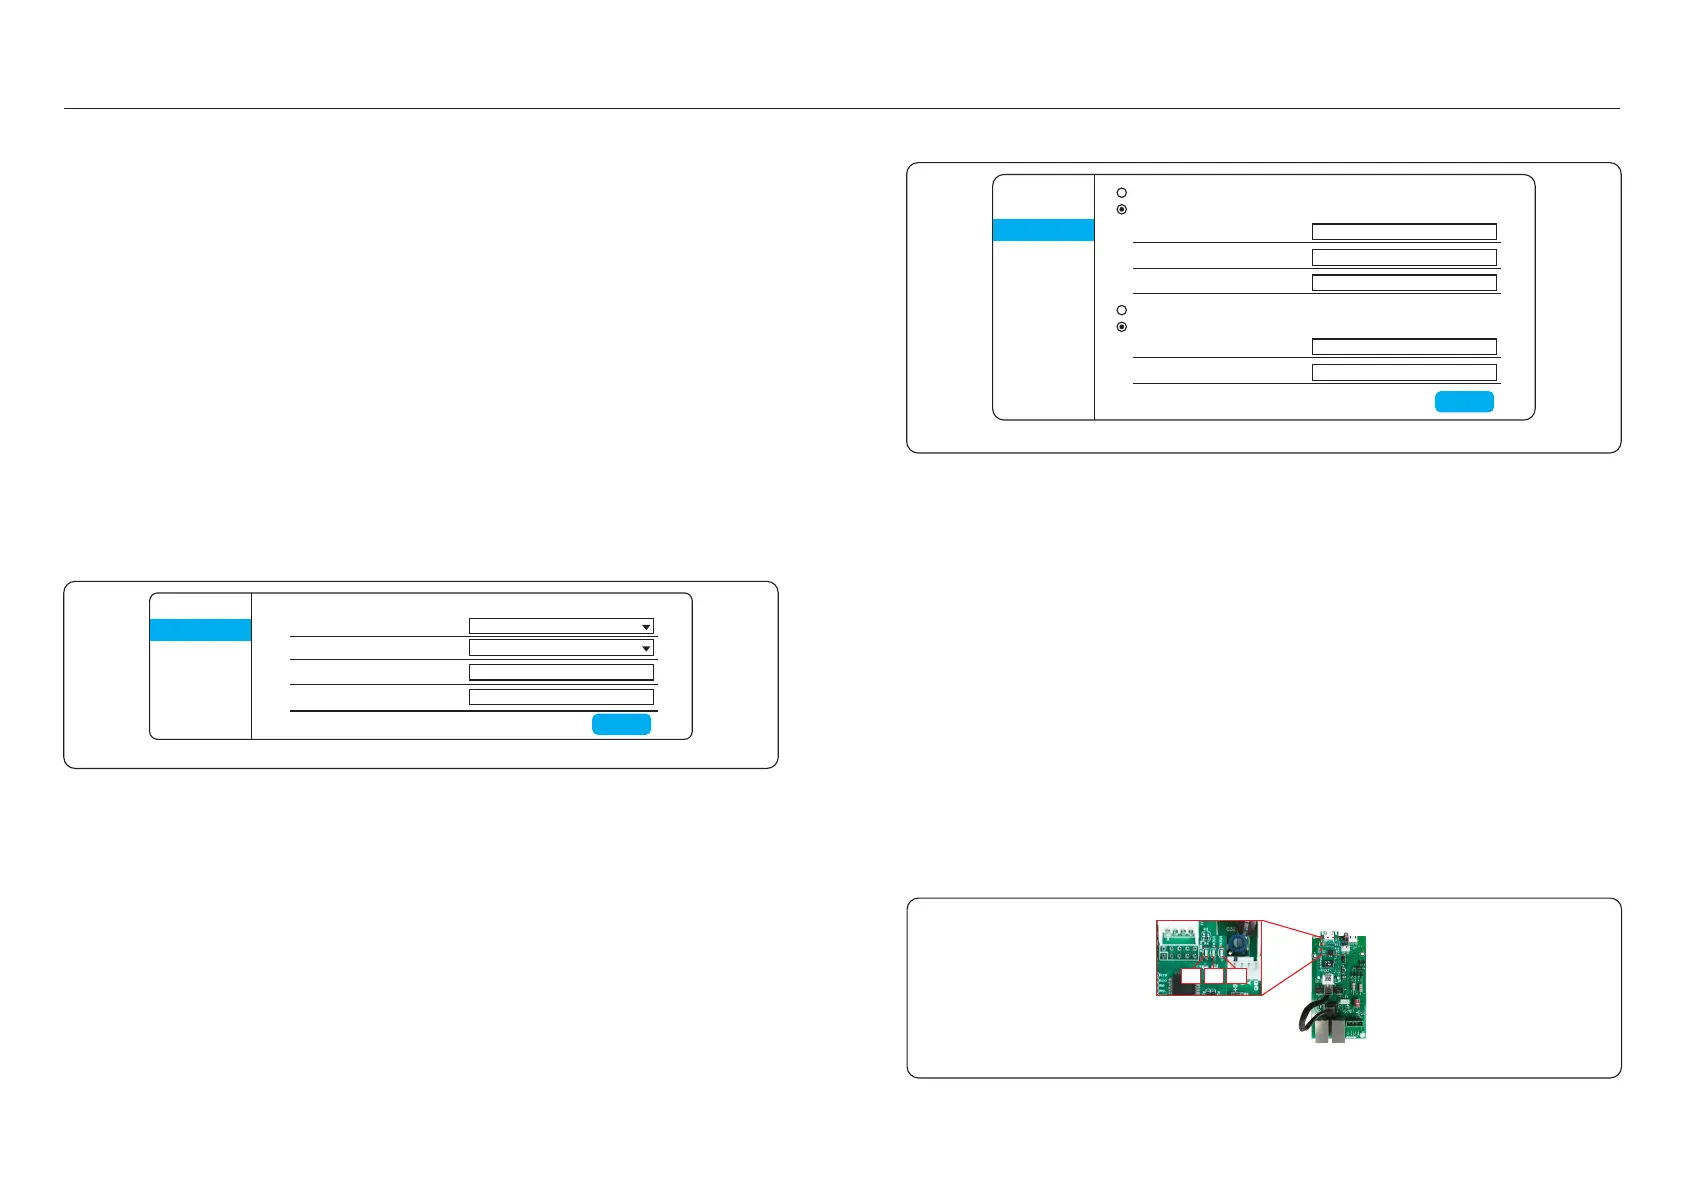
System
Work mode
Network
Manual
Restart
Reset
Upgrade
Obtain IP address automatically
Save
Figure 4.11
Use the IP address below
IP address 192.168.3.76
Subnet mask 255.255.255.0
Default gateway 192.168.3.1
Obtain DNS address automatically
Use the DNS address below
Preferred DNS server 208.67.222.222
Optional DNS server 208.67.222.222
5. Ethernet Module LED Indicators
D1 Red LED: Indicator between module and inverter.
Constantly ON indicates normal connection.
Blinking indicates it is trying to connect.
OFF indicates connection failed.
Constantly ON but blinking sometimes indicates it is transferring data between inverter.
D1 and D2 slowly blinking alternately or slowly blinking synchronously indicates abnormal
network issue.
D1 and D2 both OFF with D3 ON indicates the module is initializing.
D2 Red LED: Indicator between module and server.
Constantly ON indicates normal connection.
Blinking indicates it is trying to connect.
OFF indicates connection failed.
Constantly ON but blinking sometimes indicates it is transferring data between the server.
D3 Green LED: Module power light.
Constantly ON indicates power supply normal.
OFF indicates power supply abnormal.
2. Monitoring Platform Solis monitoring only(Static IP)
1. Connect laptop directly to Ethernet module with Ethernet cable.
2. Configure laptop IP address and navigate to 10.10.100.254 via web browser.
Enter username and password (admin,admin).
3. Select Network from left menu.
4. Select Use IP address below radio button.
Enter IP address, subnet mask and default gateway. Click Save.
5. Confirm by changing laptop to new IP address in range of inverter IP address and
navigate to new inverter IP address.
3. Modbus TCP with DHCP
1. Connect laptop directly to Ethernet module with Ethernet cable.
2. Configure laptop IP address and navigate to 10.10.100.254 via web browser.
Enter username and password (admin,admin).
3. Select Work Mode from left menu. Change Work Mode to LOCAL and Protocol Type to
MODBUS TCP
4. Connect inverters in daisy chain configuration see Figure 4.7. An IP address will be assigned
by the DHCP server. Refer to router configuration pages to find assigned IP address.
System
Work mode
Network
Manual
Restart
Reset
Upgrade
Work mode settings
Work mode
Protocol type
IP address of the device
Port of the device
Local + Remote
ModBus TCP
192.168.3.50
30003
Save
Figure 4.10
4. Modbus TCP with static IP
1. Connect laptop directly to Ethernet module with Ethernet cable.
2. Configure laptop IP address and navigate to 10.10.100.254 via web browser.
Enter username and password (admin,admin).
3. Select Work Mode from left menu. Change Work Mode to LOCAL and Protocol Type
to MODBUS TCP
4. Select Network from left menu.
5. Select Use IP address below radio button.
Enter IP address, subnet mask and default gateway. Click Save.
6. Confirm by changing laptop to new IP address in range of inverter IP address and
navigate to new inverter IP address.
D1D2D3
Figure 4.12
 Loading...