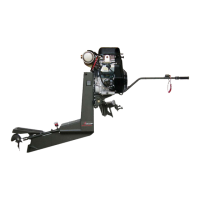
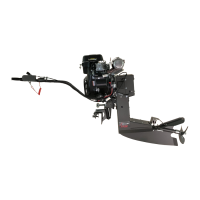
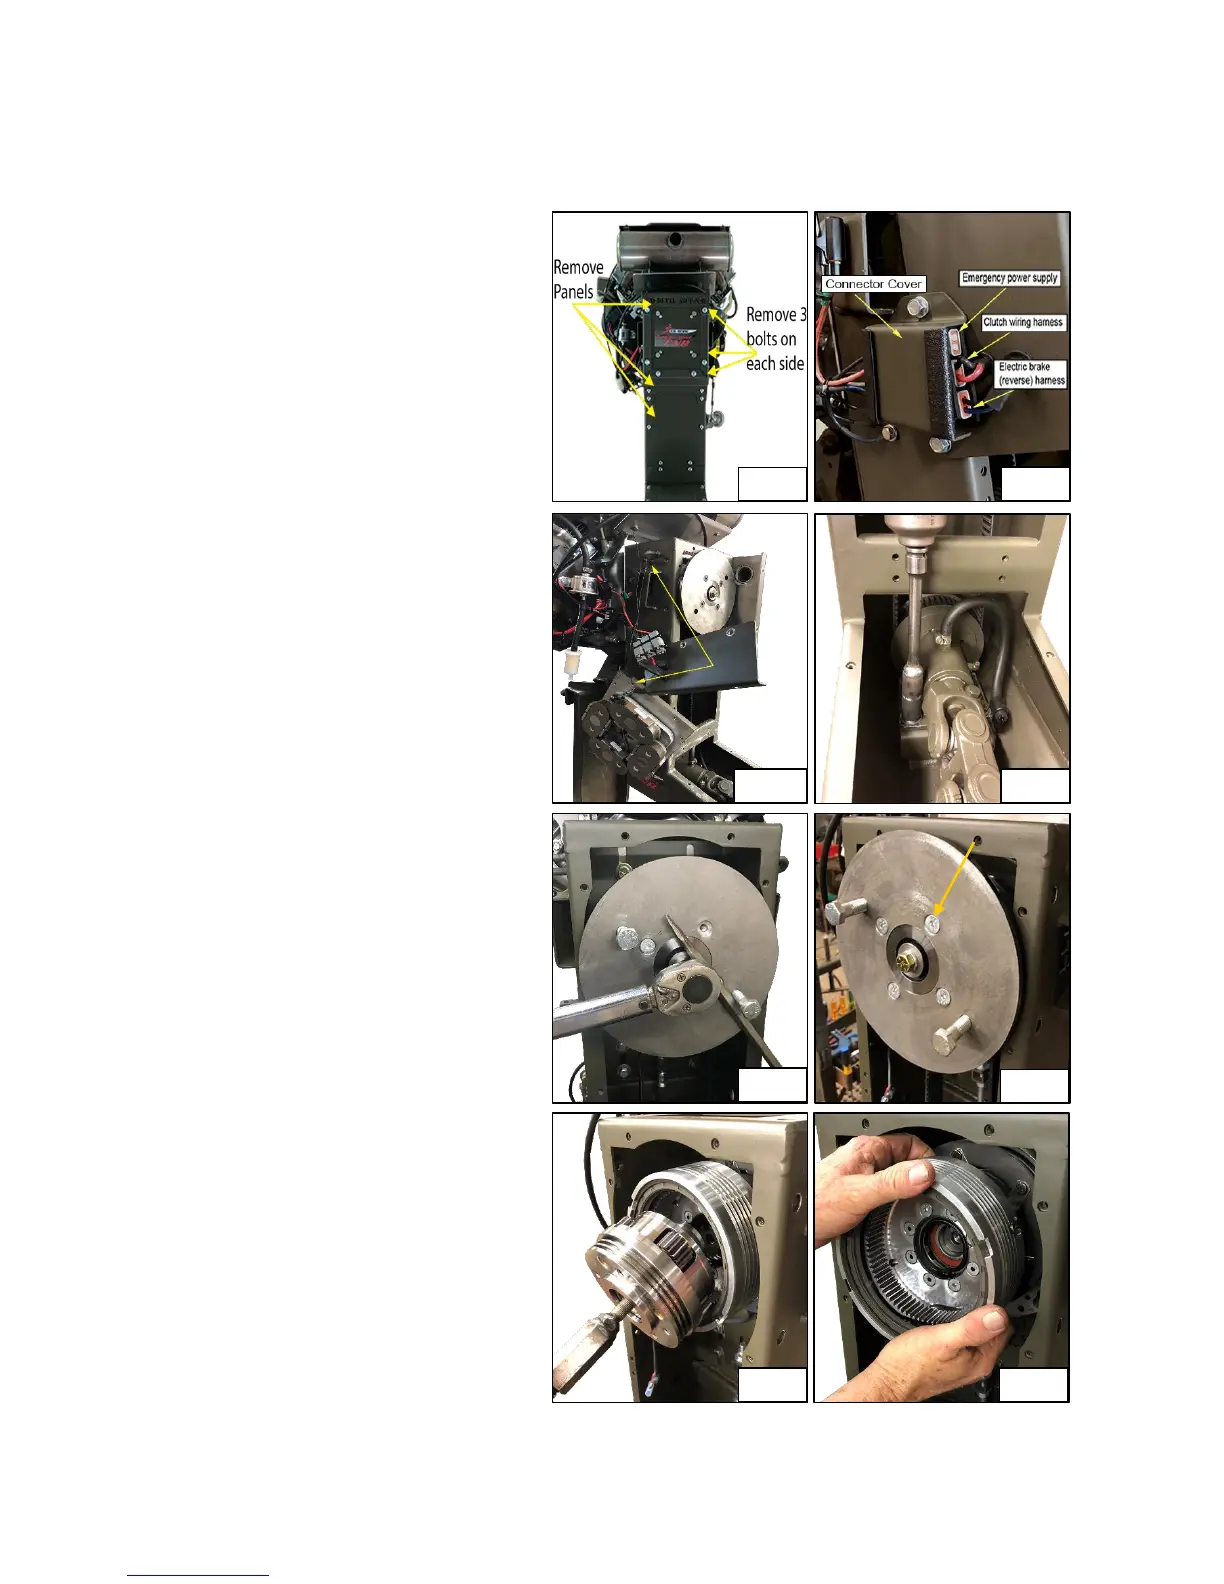
CLUTCH AND TRANSMISSION REMOVAL
1. Remove the top, back covers,
wiring harness cover and brake
plate assembly. You can remove
the side covers and brake plate in
one piece. (Fig.1)Hang the brake
plate assembly from the lift eye
on the frame. (Fig. 2 and 2a)
2. Refer to steps 2-4 of “Changing
Oil in FNR Gearbox” to drain the
oil from the gearbox before
proceeding.
3. Remove the 4 bolts in the bearing
unit using a 9/16” socket to
relieve the belt tension. Doing this
will allow you to reinstall the belt
without needing to tension it
again (Fig. 3)
4. Insert two ½” bolts through the
brake plate into the machined
stops on the transmission to lock
the transmission in place. Insert a
large screwdriver between the
bolts. (Fig. 4)
5. Loosen the center bolt on the
transmission with a 5/8” socket
but do not remove the bolt.
6. Remove the four socket head
screws attaching the brake plate
with a 3/16” hex bit socket by
holding the ½” bolts with a large
screwdriver and remove the
brake plate and 5/8” bolt you
loosened in step 5. (Fig. 5)
7. Screw the ½” x ¾” adapter into
the center of the crankshaft
extension and pull the
transmission out with the slide
hammer. (Fig. 6)
8. Slide the transmission housing
off of the crankshaft. (Fig. 7)
 Loading...