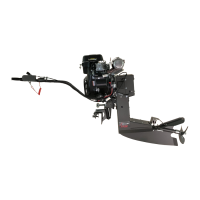
SHAFT REMOVAL
1. Leave the engine mounted on your boat in the trailering position or clamped to a solid
saw horse. Remove propeller, all nuts, and washers. (Refer to PAGE Propeller
Removal.)
2. Remove the lower cover plate to access the shaft and yoke.
3. Remove the set screw in the yoke clamped to the prop shaft. DO NOT REMOVE THE
SET SCREW FROM THE FRONT YOKE!
4. Loosen the bolt in the split yoke with two 9/16” wrenches. Drive a flat-head screwdriver
into the split yoke as parallel to the shaft as possible. DO NOT DRIVE IN
PERPINDICULAR OR AT A RIGHT ANGLE TO THE SHAFT!
5. Loosen the set screw on the eccentric collar on the upper bearing. Now rotate the
eccentric collar clockwise (standing from rear of engine) using a 1/8” pin punch or
center punch. (The collar can tighten in either direction.)
6. Install the propeller and nut and bump shaft out with a rubber mallet or rawhide
hammer by tapping on the propeller.
SHAFT INSTALLATION
1. Slide the shaft through the housing slowly until it comes out of the upper bearing
housing. Slip the eccentric collar over the shaft and leave it loose.
2. Install the shaft key ¾ of the way into the yoke and slide the shaft to the yoke with a
pair of channel locks. Now tap the shaft in about ¾” with a ¾” coupling nut or our shaft
puller. At this point, remove the lubricator and fill the tube with grease until grease
comes out at the grease fitting. Now install a 1/8” pipe plug and finish filling the tube
slowly until grease starts coming out of the lower bushing. At this time we recommend
removing the pressure lubricator and taking it apart and cleaning it thoroughly. Use
paper towels or soap and water, no solvents. Stretch the spring to insure proper
pressure.
3. Now install the lower seal housing by applying silicone inside the lower seal housing,
in front of the threads. Tighten the lower seal housing with a pipe wrench and install
the set screw with blue Loctite. Install the lower seals as described on PAGE 22. Install
the prop using steps 1-5 in “PROPELLER INSTALLATION” on PAGE 23. Now drive
the shaft in until you have 1/8” to 3/16” air gap between the prop and the LHC1.
4. Countersink the set screw hole in the split yoke with a 5/16” drill bit. Tighten the bolt
on the yoke at this time using two 9/16” wrenches extremely tight. Install the set screw.
Install the lower seal housing cap and fill the pressure lubricator until it is ¾ full. You
are now ready to install the propeller.

 Loading...