Unstirred water bath SAP, JBA, JBN Service Manual (Version 2.0) July 2014
31667 Page 10 of 23
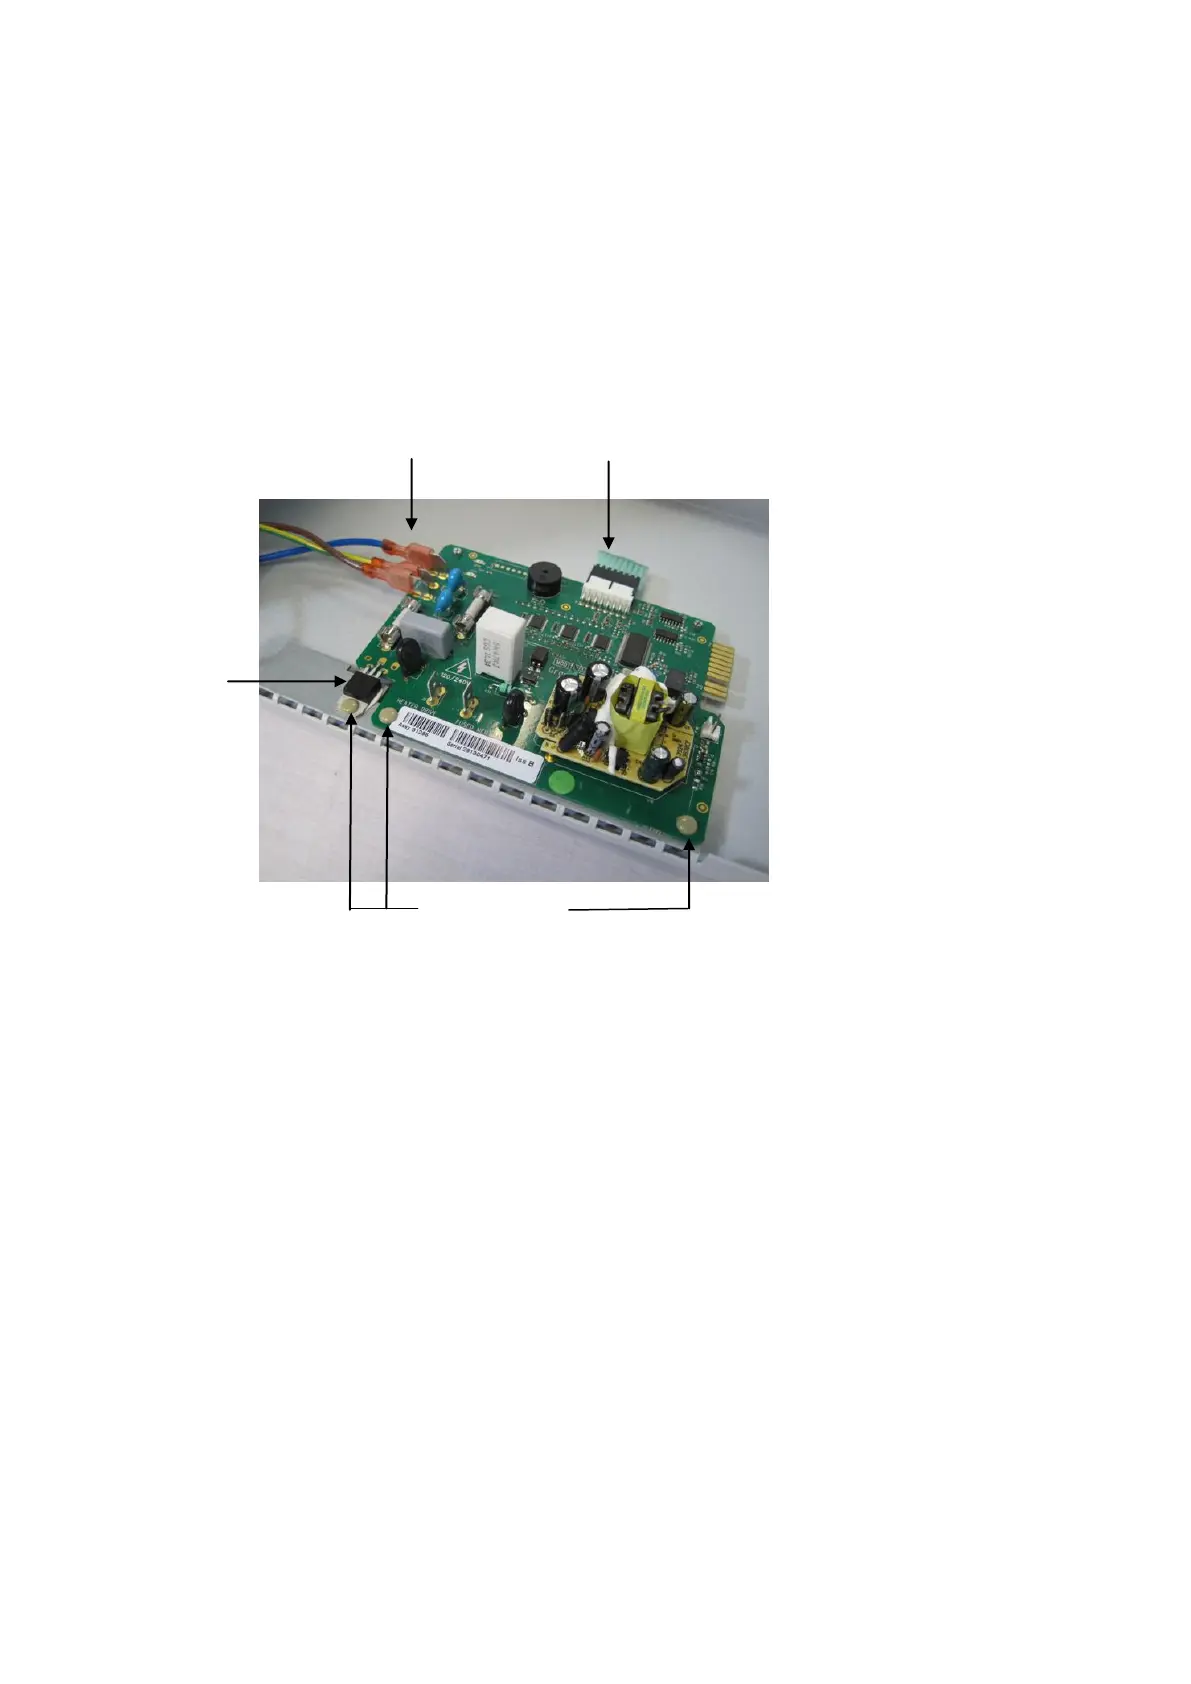
2.3.3 Removing the PCB assembly
Following on from the instructions above
Disconnect the mains cables (brown, blue and green/yellow) from the PCB
Disconnect the key pad connector from the back of the PCB
On 2,5 and 12 litre and Dual baths lift out the 3off plastic rivets at the front of the PCB flush
cutting side cutters. On 18, 26 and 34 litre baths lift out the 2 plastic rivets at the front of the
PCB and unscew the M3 screw holding the TRIAC in place.
Gently lift the PCB to release it from the locating fixings at the back of the PCB
2.3.4 Removing the front panel membrane keypad
Following on from the instructions above:
The membrane is fixed to the outer bath case by adhesive. Use the fine blade to lift the
corner of the membrane then gently peel from the front of the bath case. Once removed
membrane keypad cannot be re-used and must be replaced with a new part.
2.4 Reassembling the unit
Follow the instructions above in reverse using the existing components or, if faulty, replaced
with new components. Ensure the following :
The tank is fitted the correct way around.
The TRIAC component is correctly seated flat on the chassis with heat-sink paste and secured
with a plastic rivet or M3 srew for larger baths.
Correct new heat resistant ties are used to secure the tank. These are available from Grant
Instruments. Part no. 31308 – All bath sizes except 18 litre. Part no.31309 – 18 litre
WARNING: The unit must be tested and inspected to verify that it is electrically safe after
re-assembly – see section 4.3
 Loading...