Cassette Type Fan Coil Unit
7
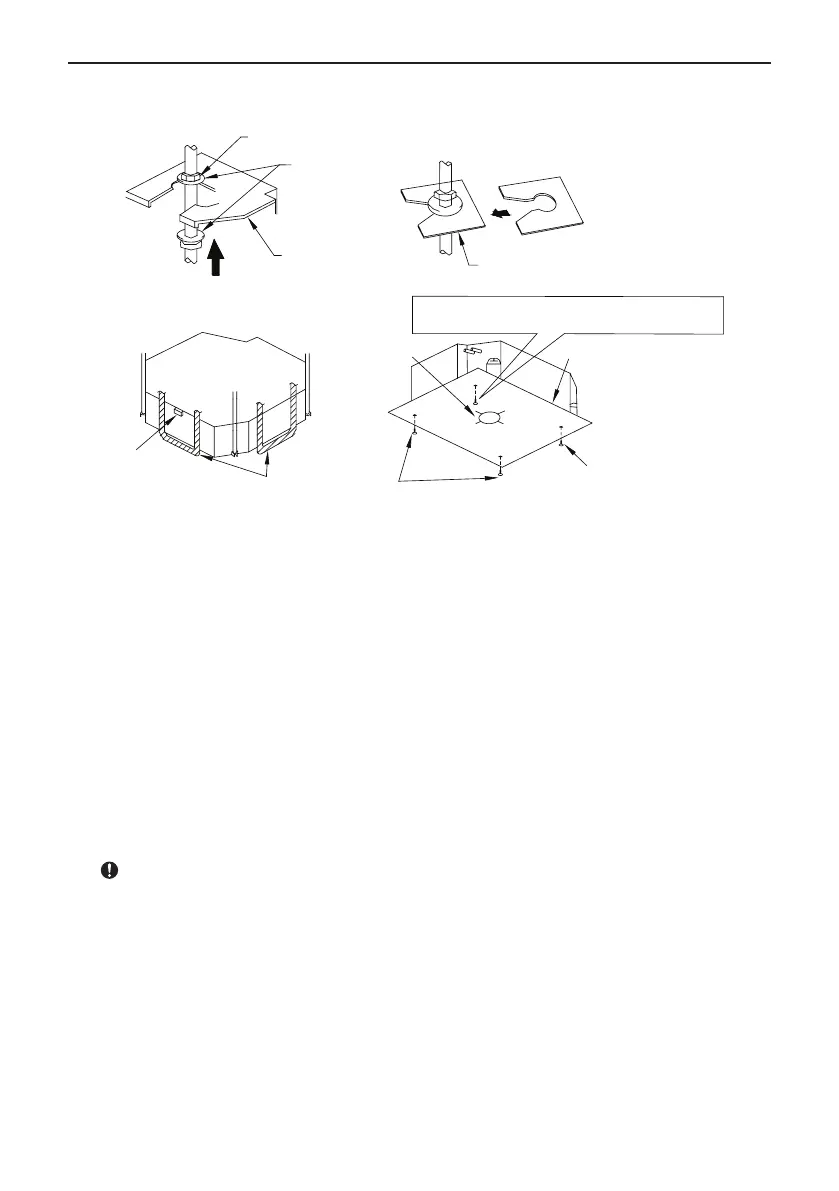
5.4 Main body of hoisting unit
Water level
Polyethylene pipe
Bolt(attachment)
Tighten (double nuts)
Hoisting stand
Center of the ceiling
opening
Gasket (attachment)
Nut (field supplied)
Bolt(attachment)
paper template
[Fix the paper template]
[Fix the gasket firmly]
Insert
Gasket anchor board (attachment)
One bolt located at one corner of the outlet pipe
should be fixed on one corner of the drainage slot.
[Fix the hoisting stand firmly]
Fig.8
(1) The primary step for the unit.
When attach the hoisting stand on hoisting screw, do use nut and gasket individually at the
upper and lower of the hoisting stand to x it. The use of gasket anchor board can prevent gasket
break off.
(2) Use install cardboard (as Fig.8).
1) The central mark of the ceiling opening is marked on the install cardboard.
2) Install the install cardboard on the unit by bolt , and x the angle of the drainage pipe at the
outlet vent by bolt.
(3) Adjust the unit to the suitable install place(as Fig.8).
(4) Check if the unit is horizontal(as Fig.8).
Inner drainage pump and bobber switch are included in the unit, check if 4 angle of every unit
are horizontal by water lever. (If the unit is slant toward the opposite of the coagulate water ow,
there may be malfunction of the bobber switch and lead water drop.)
(5) Backout the gasket anchor board used to prevent gasket break off and tighten the nut on it.
(6) Backout the install cardboard.
Please do tighten the nuts and bolts to prevent air conditioner break.
6 Drainage pipe
6.1 Installation of drainage pipe
(1) The diameter of the drainage pipe should be equal or bigger than to the diameter of the
connecting pipe tube. The outer diameter of pipe size is 35mm ( FP-(85~200)XD(S,M)/B-T ).
(2) Keep the drainage pipe short and sloping downwards at a geadient of at least 1/100 to prevent
air pockets from forming(as Fig.9).
(3) If the drainage hose cannot be sufciently set on a slope, add a drainage raising pipe.
(4) To keep the drainage hose from sagging, keep space between hanging hooks at 1~1.5m(as
Fig.9).
 Loading...