U-Match Series DC Inverter Service Manual
134
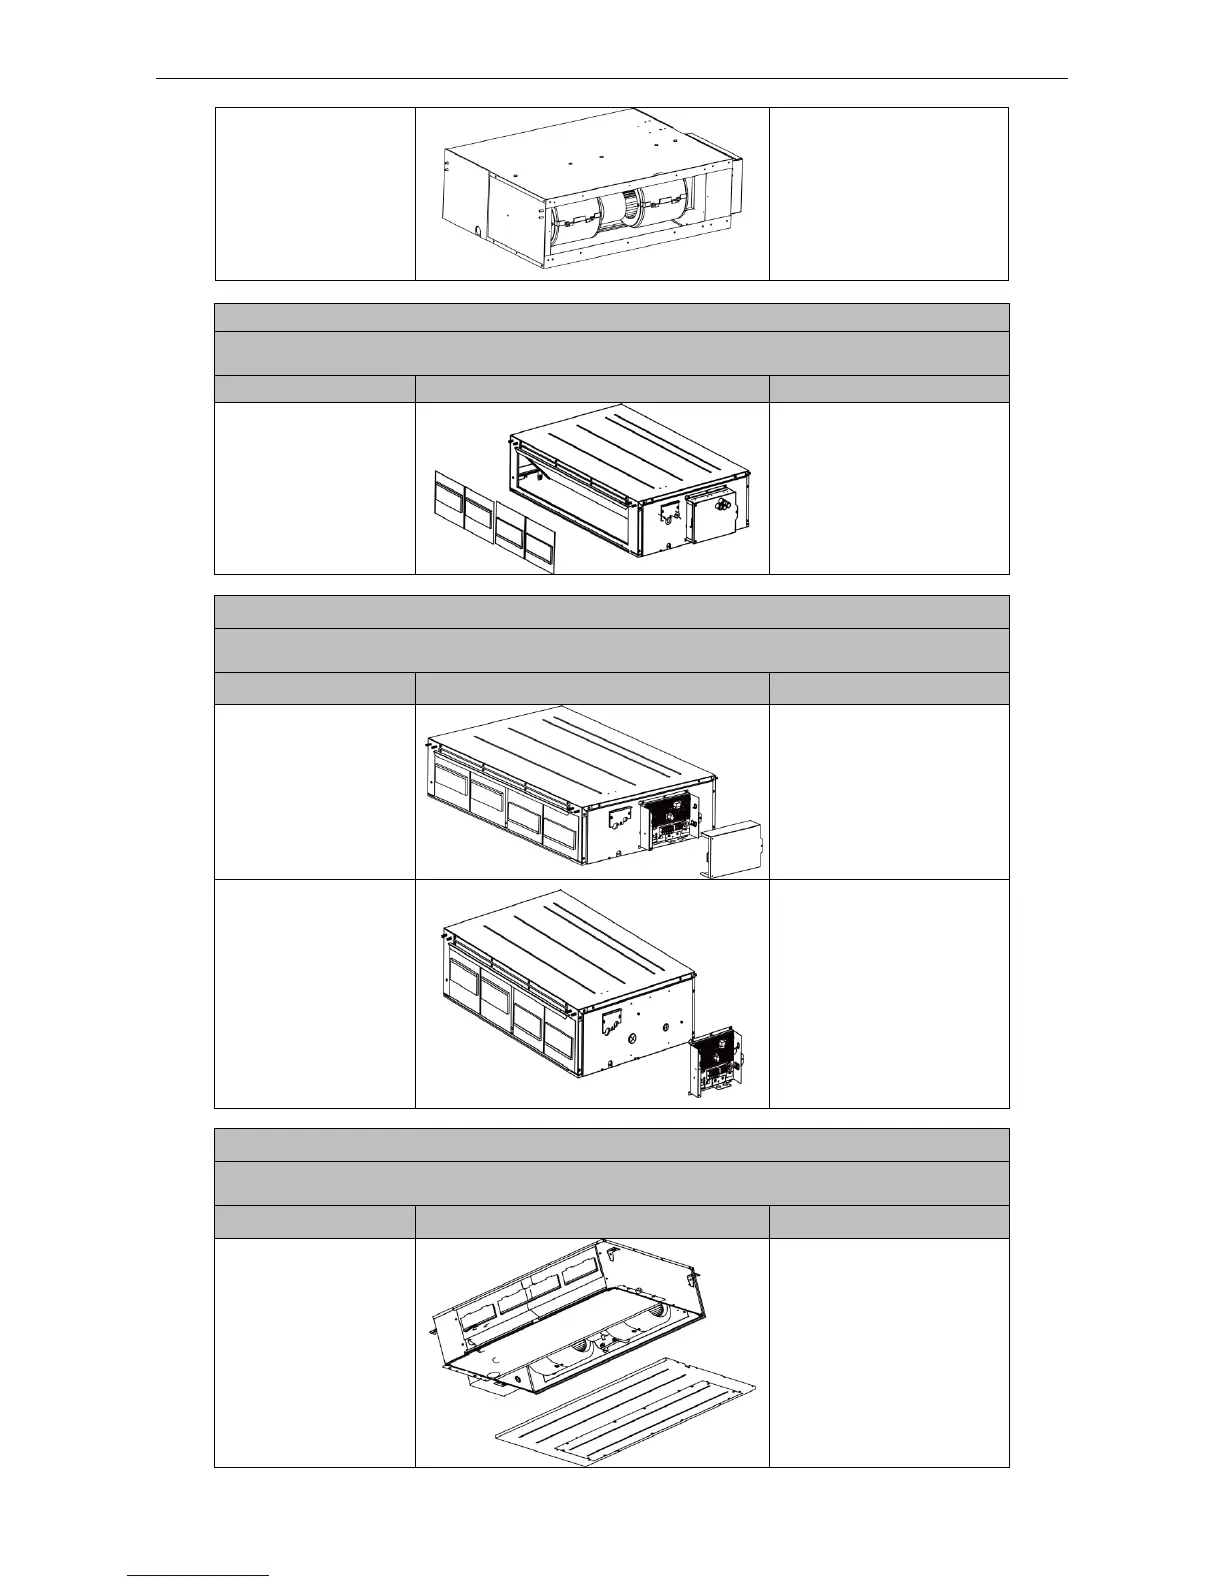
7. Assemble the unit in
reverse to the
disassembly
procedures
Assemble the unit in reverse
to the disassembly
procedures and energize it
for testing.
Disassembly of filter screen for return air.
Remark: Make sure that the power supply is cut off before disassembling and protect all the parts during
disassembly. Do not put filter screen near the high temperature heat source.
1.Disassembly of filter
screen for return air
Compress the filter screen
for return air down on the
guide slot sponge, and
remove according to the
direction shown by the arrow.
There are 2 filter screens for
return air.
Disassembly of electrical parts box cover panel and electrical parts box
Remark: Make sure that the power supply is cut off before disassembling and protect all the parts during
disassembly, especially the electrical components. Do not dampen or hit them
1. Disassembly of
electric box cover
Disassemble the screw
according to the position
shown in the circle and the
box and remove the electric
box in the direction of the
arrow.
2. Disassembly of
electric parts box
Disassemble the fastening
screw and remove the
electrical parts box. (As is
shown in the graph, there are
2 fastening screws in the
circle and the screws in the
direction of arrow shall be
disassembled too.)
Disassembly of water-containing plate
Remark: Make sure that the power supply is cut off before disassembling and protect all the parts during
disassembly.
1. Disassembly of cover
plate
Disassemble the fastening
screws on the cover plate
and remove the cover plate.
(As is shown in the graph,
circle represents 6 fastening
screws under the cover plate
and the box represents two
fastening screws on
water-containing plate
symmetrically arranged both
on left and right.)
 Loading...