Installation
14
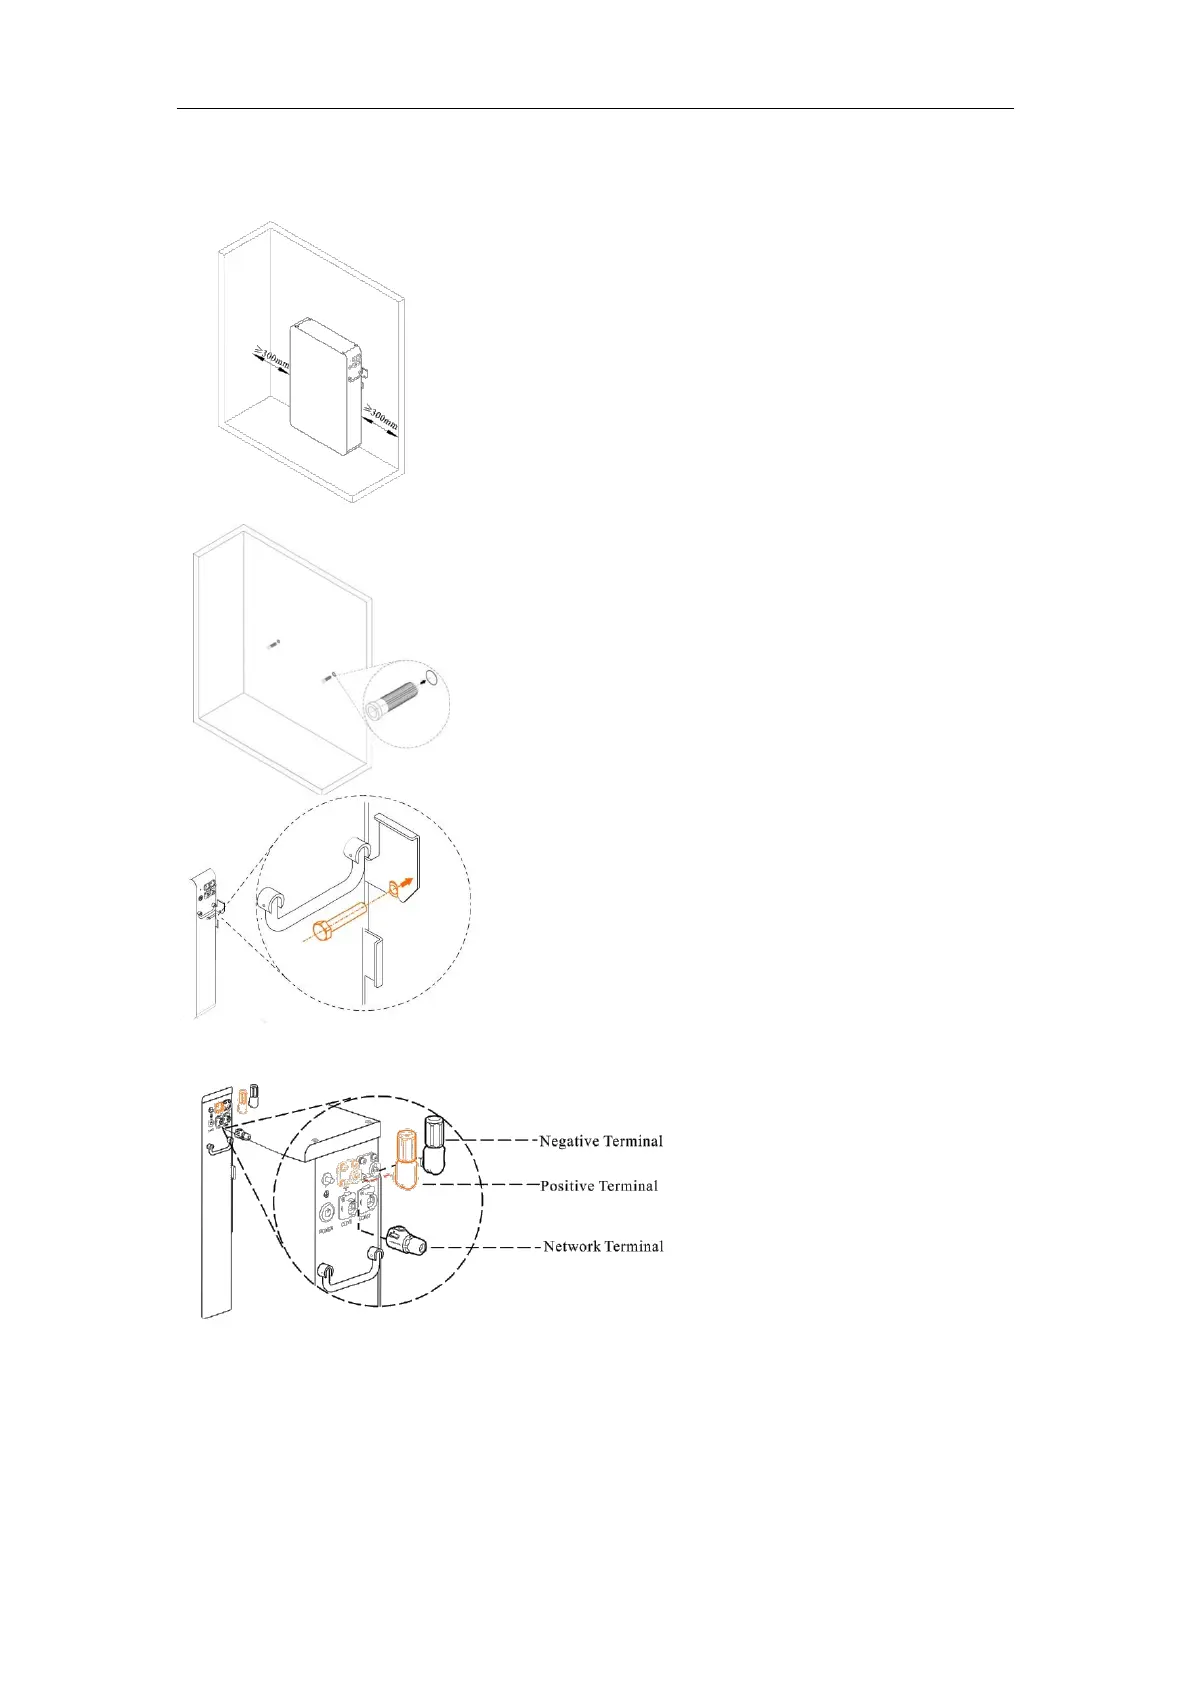
3.3.2 Floor Standing Installation
Step 1 Confirm installation spot.
Place battery in the to-be installed area. Rotate the left latch
leftward and the right latch rightward until they are
perpendicular to the battery. Keep the distance between
wall and battery as shown (300mm, 300mm). Leave a
minimum clearance of 133mm before the front surface of
battery. Use pencil to mark where the notches of two
latches are and confirm the two drilling spots. Move
battery away.
Choose an alloy drill bit with a diameter of 12mm and install
it in the drill. Drill two holes in the spots that have been
confirmed in step 1. Keep the drilling depth as least 60mm.
Clean the soil and drive expansion tube into hole.
Step 3 Insert power cables and network cable
into battery terminals.
Check and confirm battery is well fixed
to wall. Plug the power cables into
battery terminals. Plug the CAN
network cable into network ports of
battery and PCS. Please refer to Section
4.2 for cable making details.
Move battery back to the place confirmed in step 1.
Drive M8 screw through notch of latch into wall.
 Loading...