11
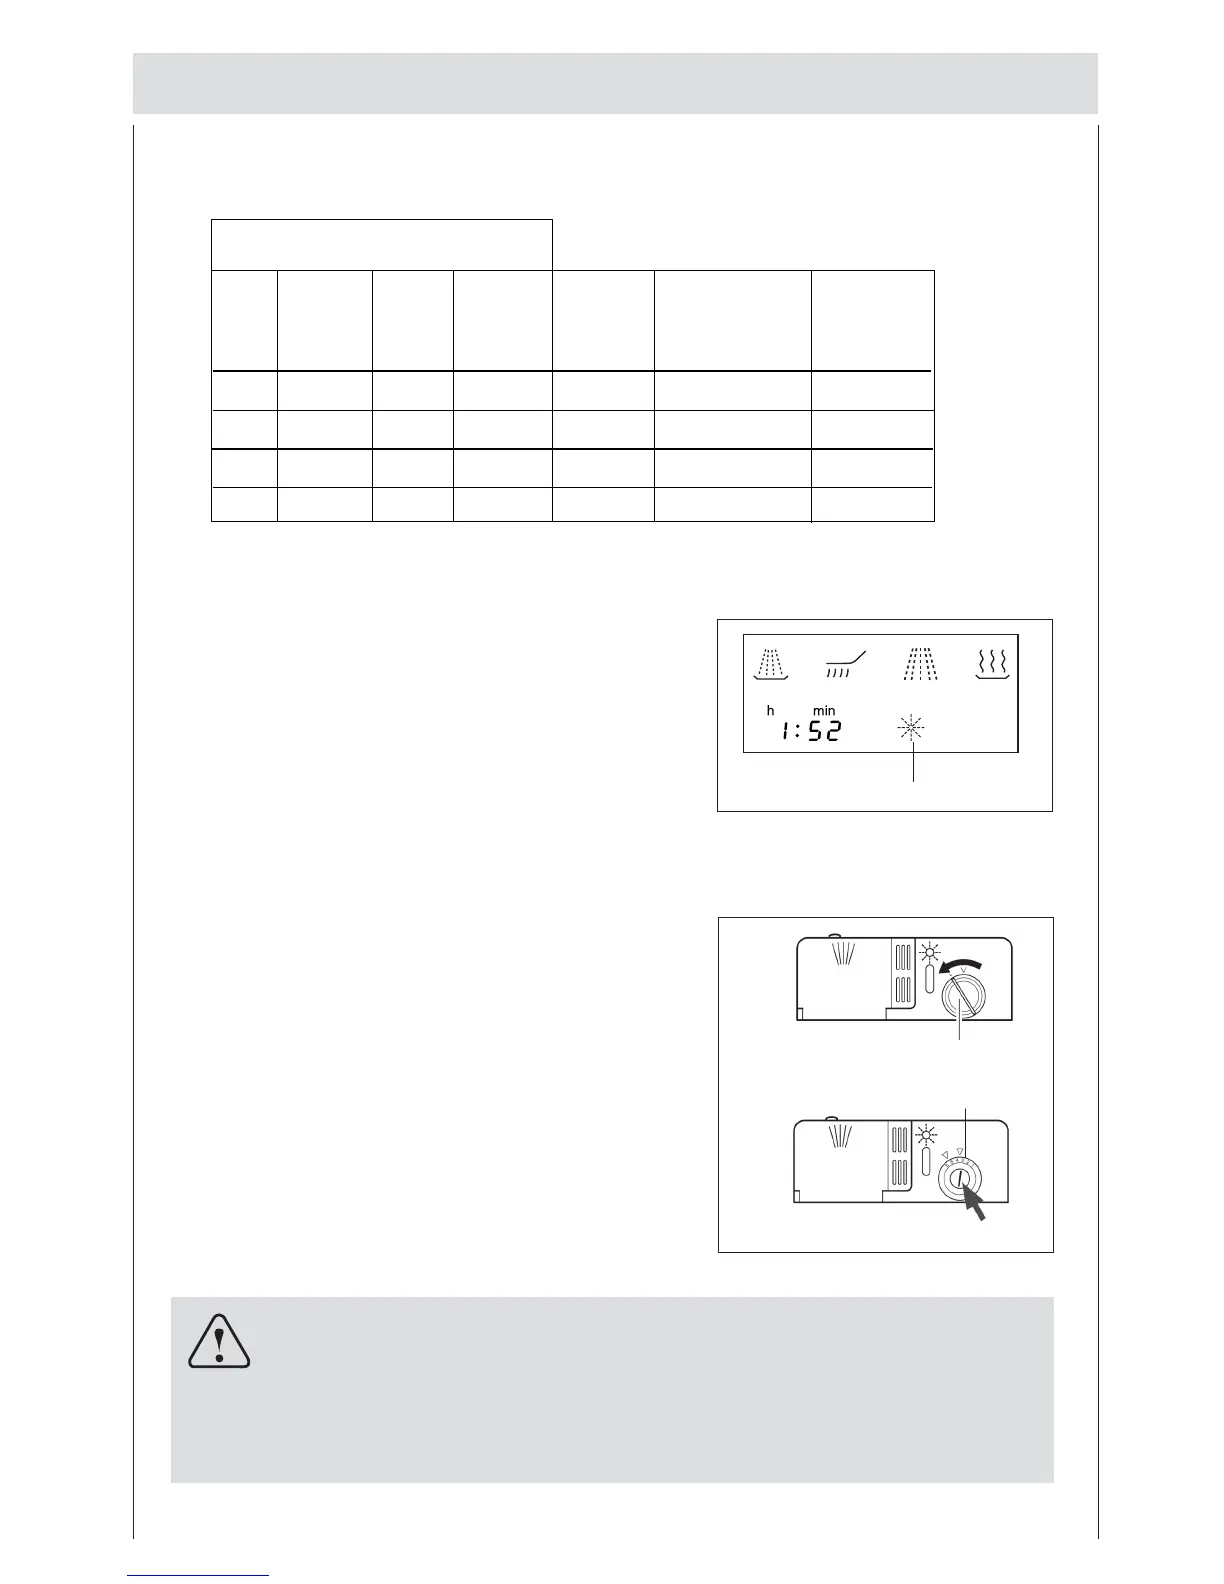
It is recommended that adjustments be made in accordance with the following table:
Rinse aid
This product makes dishes sparkle and helps them to dry
without spotting. The dispenser is located on the inside panel
of the door and should be filled after low rinse aid indicator
“ 2 ” lights.
Loading the rinse aid
Regardless of the type of detergent dispenser installed on
your appliance, you must proceed as indicated below when
loading the rinse aid.
To open the dispenser, turn the " 3 " cap in an anti-clock-
wise direction and then pour in the rinse aid, making sure
not to overfill. The amount of rinse aid used for each cycle
can be regulated by turning the "4" dose adjustor, located
beneath the "3" cap, with a screwdriver. There are 6 differ-
ent settings; the normal dosage setting is 3.
Important
Proper dosage of the rinse aid improves drying.
If drops of water remain on the dishes or spotting occurs, the dosage adjus-
tor should be turned to a higher setting.
If the dishes have white streaks, turn the dosage adjustor to a lower setting.
3
4
2
Water Hardness
Clarke
degrees
ºdH
mmol/l
Selector
position
Salt
consumption
(Grams/cycle)
Autonomy
(cycles/2kg)
014 MNT MNIT
NIUQIQNUQQNQPS
PSTN QRUV QIRUIV
[UV[TN [UIV
L
=?J?
jba
LM
OM
QM
SM?H?
SM
QM
OR
Level
1
2
3
4
 Loading...