10
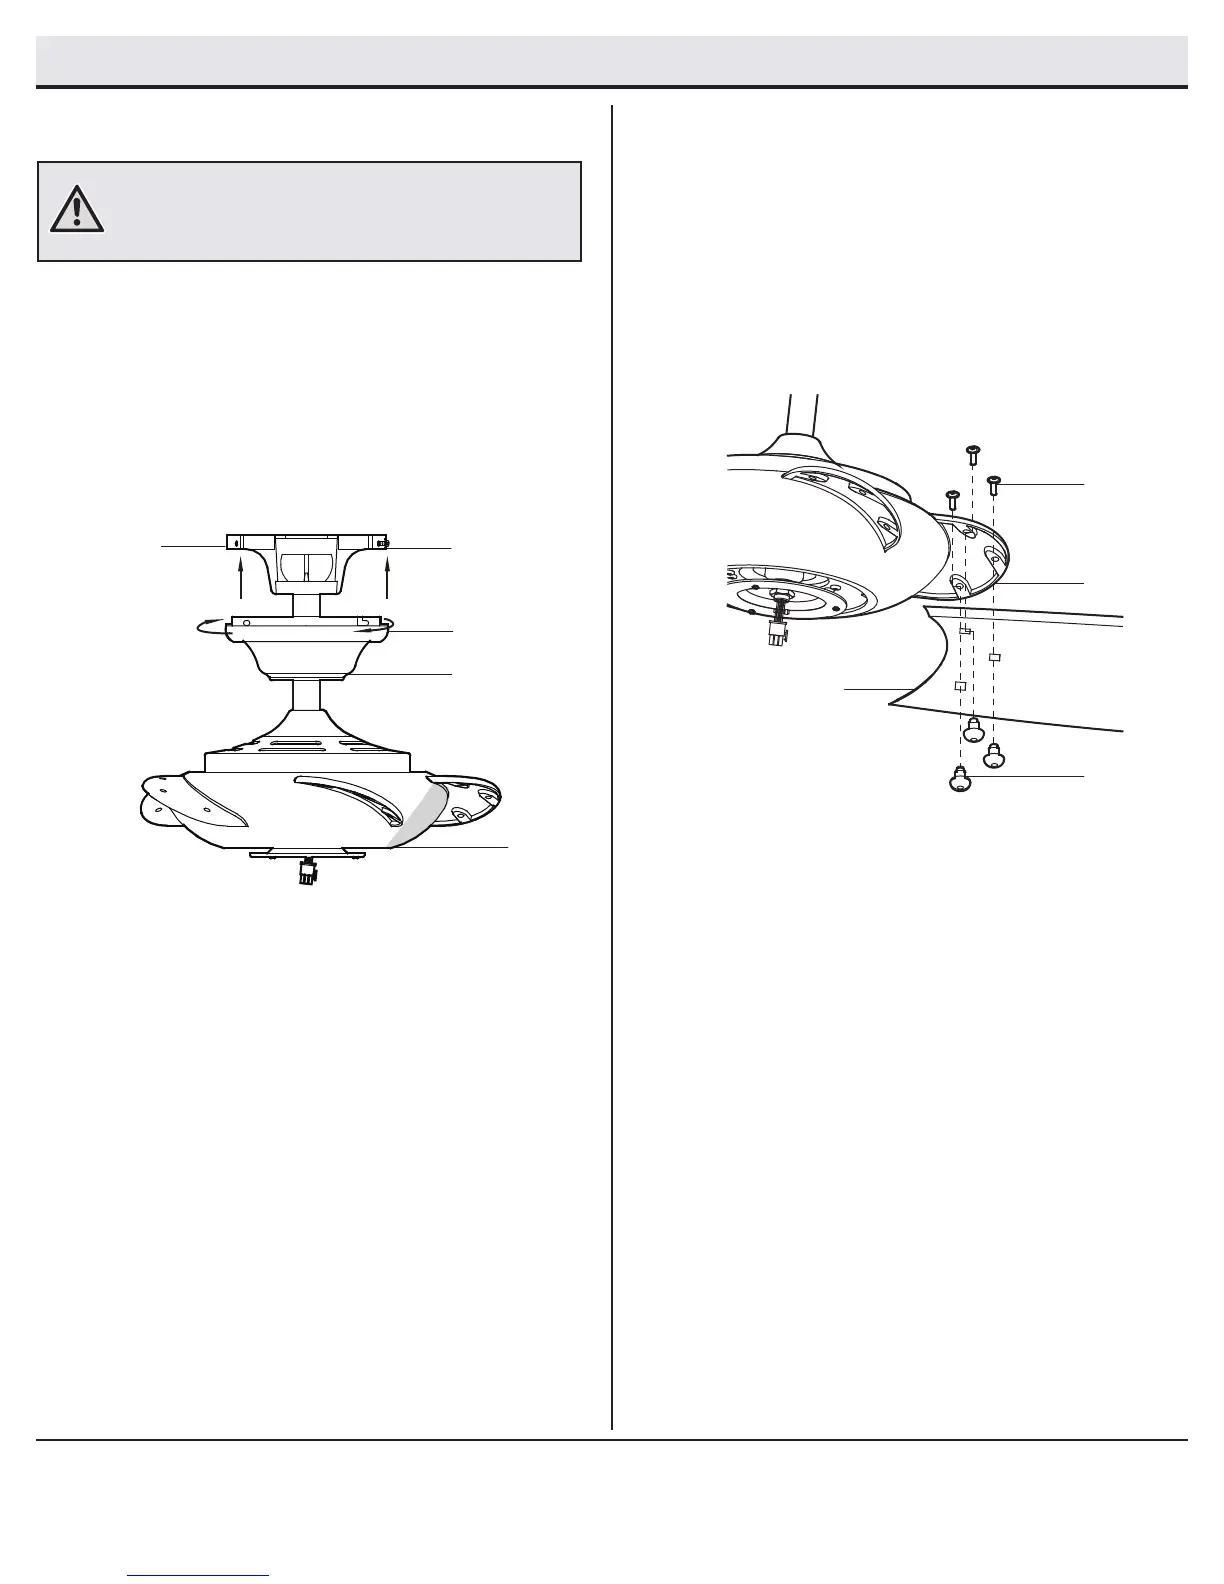
Attaching the fan blades
5
□ Attach blade (G) to blade bracket (J) using the decorative
nuts (CC) and blade attachment screws (AA) provided. Insert
a blade attachment screw (AA) through a hole in the blade
(G) and the blade bracket (J) and into the decorative nut (CC).
Repeat for the two remaining holes in the blade (G).
□ Tighten each screw (AA) securely.
□ Repeat these steps for the remaining blades.
D
AA
G
CC
Mounting the fan
□ Align the locking slots of the ceiling canopy (C) with the two
screws (SS) in the mounting bracket (A). Push up to engage
the slots, and turn clockwise to lock the canopy (C) in place.
□ Firmly tighten the two mounting screws (SS).
□ Install the remaining two mounting screws (SS) into the holes
in the canopy (C) and tighten rmly.
□ Install the decorative canopy ring (L) by aligning the ring’s
slots with the screws in the canopy (C). Rotate the canopy
ring (L) counter-clockwise to lock it in place.
4
WARNING: When using the standard ball/downrod mounting, the
tab in the ring at the bottom of the mounting bracket must rest in
the groove of the hanger ball. Failure to properly seat the tab in
the groove could cause damage to the wiring.
SS
C
D
A
L
Assembly - Hanging the Fan (continued)
 Loading...