7 – English
WARNING:
Do not allow familiarity with the product to make you
careless.Rememberthatacarelessfractionofasec-
ondissufficienttoinflictseriousinjury.
WARNING:
Alwaysweareyeprotectionwithsideshieldsorgoggles
markedtocomplywithANSIZ87.1alongwithbreath-
ingprotection.Failureto do socould resultin fluids
enteringyoureyesresultinginpossibleseriousinjury.
WARNING:
Do not use any attachments or accessories not recom-
mendedbythemanufacturerofthisproduct.Theuse
of attachments or accessories not recommended can
resultinseriouspersonalinjury.
WARNING:
Use safety equipment. Protect your eyes, skin, and
lungswhilemixing,filling,spraying,andcleaning.Fail-
uretodosomayresultinseriouspersonalinjuryand
damagetoproperty.
NOTICE:
Before each use, inspect the entire product for dam-
aged, missing, or loose parts such as screws, nuts,
bolts,caps,etc.Tightensecurelyallfastenersandcaps
and do not operate this product until all missing or
damagedpartsarereplaced.Pleasecontactcustomer
serviceoranauthorizedservicecenterforassistance.
APPLICATIONS
Youmayusethisproductforthepurposelistedbelow:
For use with most consumer-grade home-and-garden
chemicals such as insecticides, fungicides, weed killers,
andfertilizers
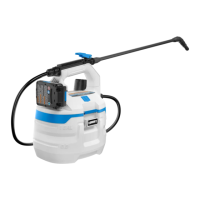
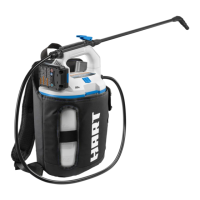
INSTALLING/REMOVING BATTERY PACK
See Figure 5.
WARNING:
Alwaysremovebatterypackfromyourtoolwhenyou
areassemblingparts,makingadjustments,cleaning,
orwhennotinuse.Removingbatterypackwillprevent
accidental starting that could cause serious personal
injury.
To install:
Aligntheraisedribonthebatterypackwithgrooveinthe
batteryportandplacethebatterypackinthetool.
Make sure the latch on the battery pack snaps in place
and that the battery pack is secured in the tool before
beginningoperation.
To remove:
Depress the latch on the battery pack to release the
batterypackandremoveitfromthetool.
For complete charging instructions, see the operator’s
manualsforyourbatterypackandcharger.
WARNING:
Risk of fire or explosion. Spray area must be well-
ventilatedandawayfromsparksorflames.
TURNING THE SPRAYER ON/OFF
See Figures 6 - 7.
To turn the sprayer ON,depresstheON/OFFbutton.
To start the flow of liquid at the spray wand, depress the
trigger.
To stop the flow of liquid at the spray wand, release the
trigger.
To turn the sprayer OFF, depress the ON/OFF button
again.
LOCK-ON
See Figure 7.
The lock-on feature is convenient when spraying for an
extendedperiodoftimeorwhencoveringalargearea.
Tolock-on,depressthetriggerandslideitforward.
To release the lock-on, depress the trigger and slide it
backward.
NOTE: Make sure the trigger is not locked on before
insertingthebatterypackintothesprayer.
ADJUSTING THE SPRAY NOZZLE
See Figure 8.
Thespraynozzlecanbeadjustedfromastreamtoafan
spray.
Removethebatterypackfromthetool.
Loosenthenozzleforastream.
Tightenthenozzleforafanspray.
OPERATION
 Loading...