- 7 -
Chapter 3 Installing the 4/8 Switch
Caution:
Only professionals are allowed to install or replace the devices of the switch.
3.1 installation equipment
The switch adopts the way of clamping rail installation. Please select the most suitable
installation location according to the specific installation environment
3.2 Track installation
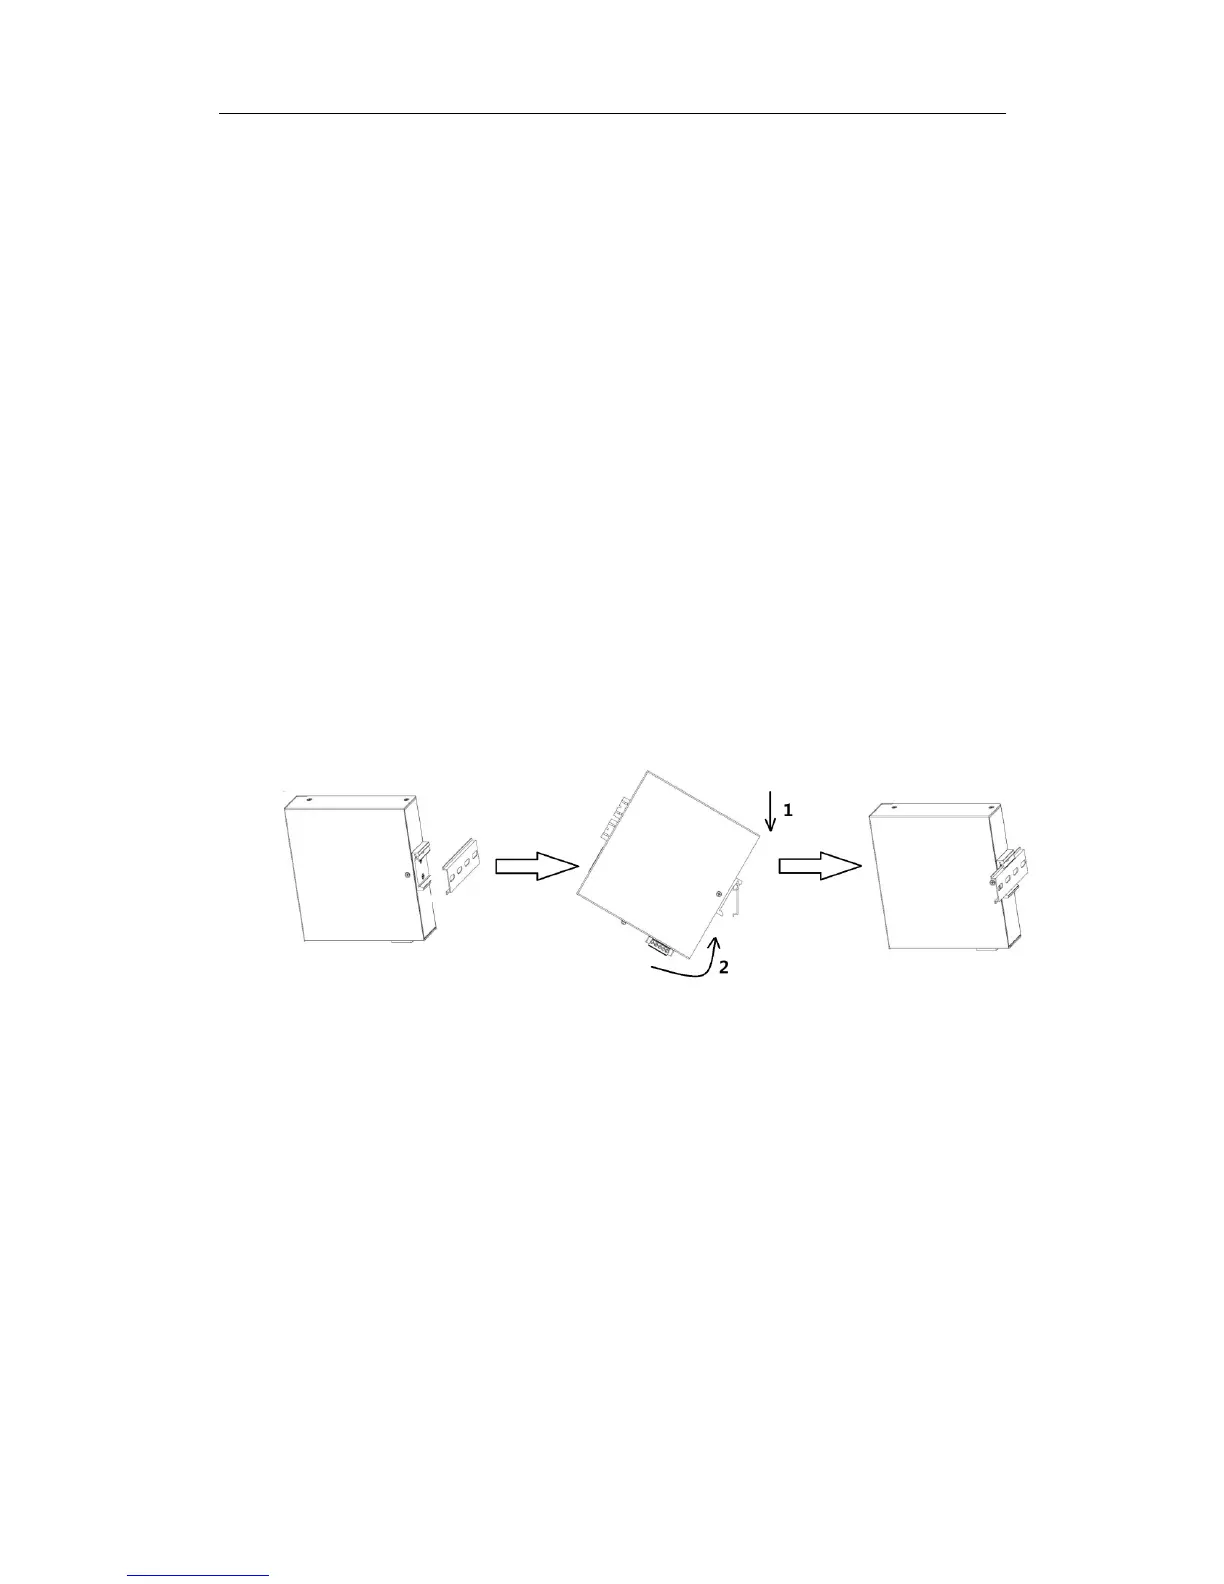
The switch supports card rail installation, and the specific installation steps are as follows:
select the installation location of the switch to ensure that there is adequate
installation space.
insert the upper part of the DIN card rail seat into the DIN rail and rotate the
device at the lower end of the switch, as shown in the arrow 2 in the next figure,
and card the DIN card rail into the DIN rail to ensure that the device is safely
and reliably installed on the DIN rail as shown in the following diagram.
Figure 3-1 track installation diagram
The demolition process is similar to the installation process. The specific steps are as
follows:
as shown in arrow 1 below, press down the switch slightly down.
switch the switch in the direction of arrow 2 and move the lower end of the
switch outward. If arrow 3 shows, the device can be removed from the DIN rail.
 Loading...